Workspace Settings
Open settings, find your way around its tabs, and read your plan, storage and workspace totals on the Overview.
Settings is where the workspace's plan, storage, members, invoices and usage live, next to your own profile and API keys. It's a single page with a row of tabs across the top. Which tabs you can open depends on your role.
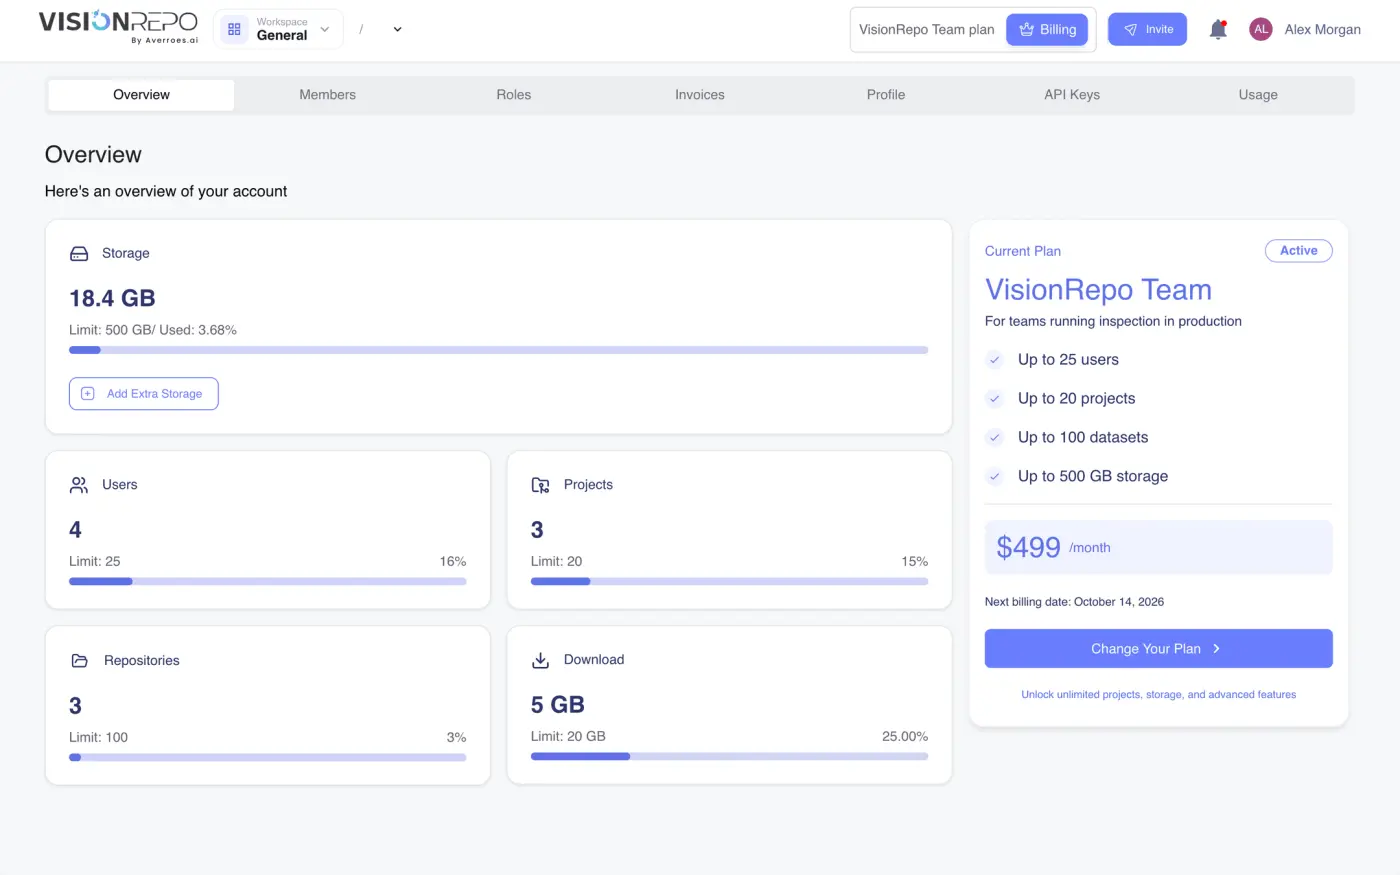
Open settings
- Click your name or avatar at the top right of any page.
- Choose Settings.
Settings always opens on Overview. The same menu has shortcuts to API Keys (if your role can see keys) and, for workspace super admins, Action Log.
The plan button in the header is another way in. It shows your plan name, and next to it Upgrade on a free plan or Billing on a paid one. Billing opens Overview; Upgrade goes straight to the plan picker.
Find your way around the tabs
| Tab | What's on it |
|---|---|
| Overview | Storage, workspace totals and your current plan |
| Members | Everyone in the workspace, and pending invitations |
| Roles | The roles you can assign, and what each one allows |
| Invoices | Payment methods, billing address and invoice history |
| Profile | Your name and password |
| API Keys | Keys for calling the platform from your own systems |
| Usage | Today's allowances, extra usage and your prepaid balance |
Not everyone gets every tab:
- Overview, Profile and Usage are there for everyone.
- Members is always listed, but it's dimmed unless your role can read users. Hover it to see which permission is missing.
- Roles only appears for people who can see users or roles, and only a workspace super admin can open it. It also stays dimmed until the workspace has more than one member.
- Invoices is dimmed unless your role can read or change billing (super admins always can).
- API Keys only appears if your role can read or manage API keys.
If you follow a link to a tab you can't use, settings sends you back to the first tab you can open.
Read the Overview
Overview is the state of the workspace at a glance.
The Storage card shows how much your repositories, models and results take up, against your plan's storage limit, with the share used. If you've bought extra storage it appears underneath with its own bar. See Plans and Billing for adding, changing or removing it.
Under it, four cards count what the workspace has, each with its limit and a bar:
- Users: members in the workspace.
- Projects and Repositories: how many exist.
- Download: how much you've downloaded or exported against your plan's download quota.
When your plan doesn't cap something, the card reads Limit: Unlimited and has no bar.
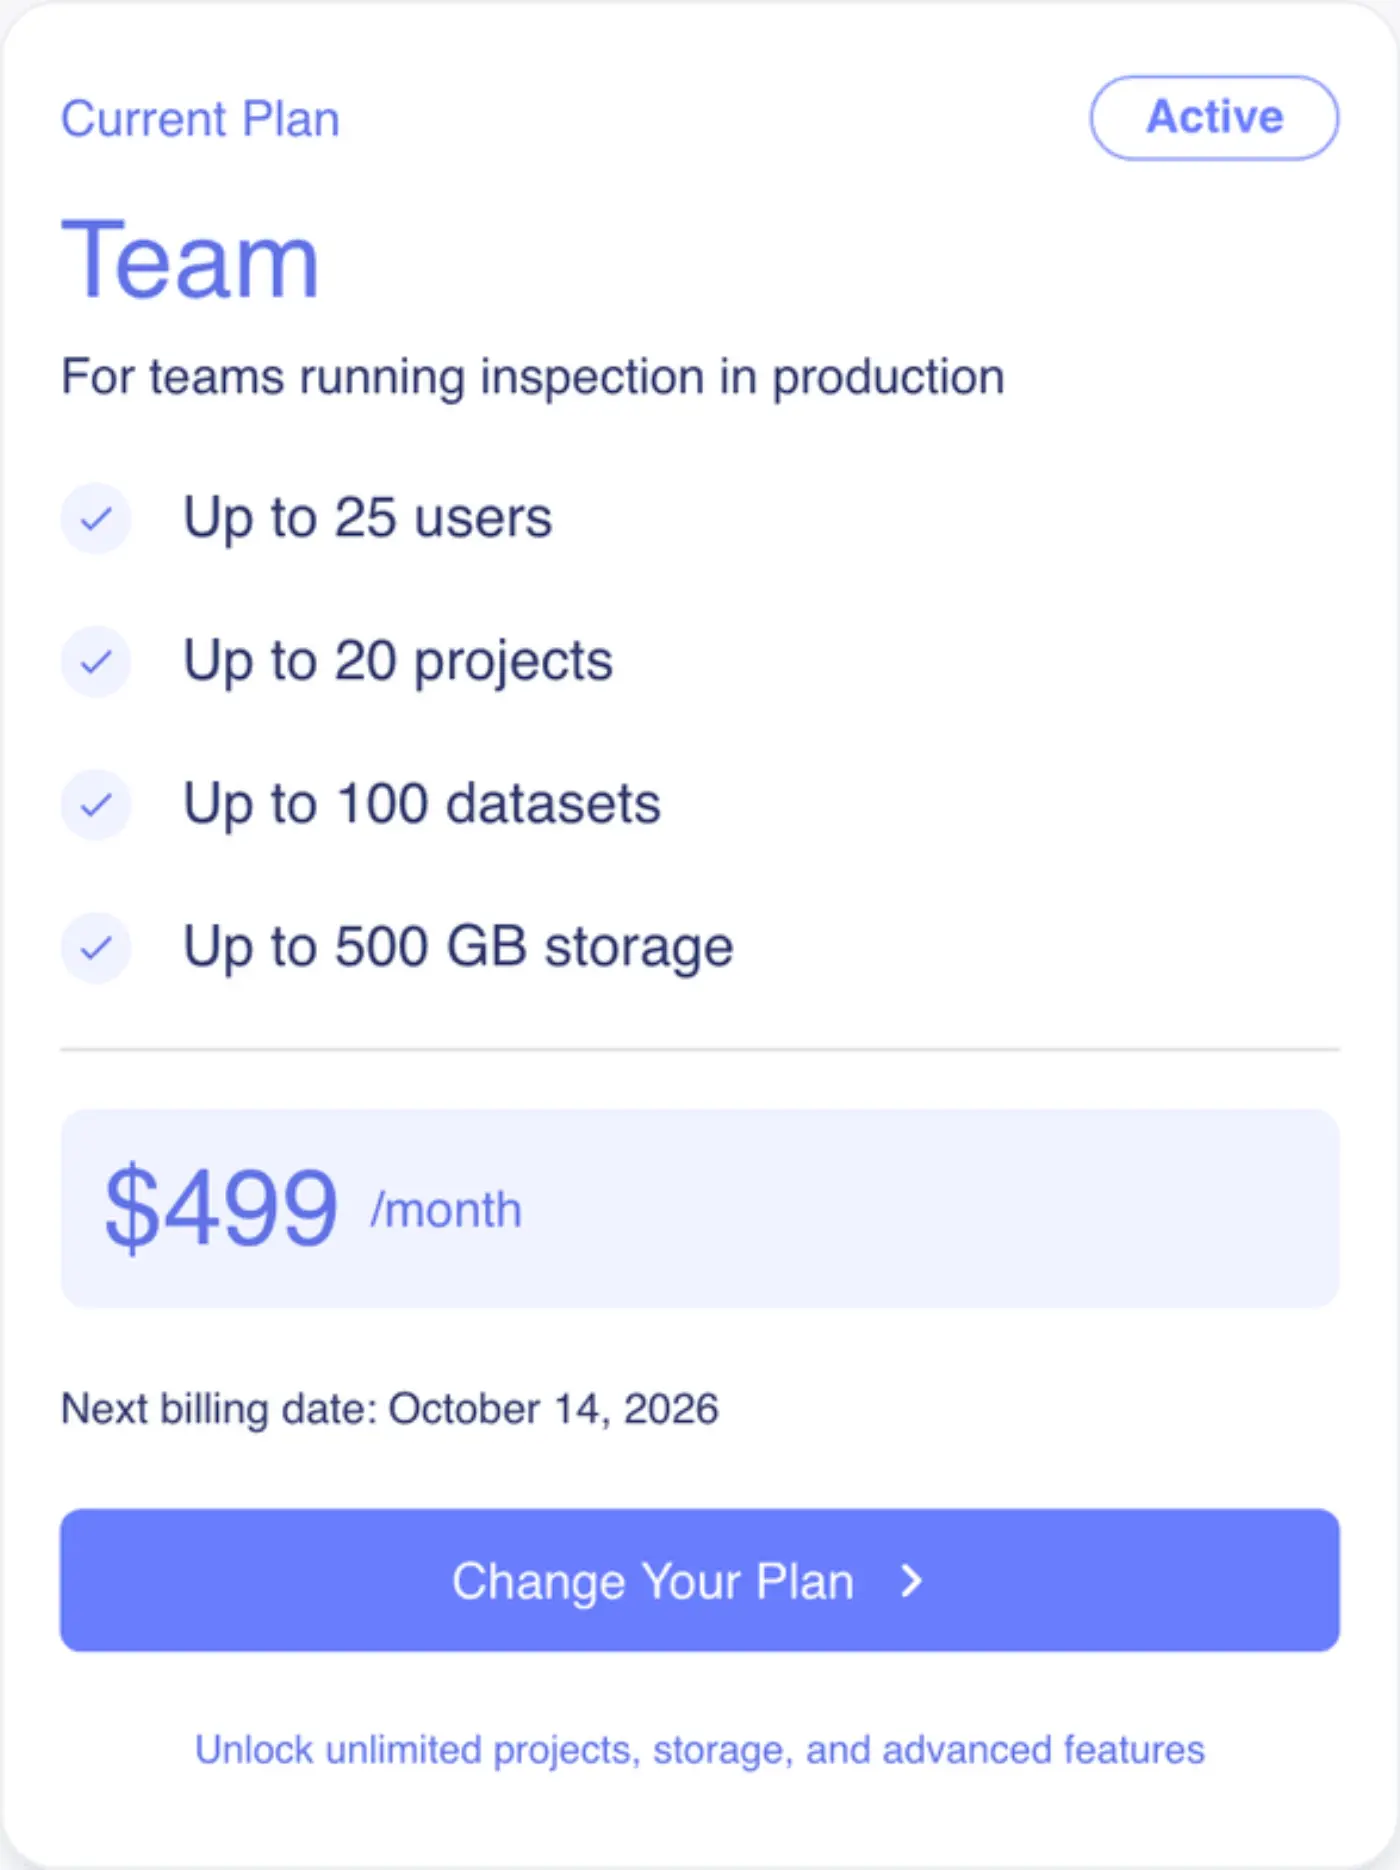
The Current Plan card on the right lists what your plan includes, its price per month or year, and the Next billing date. If a downgrade is scheduled you'll also see Next plan. If the subscription is set to end, the date line reads Cancellation date instead.
The button at the bottom of the card changes with the state of the subscription:
- Change Your Plan (or Upgrade Your Plan on a free plan) opens the plan picker.
- Resume plan appears when a cancellation is scheduled and lets you keep the subscription.
- Cancel Downgrade Plan appears when you've scheduled a move to a smaller plan.
- Pay Now and Cancel Subscription appear when a payment has failed.
Changing the plan needs billing write access, unless you're a workspace super admin. Without it the button is greyed out and hovering it names the missing permission. Pay Now, Cancel Subscription and Cancel Downgrade Plan need write access to both billing and the subscription, and are hidden if you don't have it. All of this is covered in Plans and Billing.
Watch for limit banners
When the workspace uses up one of its daily allowances, a banner appears across the top of the settings pages and repository pages, for example "Usage limit reached. You've reached your daily inference limit." You'll also get a warning once inference or running models pass 70% of the day's allowance.
Super admins get an Upgrade button on the banner that opens the Usage tab. Close the banner with the ×. It comes back the next time the page loads if the limit is still reached. Usage and Limits explains the allowances and how to keep working past them.
Switch to another organization
If your account belongs to more than one organization, hover Switch organization in the account menu and pick one from the list. The app reloads in that organization, on its home page. Your role, plan and projects all come from the organization you're in, so settings can look quite different after a switch.
Where the rest lives
- Inviting people and editing roles: Team Members and Roles.
- What each permission allows: Roles and Permissions Reference.
- Your name and password: Your Profile.
- Keys and the API reference: API Keys and API Docs.
- Who did what, and when: Action Log.