Classes and Image Settings
Create and manage label classes and their shortcuts, read the details panel, and tune how an image is displayed.
A class is one of the things you're labeling, such as scratch, particle or edge chip. Classes belong to the repository, so every image in it shares the same list. The panel on the right of the labeling canvas is where you read what's on the current image and change how it's displayed.
Manage your label classes
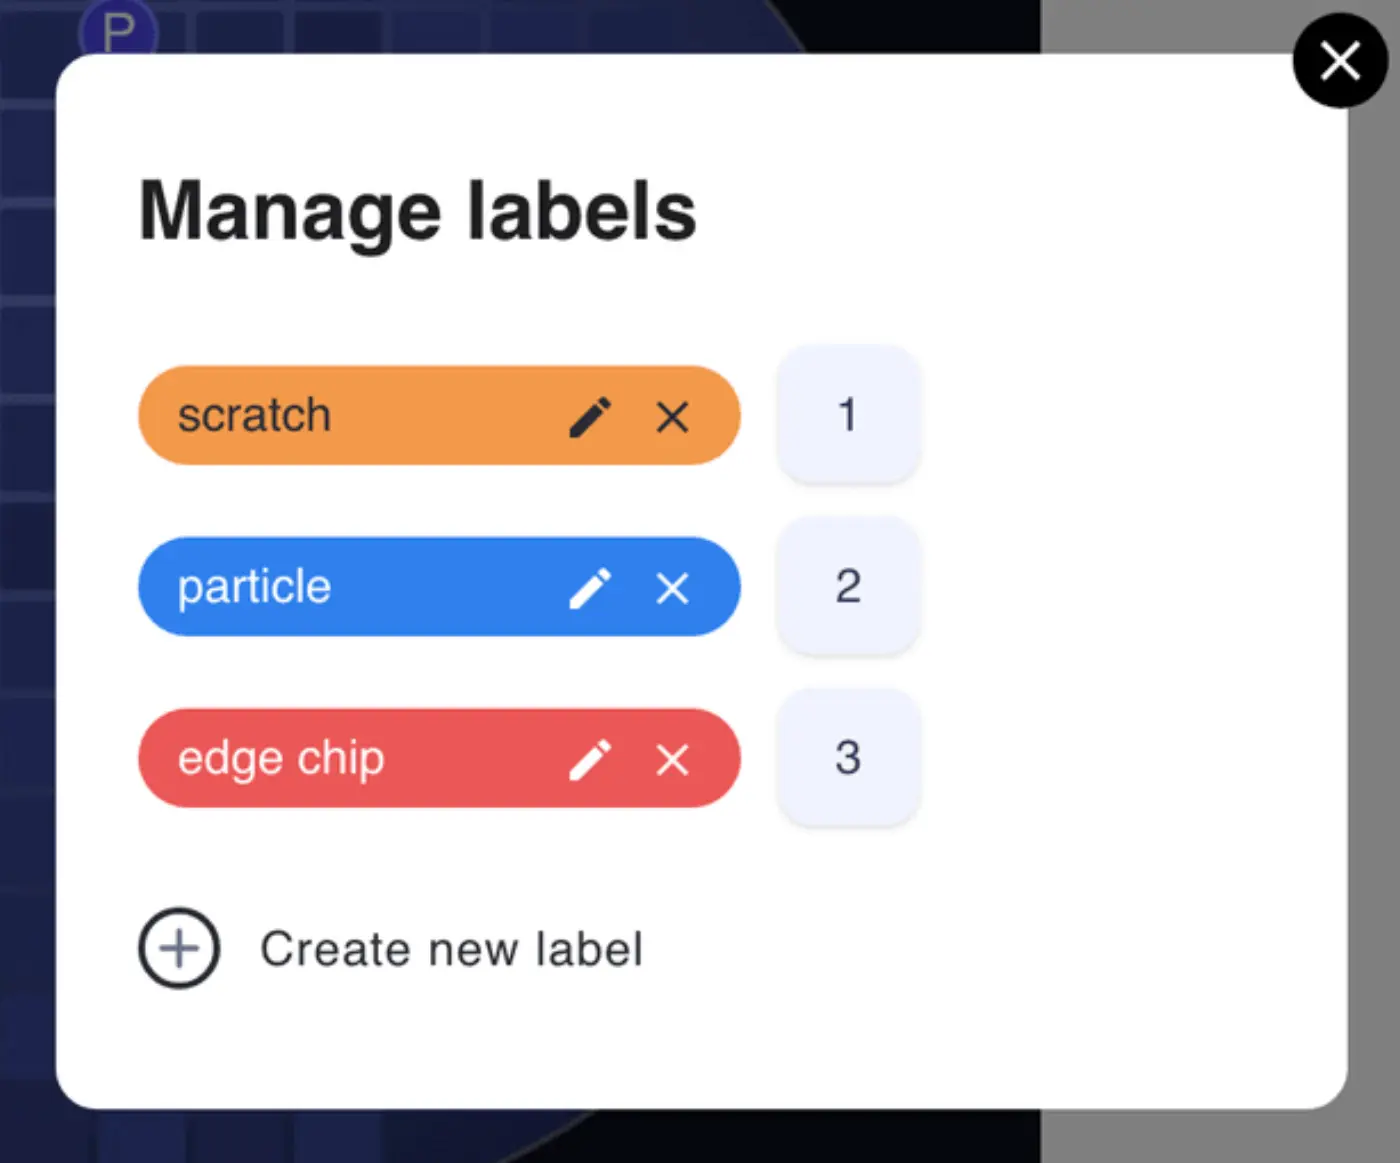
Click Labels in the bar at the top of the canvas. The Manage labels dialog opens with every class in the repository down the left.
To create a class:
- Click Create new label.
- Type a name under Label name.
- Pick a colour under Label color. The swatches are a preset palette; the last swatch opens a colour picker for any other colour.
- Optionally, set a keyboard shortcut (see below).
- Click Create.
A new class starts on the first preset colour no other class uses yet, so classes stay easy to tell apart if you don't change it.
To edit a class, click the pencil on its pill, change it, and click Save. Renaming or recolouring updates every object that already uses the class.
To delete a class, click the × on its pill. A confirmation asks you to type the class name, and warns that deleting the class also deletes all of its annotations. This can't be undone.
If the repository has no classes yet, Import from another dataset appears under Create new label. Pick a Source dataset and click Import to copy its classes across.
Creating, editing, deleting and importing classes needs permission to write repositories. Without it the list still shows, but the buttons are disabled and hovering them says you don't have sufficient permissions.
Give a class a keyboard shortcut
Beside each class pill is Add shortcut, or the shortcut itself once one is set. Click it, press the keys you want, and click Save. Delete removes the shortcut.
On the canvas, pressing a class's shortcut makes that class the one your next shape gets, without leaving the image.
A shortcut can be a single letter or digit, or up to two modifiers (Ctrl, Alt, Shift, Cmd) followed by one letter or digit. The dialog refuses shortcuts the canvas already uses, such as Ctrl + Z or the tool letters, and shortcuts another class already has. The error under the field says which rule was broken.
Read the Labels and Objects cards
These two cards describe the image you're on, not the whole repository. They only appear once the image has at least one object.
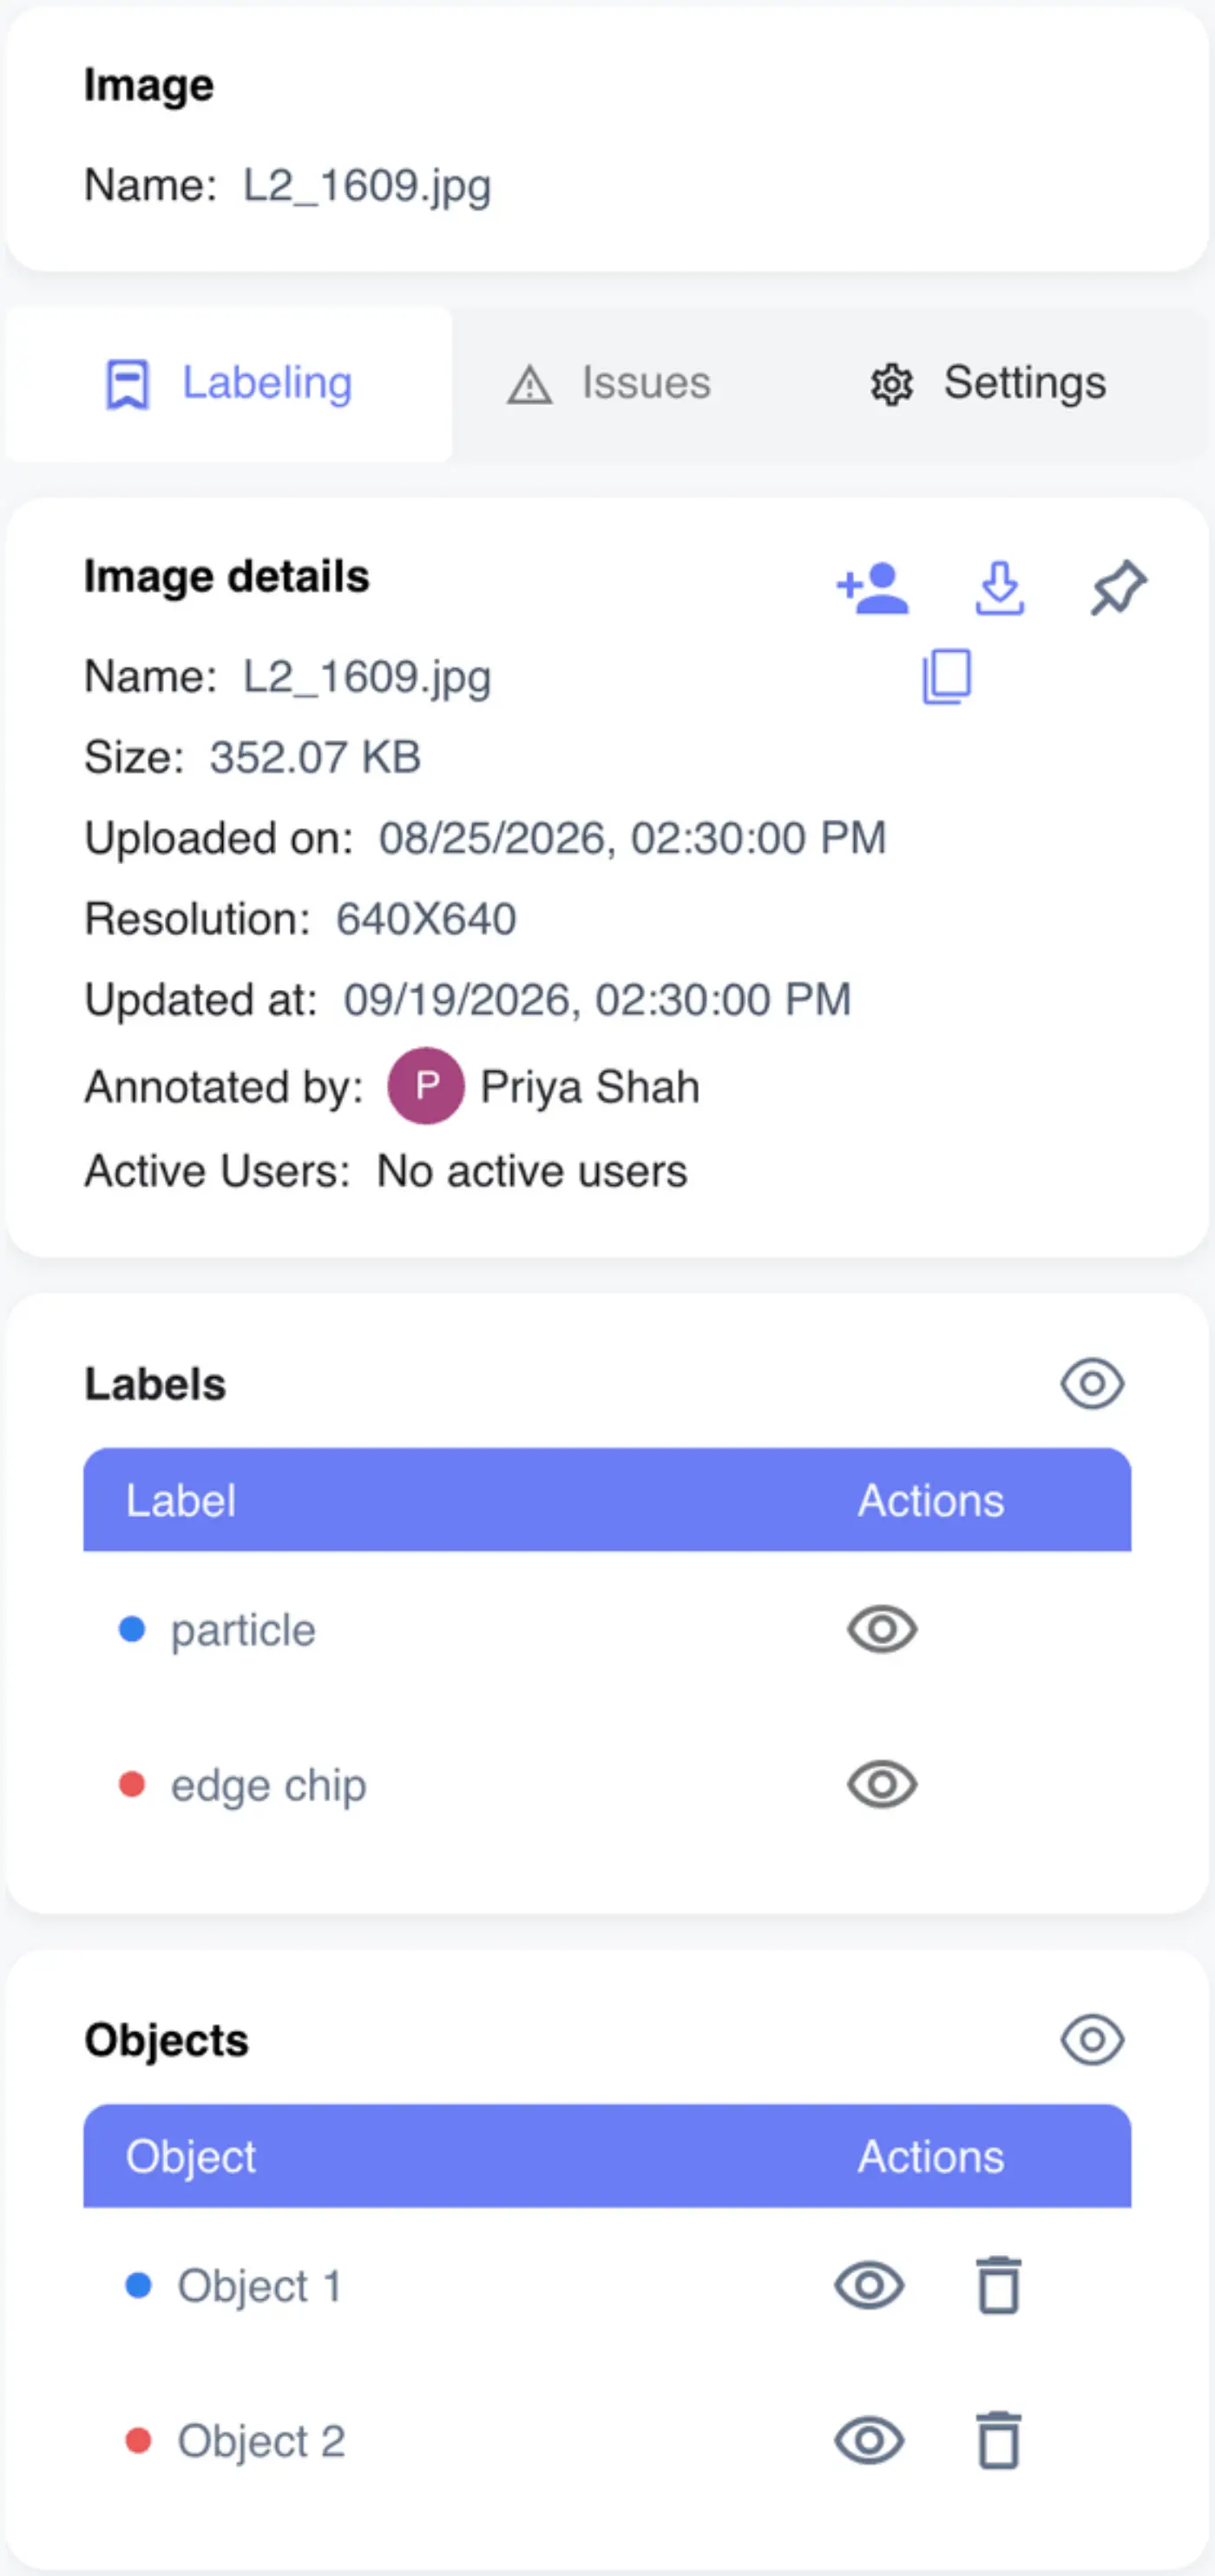
Labels lists the classes that appear on this image. Clicking a row selects every object of that class on the image, which is handy for checking them all or deleting them together. Clicking the row again clears the selection.
Objects lists each shape as Object 1, Object 2 and so on, with a dot in its class colour. Clicking a row selects that shape on the canvas. Each row has a bin that deletes the shape; it only shows if you can write media.
While a single object is selected, both cards narrow to that object, the top card switches from Image to Label with the object's ID, and the Image details card is hidden until you clear the selection.
Hide what you're not working on
Both cards have an eye in the header that hides everything in them, and each row has its own eye. Hide Annotations in the drawing toolbar (Ctrl + H) hides every shape on the image.
Hiding only affects your view. Nothing is deleted, nobody else is affected, and hidden objects come back when you move to another image.
Tag a whole image with a class
On repositories without a fixed task type (shown as Repository), an Image classes card sits above the others. Its button adds a class to the image as a whole rather than to a shape on it, and the chips in the card remove one. If no class is applied it reads No image classes. Add some to classify this image. Adding one needs permission to write media.
On classification repositories there are no shapes at all. The image's classes appear as chips over the image, with a button to add more, and you can also set them from the thumbnail strip.
See an image's details
The Image details card lists Name, Size, Uploaded on, Resolution, Updated at and Annotated by. It adds Reviewer once someone has reviewed the image, and Active Users (who else has it open) if your plan includes labeling collaboration.
Annotated by shows an Auto Labeling chip instead of a person when a model labeled the image.
Three buttons sit in the card's header:
- The pin marks the image so you can filter to it later with Show pinned images only. Its tooltip reads Pin image or Unpin image. It needs permission to write media.
- Download offers Download with labels and Download without labels (just a download on classification repositories). Only workspace super admins can download; for everyone else the button is greyed out.
- Invite to collaborate sends a teammate a link to this image. See Drafts and Collaboration.
When your role doesn't allow the pin or invite, the button stays in place, disabled, and hovering it names the missing permission.
Check issues on an image
The Issues tab lists problems people have raised on this image, and lets you raise a new one. With an object selected, it lists only that object's issues. How issues work is covered in Reviewing Labeled Work.
The tab only appears if you can read tasks.
Adjust how the image looks
The Settings tab changes how the image and its shapes are drawn. Nothing here changes the labels or what anyone else sees.
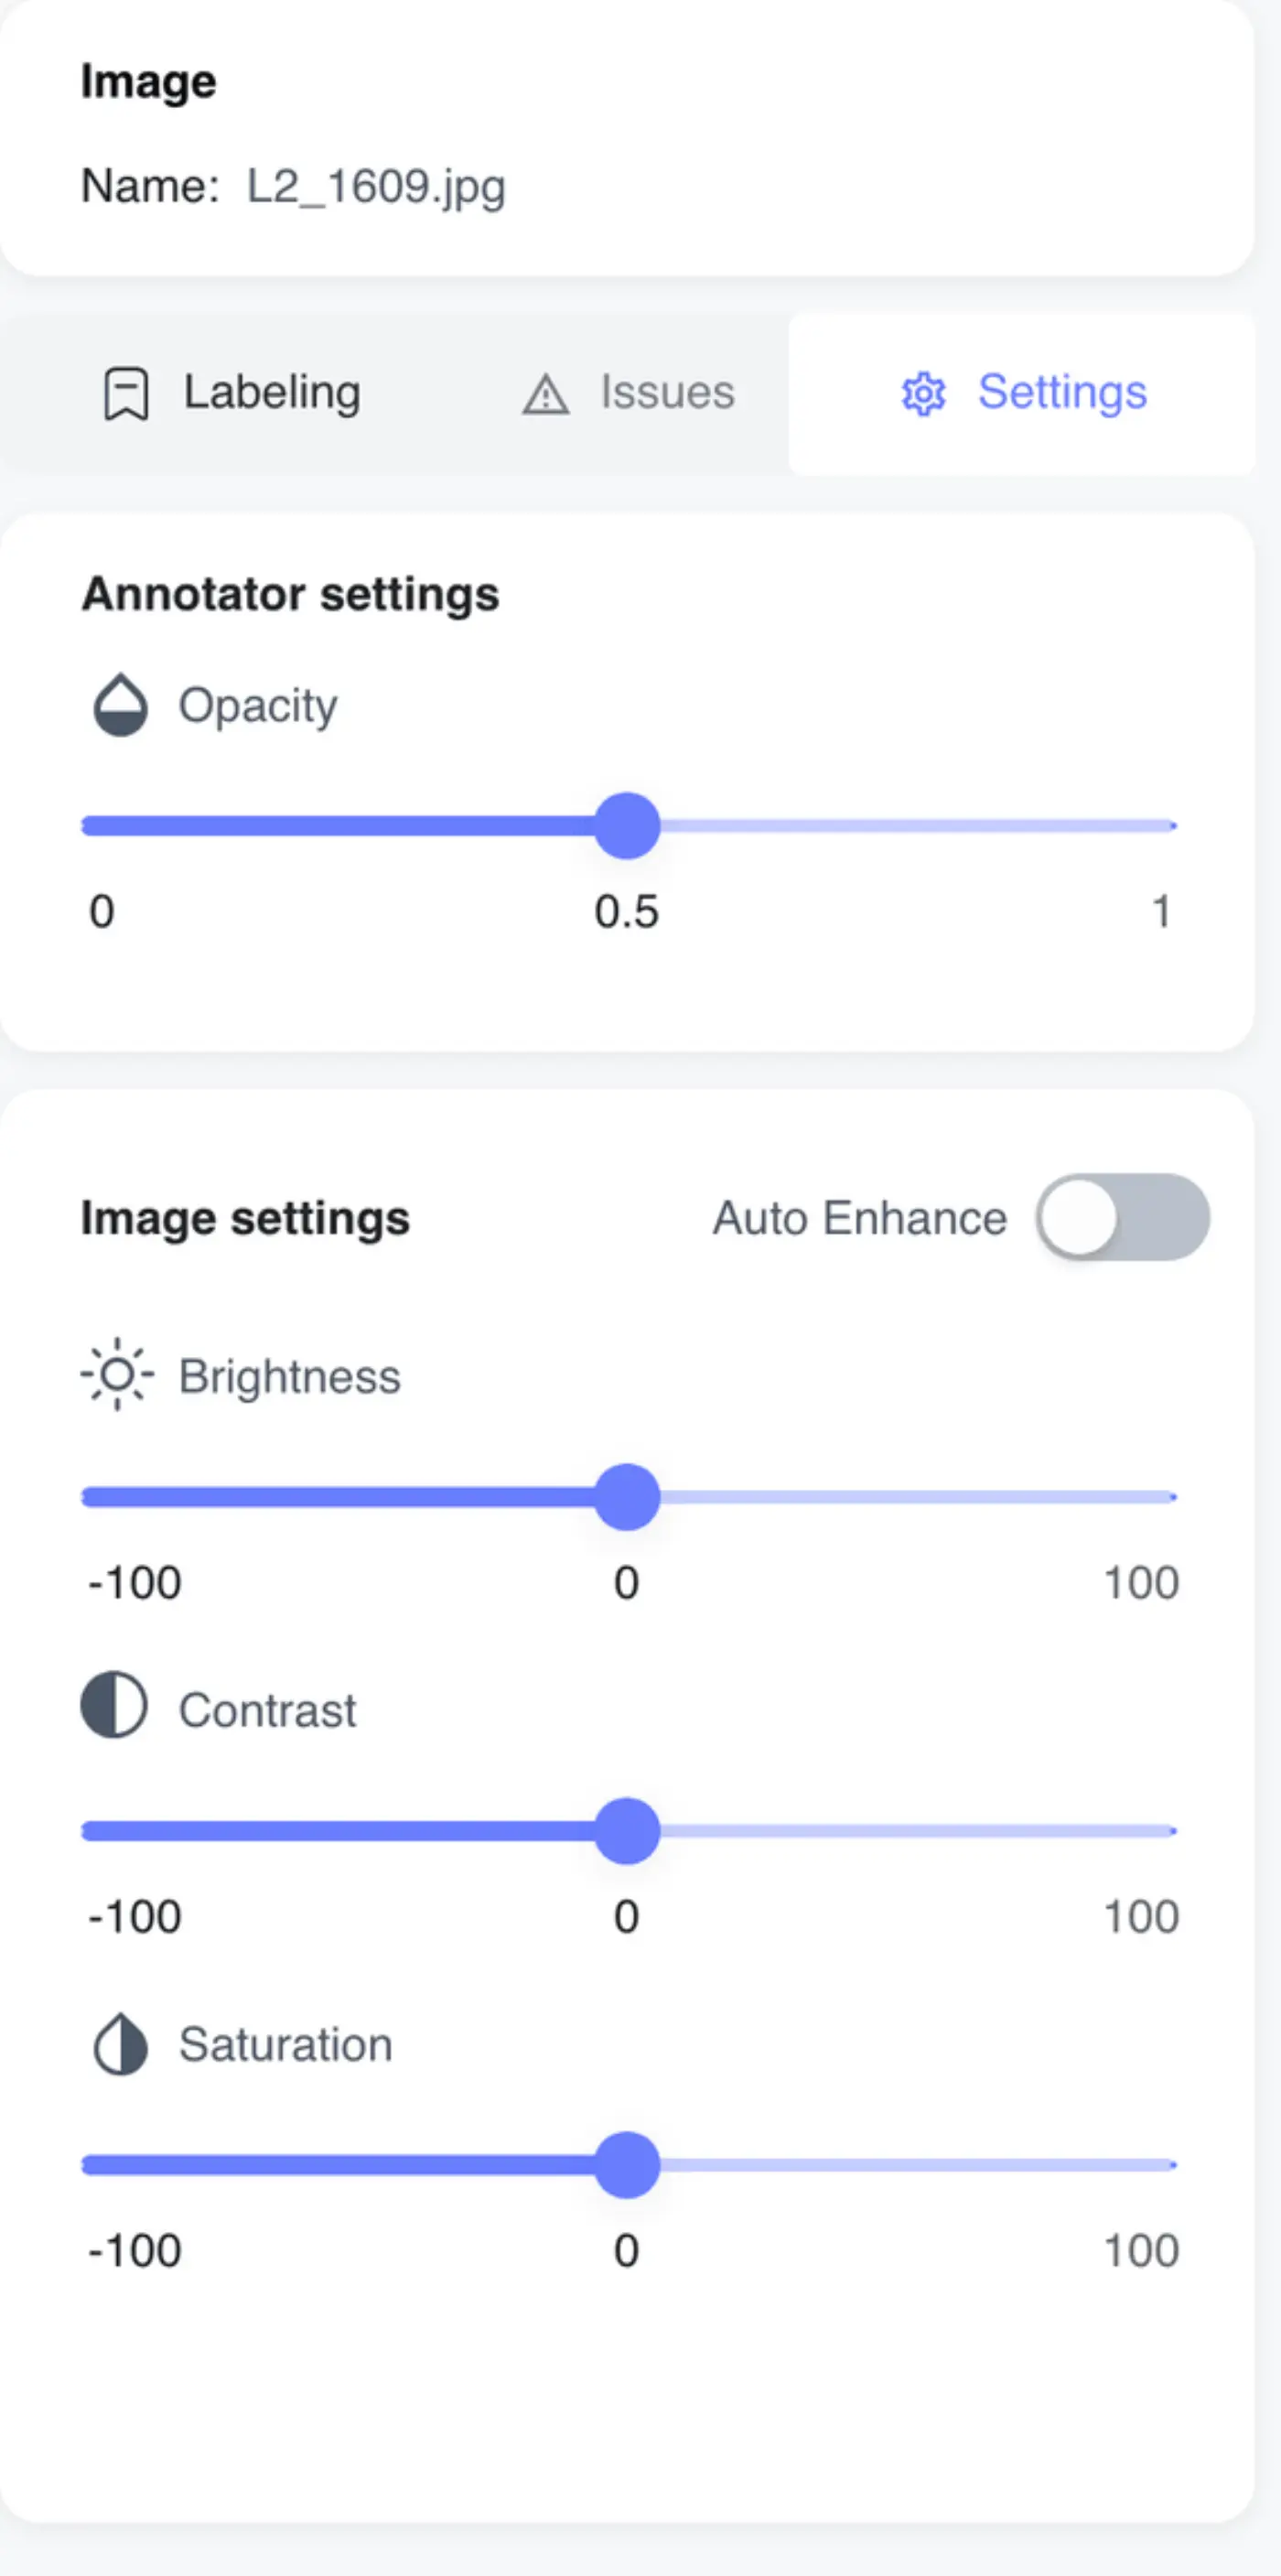
Opacity under Annotator settings sets how solid the shapes are, from 0 to 1 (0.5 to start). Turn it down to see what's under a mask.
Under Image settings, Brightness, Contrast and Saturation each run from −100 to 100 and start at 0. Inspection images are often dark, and a faint defect can be much easier to see with the contrast up.
These settings are remembered per repository in your browser, so they're still set when you come back.
Turn on Auto Enhance
Auto Enhance works out an adjustment for the image in front of you. The switch is disabled for the moment it takes to apply, and your zoom and position are kept. Turning it off puts the image back as it was.