Projects
Create a project, switch between projects, choose the default one, manage who's on it, and delete it.
A project groups the repositories, models and tasks for one body of work, such as the Wafer Inspection line at Northwind Components. Almost every page in the app runs inside one project, and the header always shows which.
Know what belongs to a project
| Belongs to a project | Belongs to the whole workspace |
|---|---|
| Repositories and their media | People and their roles |
| Models trained from those repositories | The plan, billing and usage limits |
| Tasks and reviews | API keys |
| Monitors, connectors and batch predictions | The action log |
Storage, repository and user allowances are counted across the whole workspace, so work in one project uses up allowance that another project could have used.
A project is a General, PCB or Solar project. Which one you get depends on the Workspace switcher in the header when you create it; see PCB Inspection for PCB projects and Solar Sites and Flights for Solar sites.
Create a project
- Click the current project's name in the header.
- Click Create new project at the bottom of the menu.
- In Create New Project, fill in Name your project.
- Optionally add a Description (Optional) and pick people under Users (Optional). The list offers people who are already in the workspace.
- Click Create Project.
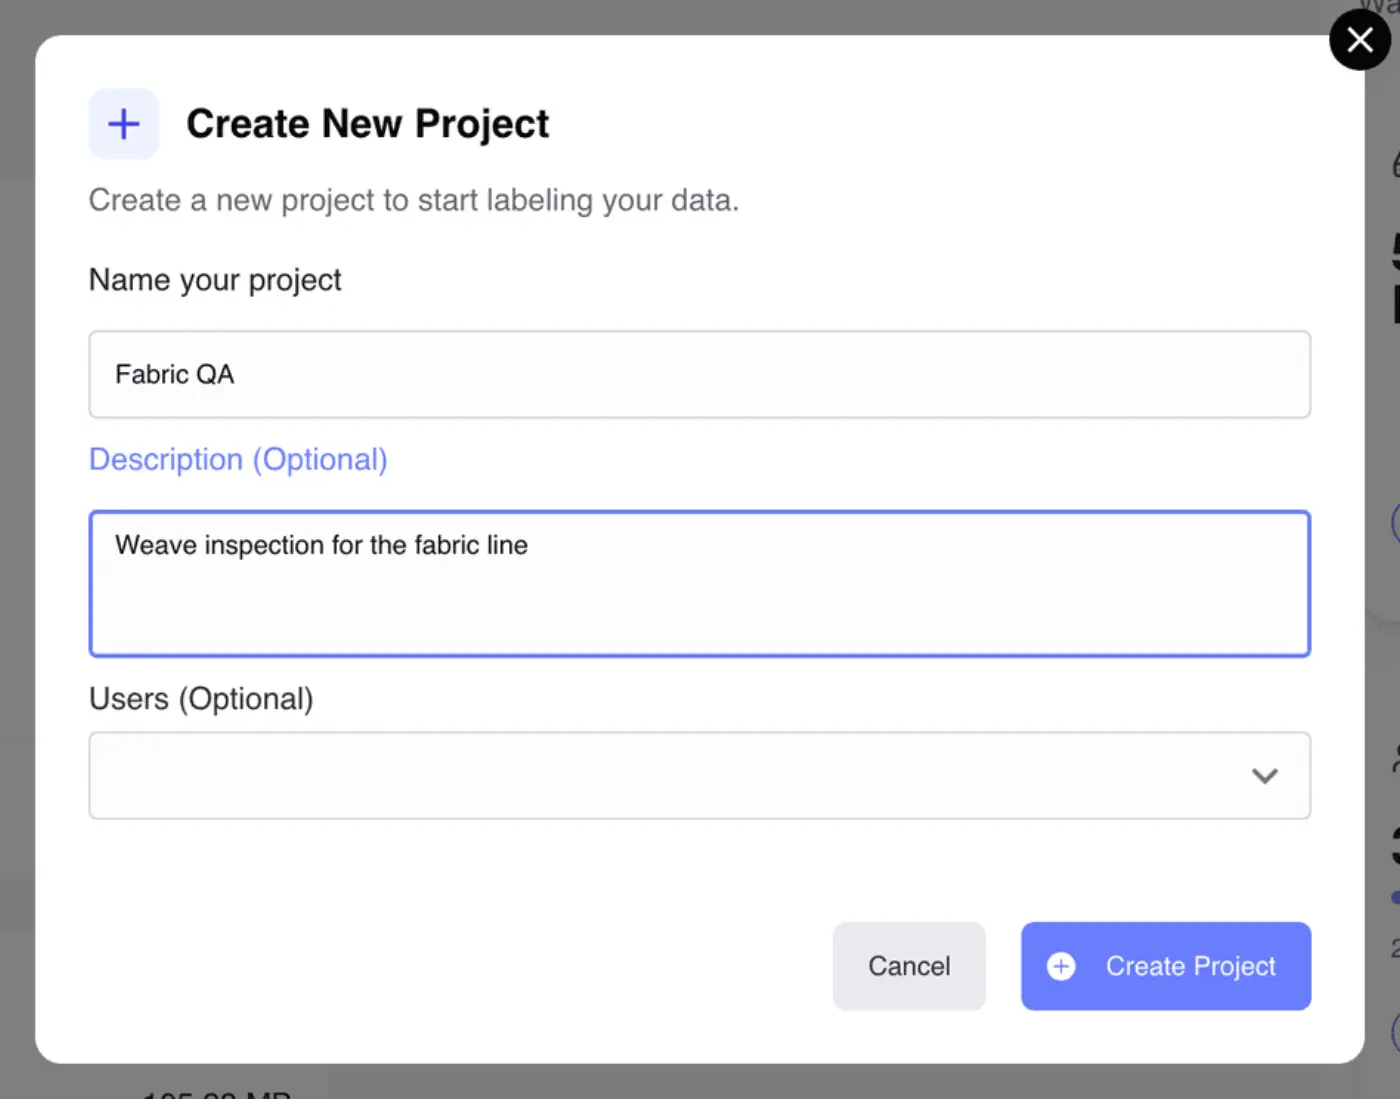
The app opens the new project's repository list straight away. It's empty until you create a repository in it; see Repositories.
Create new project only appears if your role can create projects. If your plan's project allowance is used up, you get an upgrade prompt instead of a new project.
Switch between projects
Click the project name in the header to list every project of the current kind. The one you're in has a green dot. Pick another to open its repository list.
The workspace has one default project. It's the one you land in when you sign in or open the app's home page. If you haven't set one, you land in the first project in the list.
Open project settings
Project settings live on their own page. To get there, click the gear icon at the top of the side panel on the project's repository list. It's disabled if your role can't view the project.
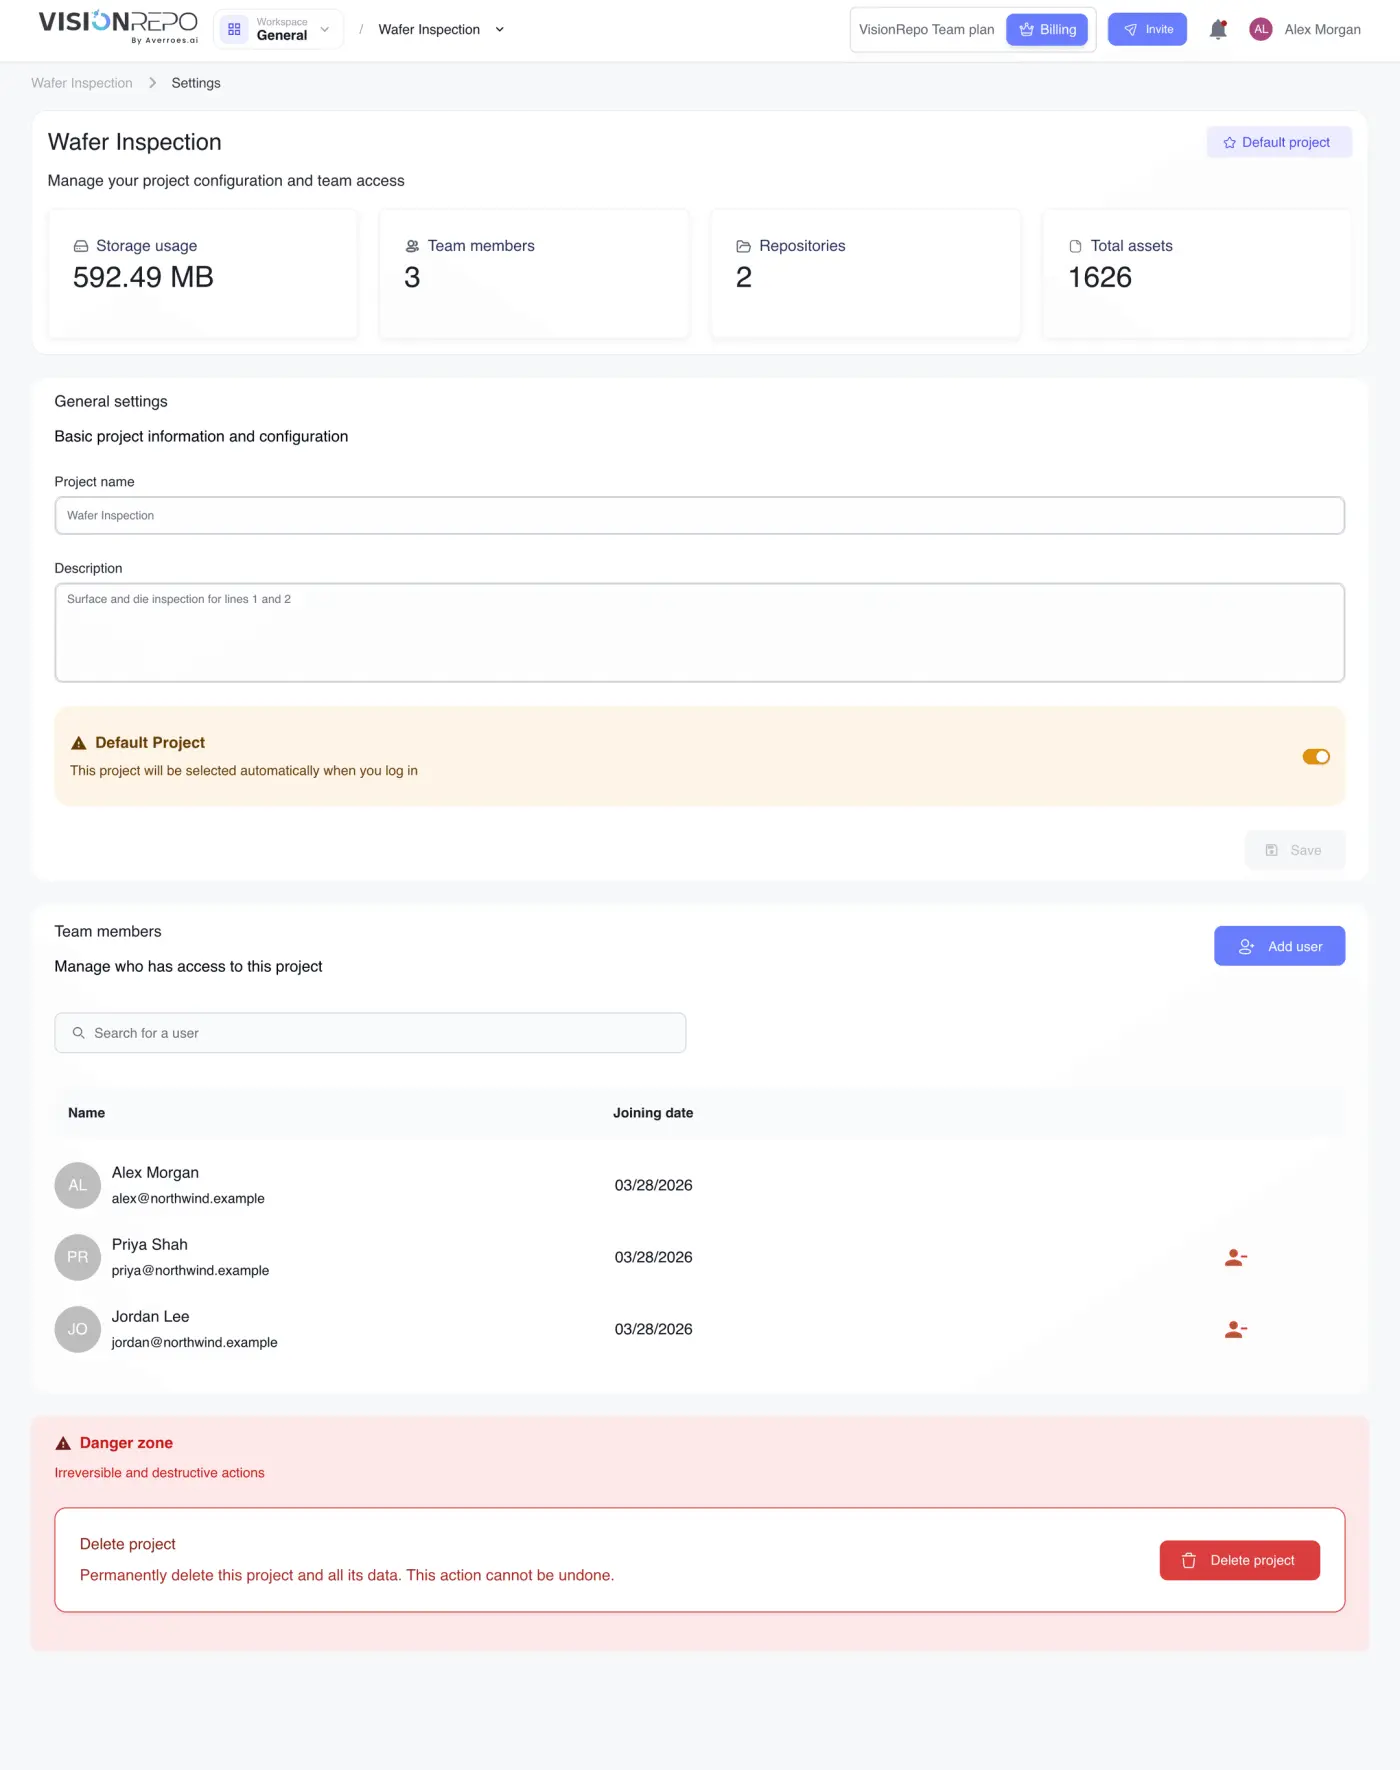
The page opens with the project's name (tagged Default project if it is one) and four figures: Storage usage, Team members, Repositories and Total assets. Below them are three cards: General settings, Team members and Danger zone.
Rename a project or change its description
- Open project settings.
- Edit Project name or Description under General settings.
- Click Save. It only becomes clickable once you've changed something.
The fields are read-only if your role can't change the project. Renaming doesn't affect anything inside it.
Choose the default project
The Default Project switch sits in the amber box under the description.
- Turning it on makes this project the default right away.
- Turning it off opens Set default project, where you pick another project and click Set Default. A workspace always has a default, so turning it off really means handing it to another project.
If the workspace has only one project, the switch is locked on and the box reads Default project cannot be changed when your organization has only one project.
Manage who's on the project
The Team members card lists everyone on the project with their name, email and Joining date. Type in Search for a user to narrow the list.
To add people:
- Click Add user.
- In Add team member, pick one or more people under Users.
- Click Send Invitation.
To take someone off, click the remove icon at the end of their row and confirm with Remove Member.
Only workspace super admins see Add user and the remove icons. Nobody can remove themselves, the workspace owner, or another super admin. People who can't view the workspace's users don't see the Team members card at all. To invite someone who isn't in the workspace yet, see Team Members and Roles.
Delete a project
Deleting a project removes its repositories, models, member access and history, and it can't be undone.
- Open project settings and scroll to Danger zone.
- Click Delete project.
- In Delete Project, type the project's name exactly as shown.
- Click Delete.
The app reloads on your default project, or on the welcome screen if that was the last one. Danger zone only appears if your role can change the project.