PCB Inspection
Set up an inspection line from golden templates, inspect boards against it, and read the results.
PCB inspection compares every board you capture with defect-free reference images of the same design. You describe a board design once, as an inspection line with up to three golden templates. Every board you inspect on that line comes back as Pass, Defective or Failed, with each component it checked marked on the image.
Switch to the PCB workspace
PCB projects live in their own workspace, separate from the repositories, models and monitors of your general projects.
- Click the Workspace button in the header, next to the logo.
- Under WORKSPACES, choose PCB ("Inspection lines & templates").
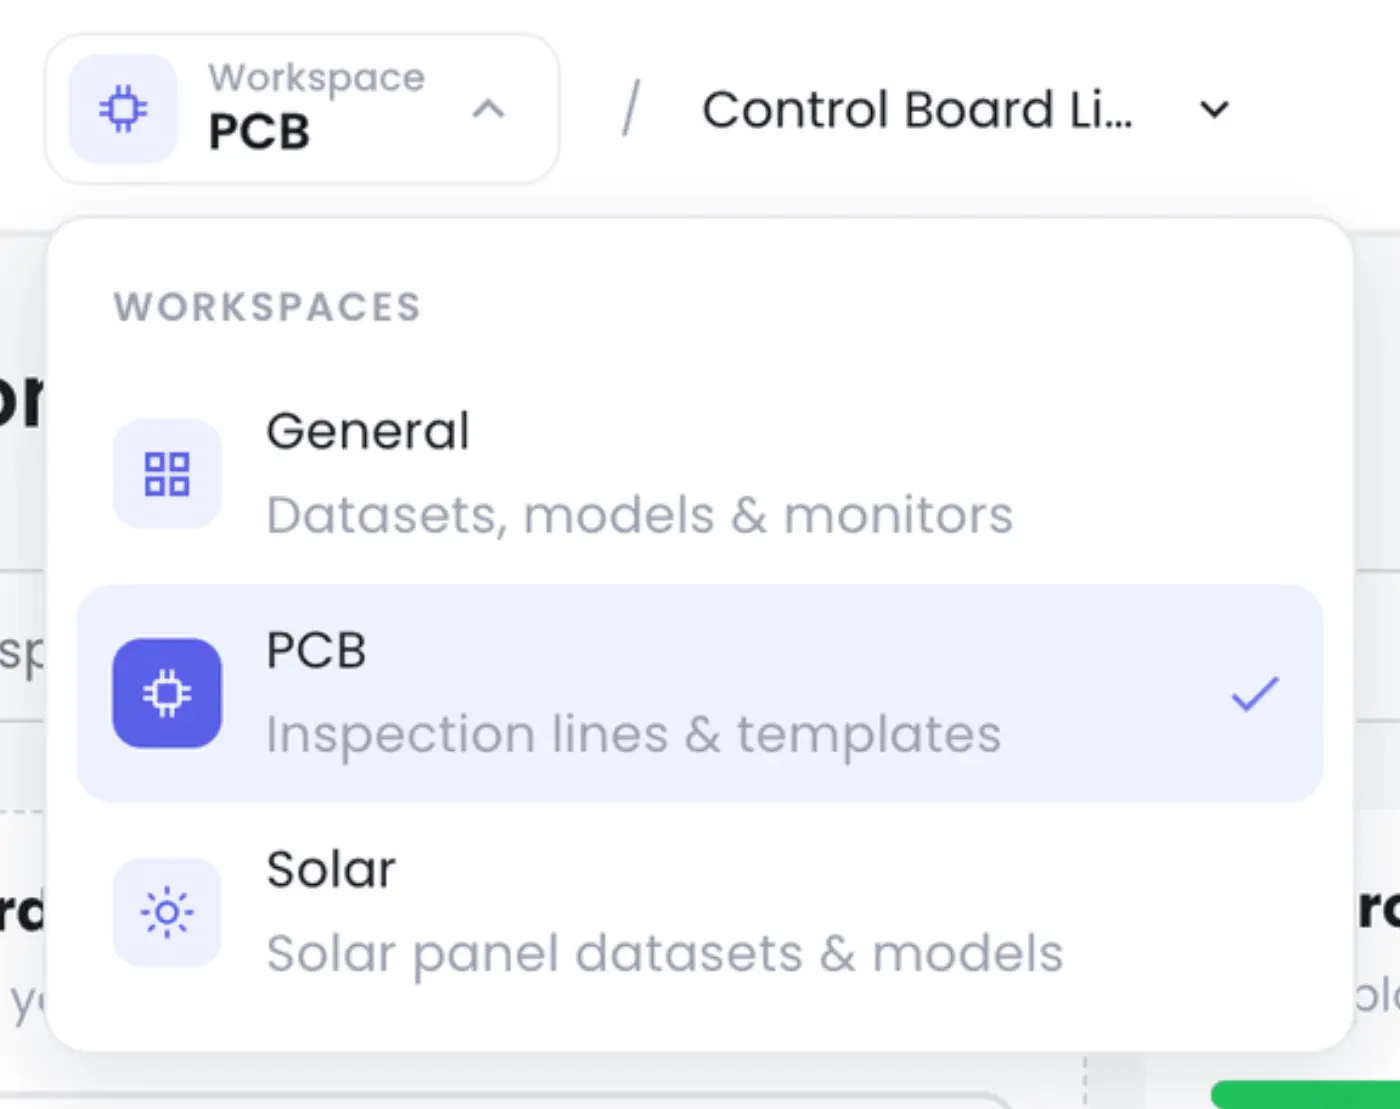
The app reloads, and the project menu in the header now lists only PCB projects. Choose General to go back. The app remembers your choice on this browser. In the PCB workspace the project drawer on the left isn't shown, because PCB projects have no repositories, models or monitors of their own.
Create a PCB project
If you have no PCB projects yet, switching to PCB shows Create your first project. Enter a Project name and click Create project.
After that, open the project menu in the header and choose Create new project. While you're in the PCB workspace, every new project is a PCB project, so there's nothing else to pick. See Projects for the rest of the project dialog.
Check your PCB credits
Uploading golden templates and boards uses PCB credits. Unless your plan includes PCB uploads, you can upload only while you have trial credits left. When you run out, New Inspection Line and the upload areas are greyed out with the tooltip You don't have enough PCB credit to upload.
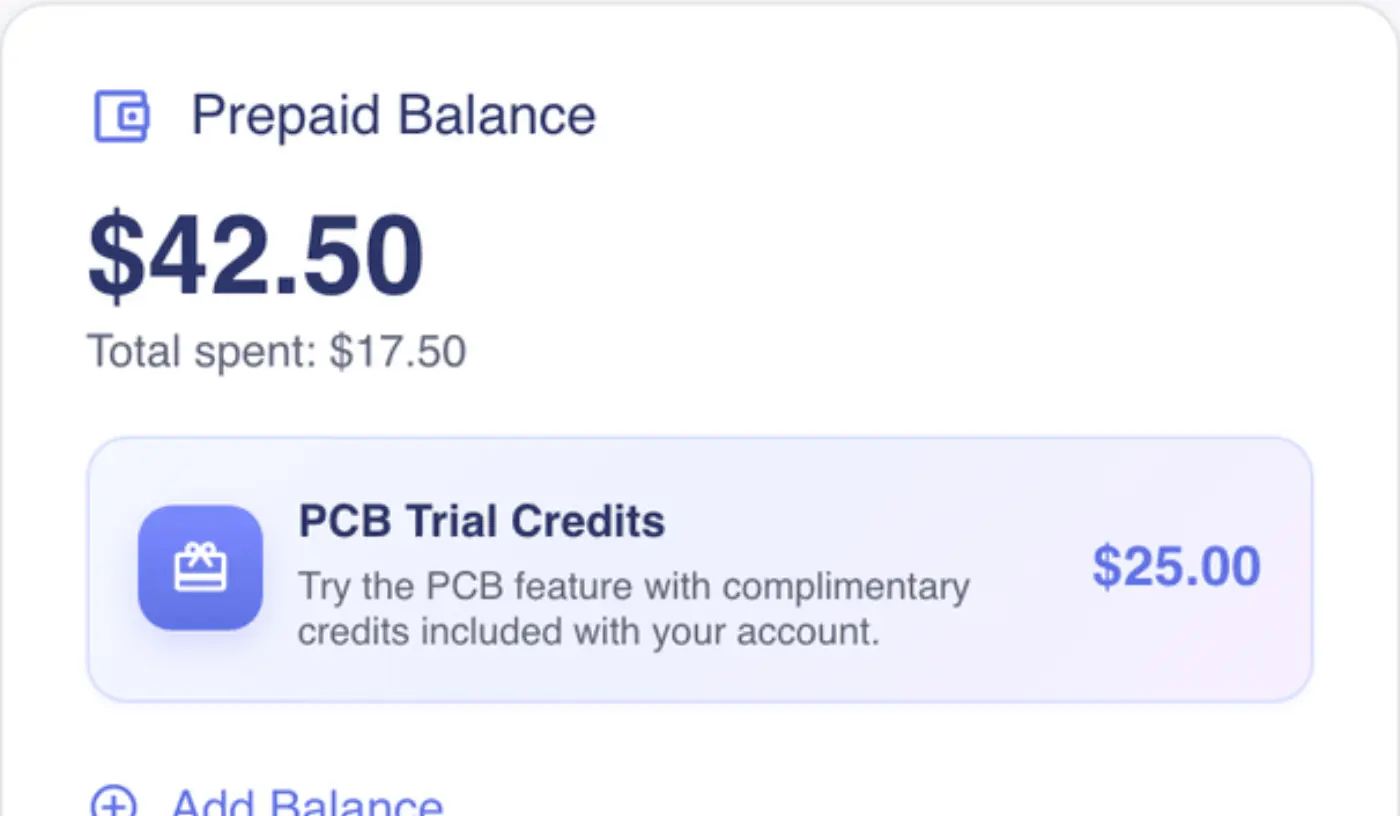
Your balance is on the Usage page in settings, in the PCB Trial Credits card ("Try the PCB feature with complimentary credits included with your account."). The pricing card on the same page lists the price of a PCB Inference Call. See Usage and Limits.
Find your inspection lines
A PCB project opens on Inspection Lines. Each card shows the line's name, how many golden templates it has, how many boards have been inspected, and a bar splitting passes from defective boards. Sort by Recent, Oldest or Name, and switch between cards and a table with the view buttons.
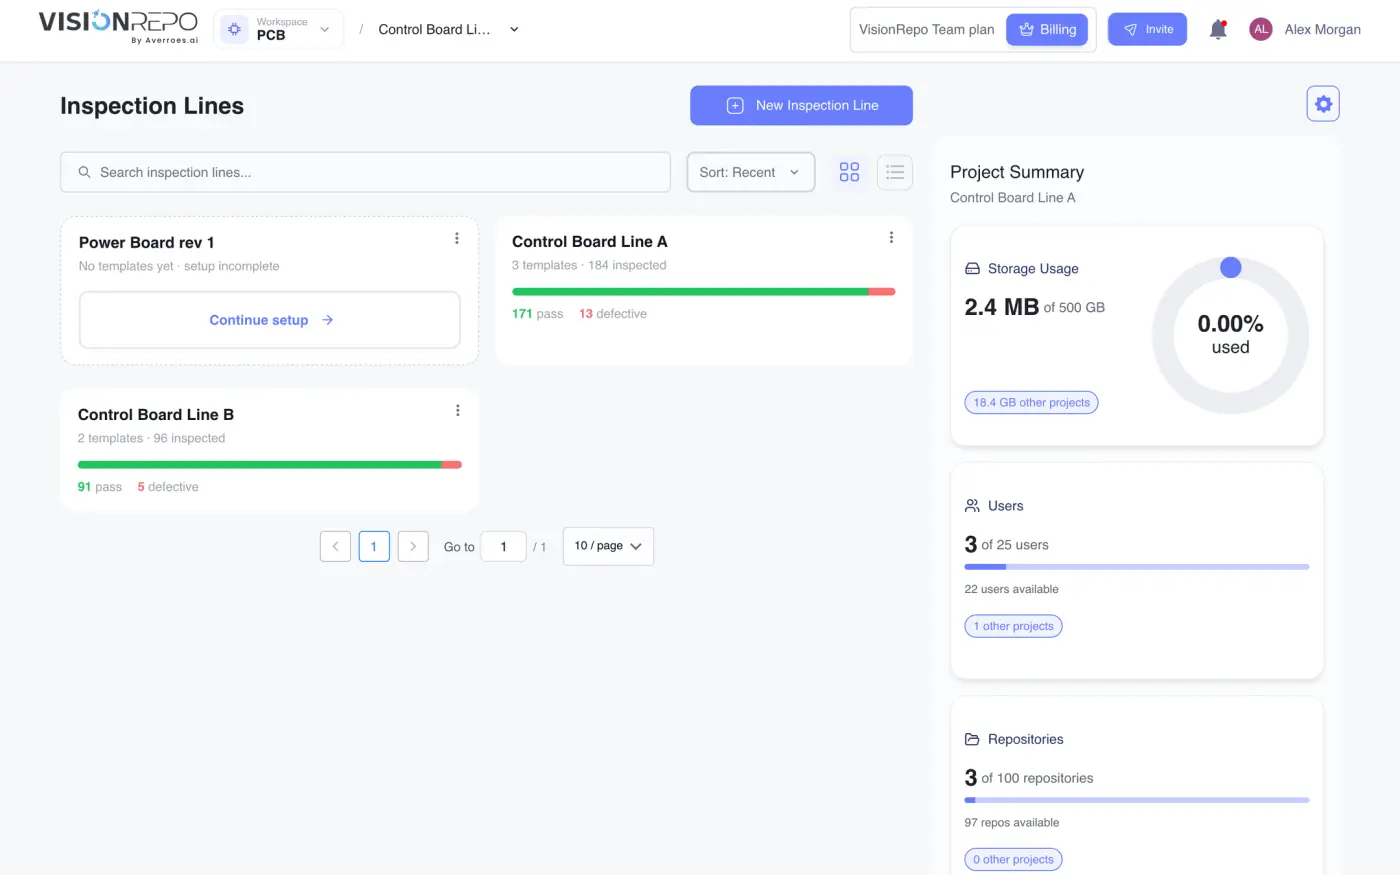
A line whose setup you didn't finish shows Continue setup. Clicking it takes you back into the setup at the golden templates step.
Set up an inspection line
An inspection line is one board design or revision. Click New Inspection Line (the repository menu in the header also has Create Inspection Line). Setup has four steps: Details, Golden templates, Review & activate and Inspect boards.
Name the board design
Enter a Line name that tells revisions apart, such as CB-A rev 3, and click Continue. The line is created at this point, and its name can't be changed afterwards.
Upload golden templates
A golden template is a defect-free image of the board, captured the same way as the boards you'll inspect.
- Drop up to three images onto Drop golden template images here, or click to browse. JPG, PNG, BMP and TIFF are accepted.
- Wait while each template is analyzed. Each card shows Image uploaded, Detecting components (with how many were found) and Building template.
- Click Continue once the analysis has finished.
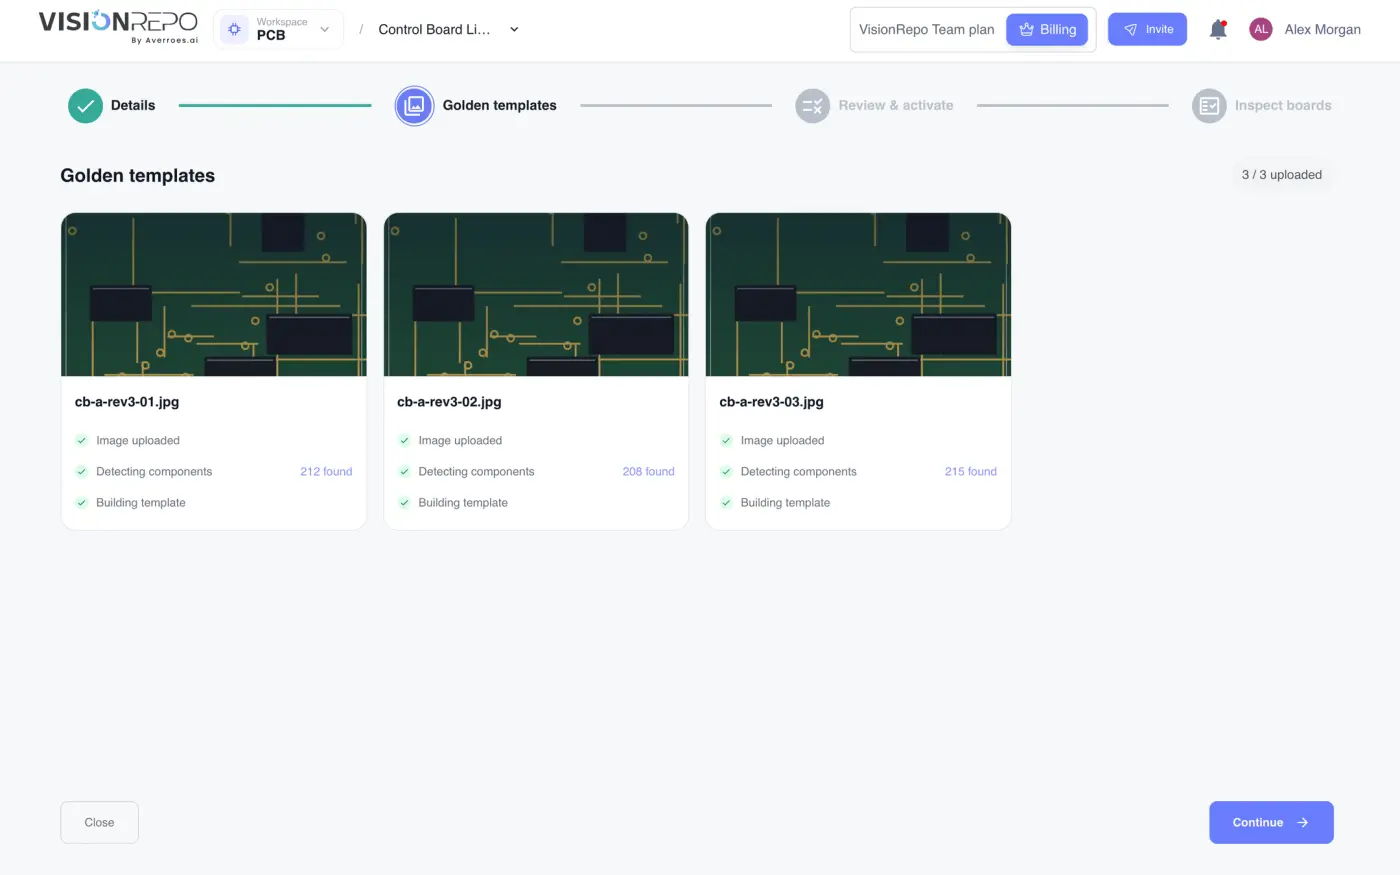
Continue stays disabled while templates are uploading or being analyzed, and until at least one template is uploaded. The tooltip says which. A template whose analysis failed is marked Failed.
Review the detected components
The review step opens each template with the components the analysis found drawn on it. Switch templates with the strip under the image, draw a missing component, or select a wrong one and delete it, as you would when labeling (see Labeling Images). Hide a class in the classes panel to see what's underneath.
Click Continue at the top when the templates look right, or Close to finish later.
Inspect the first boards
Drop the board images you want inspected onto Drop boards to inspect, or click Browse files. There's no limit on the number. Each board shows Uploading, then Inspecting, then its verdict, and a summary appears once the batch is done.
Click View inspection results to open the line. The button waits until every board has finished.
Inspect more boards
Open the line from Inspection Lines. The line page has three tabs: Inspections, Golden templates and Analytics. On Inspections, the Inspect boards tile accepts board images the same way as the last setup step.
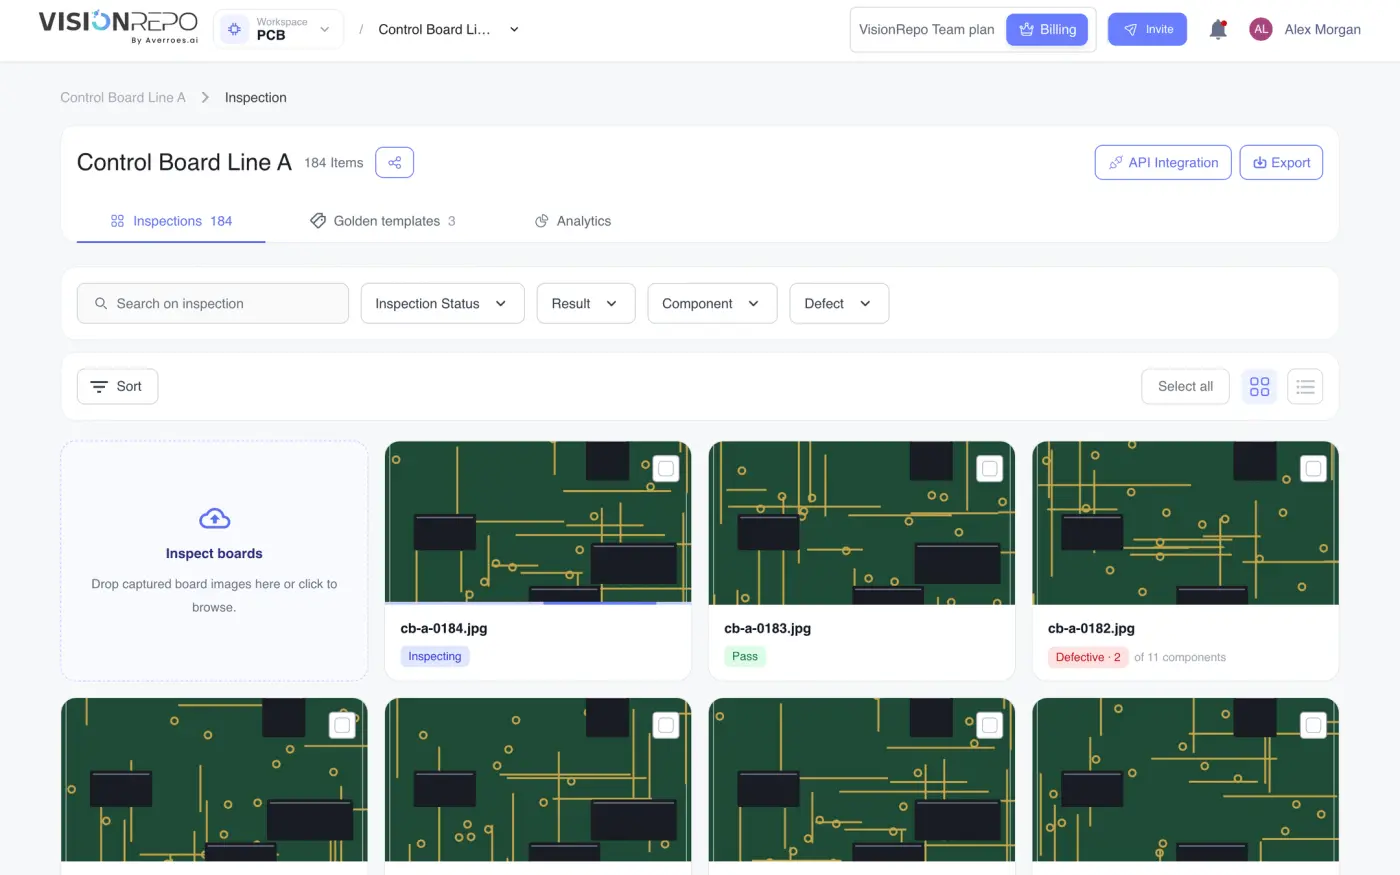
The tile is disabled until the line has at least one golden template, with the tooltip Upload at least one golden template before inspecting boards.
Find and act on boards
Search by file name, and narrow the boards with Inspection Status, Result, Component and Defect. Sort by Date added, Filename or Status.
To act on several boards at once:
- Tick the checkbox on each board, or click Select all to select the boards on the current page.
- Click Rerun to inspect them again, or Delete selected to remove them and their results.
Deleting asks you to confirm. Deleted boards and their results can't be recovered.
Read a board's result
Click a board to open its result. Components the inspection found normal are outlined in green and defects in red. The panel on the right shows the image details and lists every object found, with its label, component type, size and confidence, and the image settings adjust brightness and contrast for a closer look.
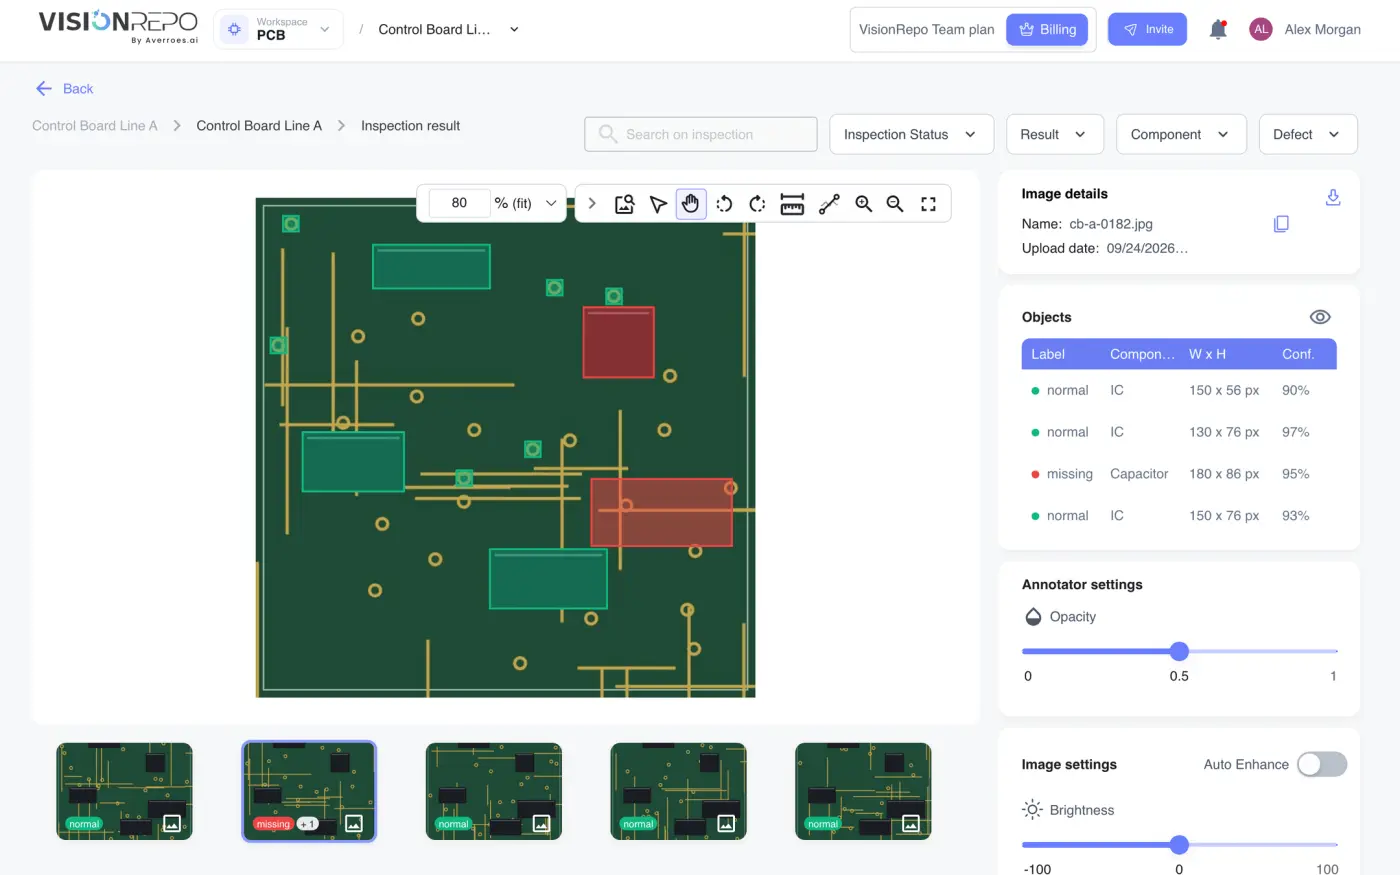
Use the thumbnails, or the filters above the image, to move through the boards. The result is read-only. To change what the inspection looks for, edit the golden templates.
Manage golden templates
The Golden templates tab lists the line's templates, each marked Analyzing template, Analyzed or Failed.
- Add template (or the Add golden template tile) uploads another one, up to three. It's analyzed before later inspections use it.
- Click a template to open it in the labeling tool and correct its components.
- Select templates and click Delete selected, or use a single template's menu. Deleting can't be undone.
Track quality over time
The Analytics tab summarizes the line for the Last 7 days, Last 30 days (the default) or Last 90 days.
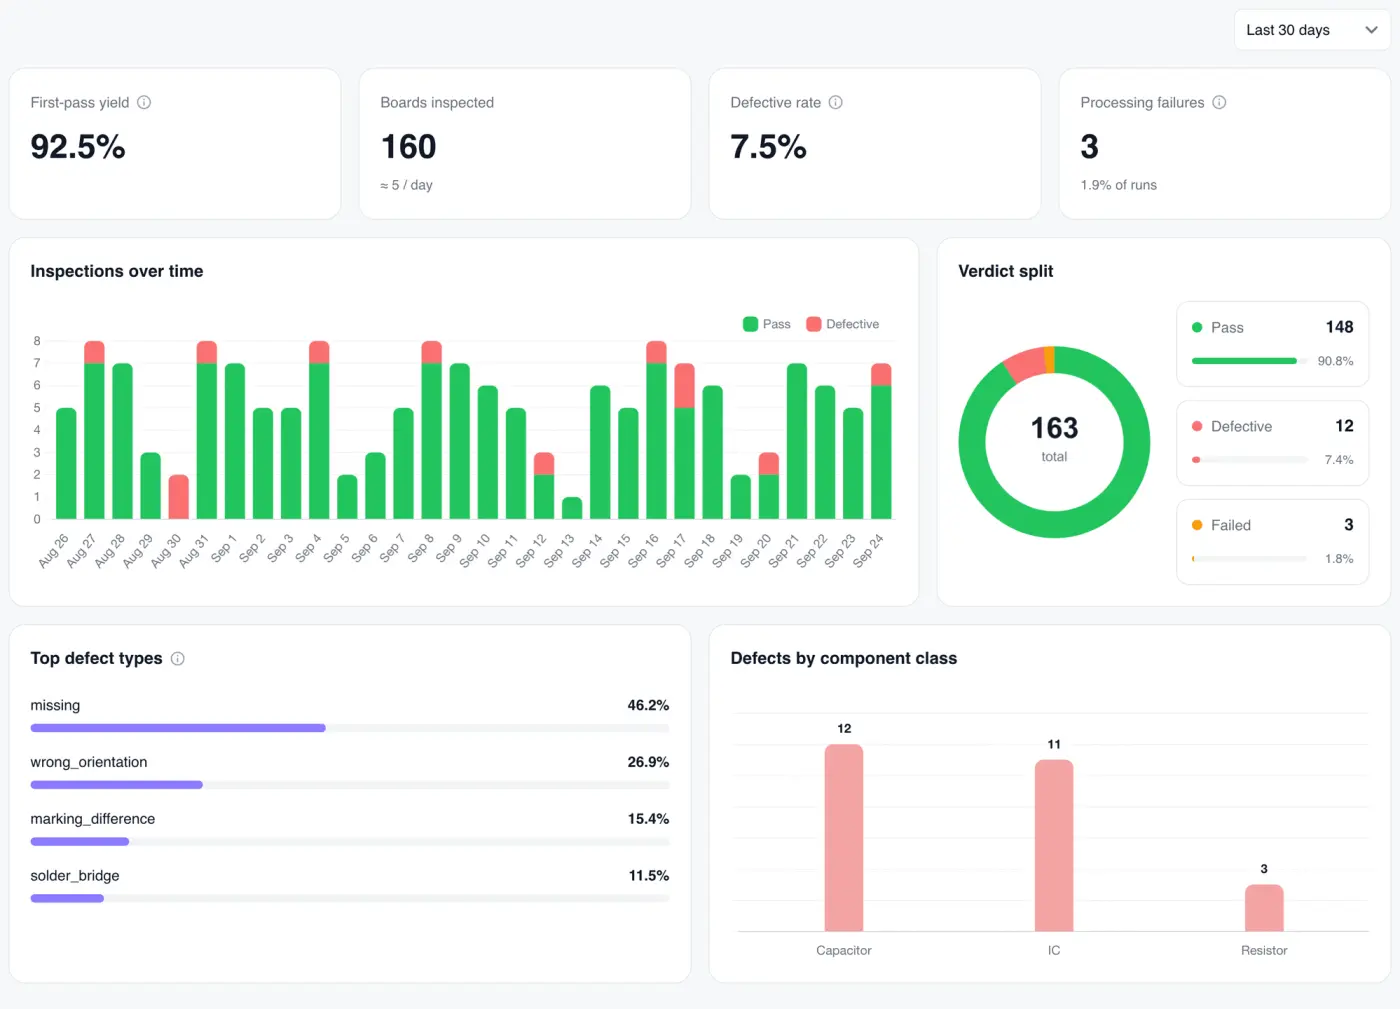
| Figure | What it tells you |
|---|---|
| First-pass yield | The share of boards that passed on their first inspection |
| Boards inspected | How many boards were inspected, with the average per day |
| Defective rate | The share of inspected boards marked defective |
| Processing failures | Inspections that couldn't run, and their share of all runs |
Below them, Inspections over time shows pass and defective boards per day, Verdict split shows pass, defective and failed, and Top defect types and Defects by component class show where the defects are concentrated.
Export results or connect a capture station
Export downloads every board and its result as a spreadsheet. If your plan doesn't include downloads, it offers an upgrade instead.
API Integration opens a panel with the requests an automated capture station needs: creating a line, signing and uploading board images, registering them for inspection, reading results, re-running or deleting boards, and fetching analytics. Each request has cURL, Node and Python examples filled in with this line's identifiers. You need an API key and secret to call them (see API Keys and API Docs).
Delete an inspection line
Deleting a line removes its golden templates, boards and results for good.
- On Inspection Lines, open the menu on the line's card.
- Choose Delete.
- In Delete this inspection?, type the line's name and click Delete.