Repositories
Find your way around a project's repository list, create a repository, and rename, download, trash or restore one.
A repository holds the images and videos you label and train on, along with their labels, folders and versions. Opening a project takes you to its repository list, titled Your Repositories.
Read the repository list
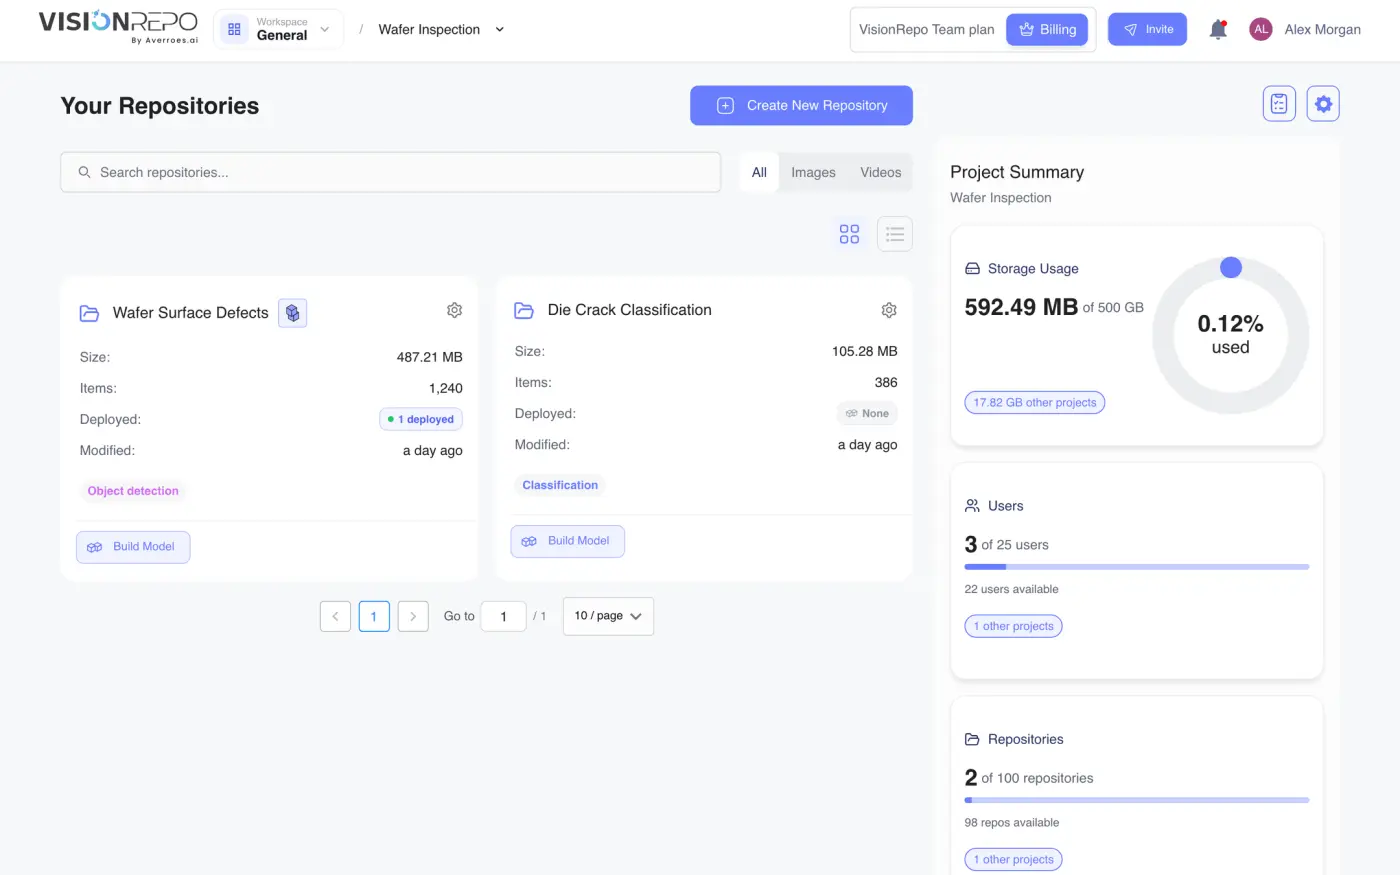
Above the cards you'll find:
- Create New Repository, to add one.
- A search box (Search repositories...) that matches repository names as you type.
- All, Images and Videos, which filter by the kind of media a repository holds.
- Two icons that switch between cards and rows. Your choice is remembered in this browser.
A pager at the foot of the list lets you page through and change how many repositories a page shows.
If the project has no repositories yet, the list reads Project is Empty with a Create New Repository button. If your search matches nothing, it says so and quotes what you typed.
Read a repository card
Each card shows:
- the repository's name, and a Trashed tag if it's in the trash;
- Size, Items, Deployed (how many of its models are serving predictions) and Modified;
- the kinds of labeling it's set up for, such as object detection or classification;
- a Build Model button, which opens the training dialog for this repository (see Build a Model).
An animated icon beside the name means something is running on the repository. Hover it: Training in Progress or Auto Labeling.
Click anywhere else on the card to open the repository on its latest version. Trashed repositories can't be opened until you restore them.
Create a repository
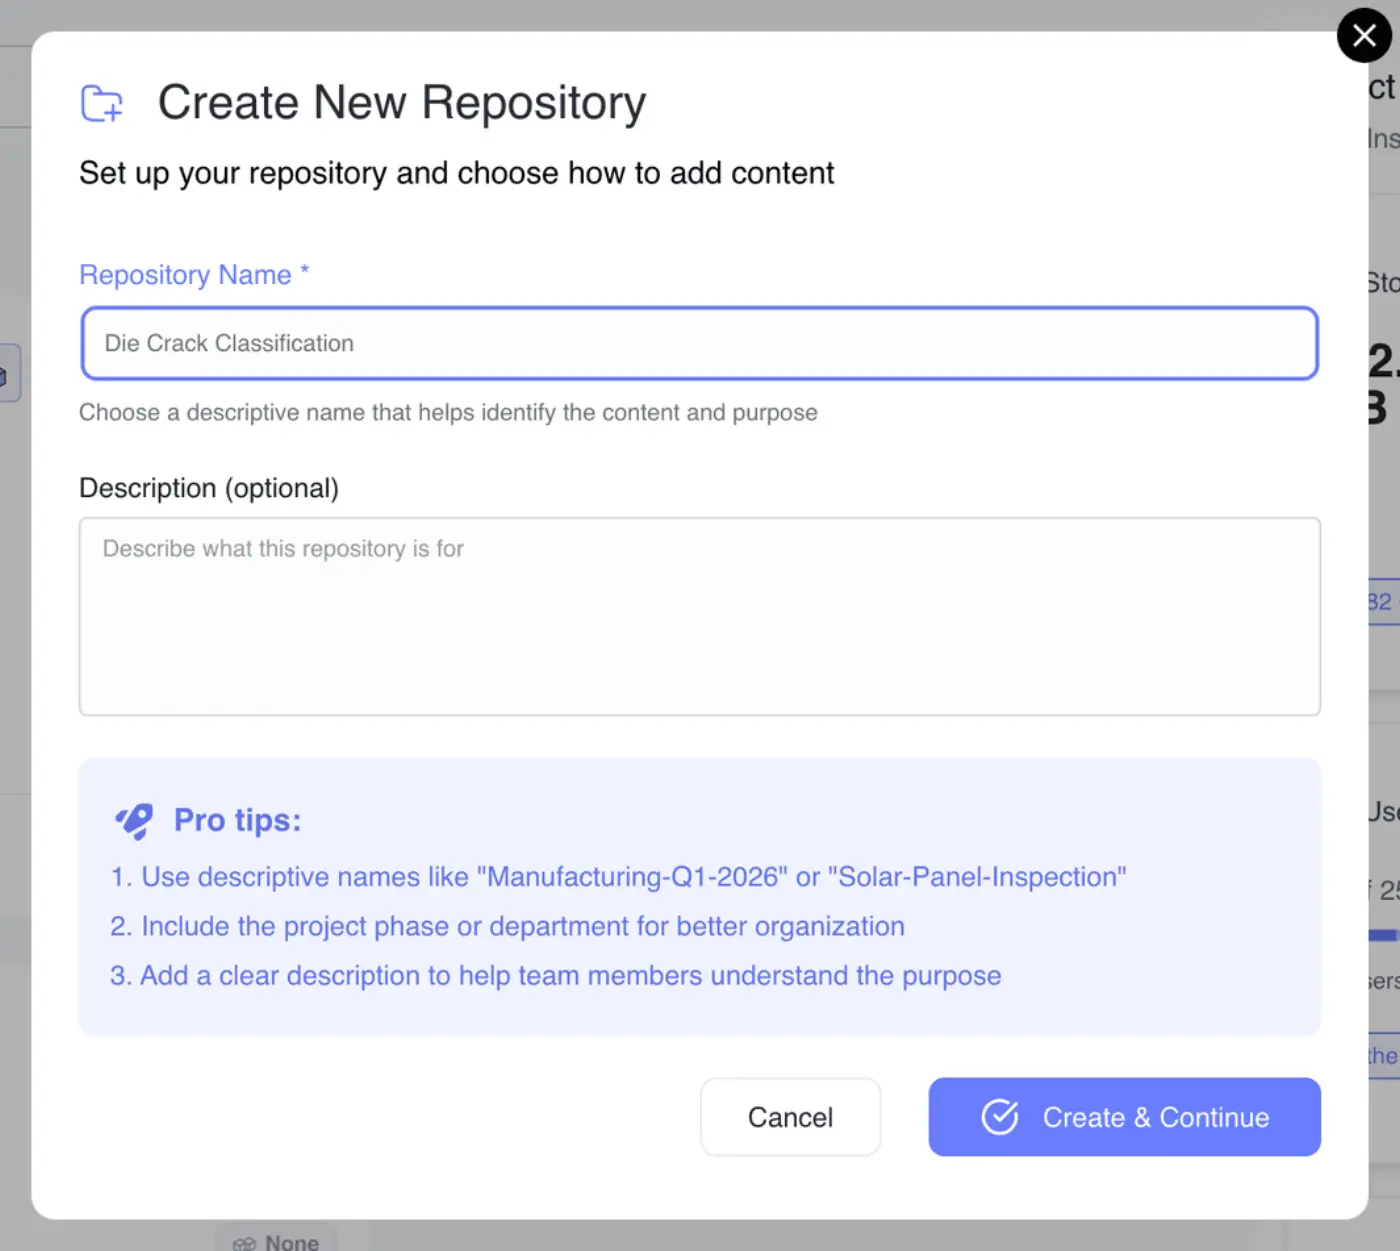
- Click Create New Repository.
- Type a name in the required Repository Name field.
- Optionally add a Description (optional). It shows under the name inside the repository.
- Click Create & Continue.
- Add Content to Repository opens. Add media now, or close it and add media later. See Upload and Import Data.
You can also create one from the repositories menu in the header while you're inside another repository.
Create New Repository is disabled if your role can't create repositories; hover it to see the missing permission. If your plan's repository allowance is used up, you get an upgrade prompt instead of the form.
Use a repository's menu
The gear icon in the top-right corner of each card opens its menu.
| Item | What it does |
|---|---|
| Edit Repository | Change the name and description |
| Unit settings | Set the real-world unit that measurements use (see Repository Details and Versions) |
| Download | Request a copy of the repository's images and labels |
| Delete | Move the repository to the trash |
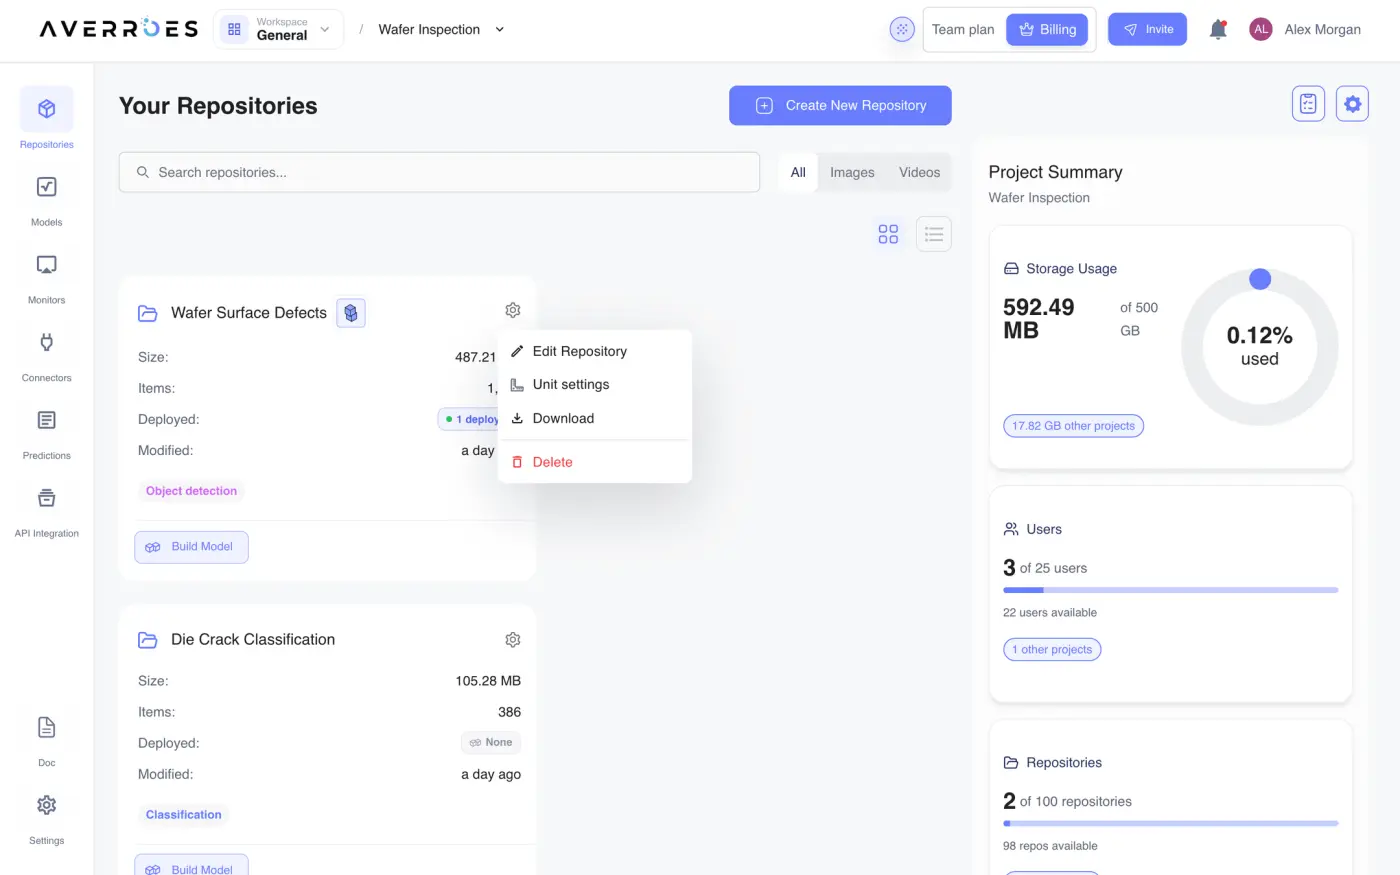
Items your role doesn't allow stay in the menu, disabled, and hovering them tells you why. Editing, unit settings and deleting need permission to change repositories. On a trashed repository they read This repository is in trash.
To rename, choose Edit Repository, change Enter a new repository name: and click Save. Only the name and description change.
Download a repository
Download is for workspace super admins only; for everyone else it's disabled with Only administrators can download. It's also disabled on an empty repository (No items available to download), and it opens an upgrade prompt if your plan doesn't include downloads.
- Choose Download from the card's menu.
- In Download repository, choose the Export type: All (images and labels), Images only or Labels only.
- Pick the Annotations type and the Annotations format you want the labels in.
- Click Download.
The export is prepared on the server. When it's ready you get an email with the download link. Downloads count against a monthly allowance, and when it's used up a Download Limit Reached message offers an upgrade.
Downloading from the card always takes the whole repository. To download one folder, or only the items your filters match, use the menu inside the repository instead.
Move a repository to the trash
- Choose Delete from the card's menu.
- In Delete this repository?, type the repository's name to confirm.
- Click Delete.
Trashed repositories stay in the list with a Trashed tag for seven days, then they're deleted for good. Until then, their menu offers:
- Restore, which brings the repository back after you confirm in Restore Repository.
- Permanently delete, which deletes it right away. You type the name again, and it can't be undone.
Read the project summary panel
The panel on the right of the list describes the project and the workspace around it.
- Project Summary shows Storage Usage, Users and Repositories for this project against your plan's allowance, each with how much is left and how much other projects are using. Below them, a card counts the models serving predictions in this project.
- Total Assets splits the project's media into Images and Videos, and Transfer counts Uploads and Downloads.
- Org Usage Summary shows the whole workspace's Storage, Repositories and Users for the current billing period, your Current Plan, and Manage Plan, which opens billing.
An AI Features card below lists what an upgrade to Averroes.ai adds. Upgrade Plan opens an email to the Averroes team.
The tasks and gear icons at the top of the panel open the project's task board and project settings. See Tasks and Projects.