Smart and Auto-Labeling
Let a model outline objects for you on the canvas, or label a whole folder with a model you trained.
There are two ways to avoid drawing everything by hand. The smart tools help with one object at a time while you label. Auto-labeling runs one of your trained models over a folder or the whole repository and writes its predictions back as labels, which you then check and correct.
Both depend on your plan. When a plan doesn't include one of them, its button is still there and offers an upgrade instead.
There's a third way, with no model at all: ask Vero to label images from a description, such as "label the scratches in line-2". See AI Labeling with Vero.
Outline an object with the smart tools
Smart Box (object detection) and Smart Polygon (segmentation) sit in the drawing toolbar on the right edge of the image. You point at an object and the tool finds its edges.
- Choose Smart Box or Smart Polygon.
- Wait while Extracting an embedding for the image... covers the canvas. This happens once per image.
- Left-click on the object. Each left click adds a point that says "this is part of it".
- Right-click on anything that was included by mistake. That adds a point saying "this is not part of it", and the shape tightens.
- Click an existing point again to remove it.
- Pick a class from the Select a class list that appears next to the shape.
The shape isn't saved until you give it a class. If the class you need doesn't exist yet, Manage labels at the bottom of that list opens the class editor.
If the preparation step seems stuck, click the overlay. That drops you back to the arrow tool with nothing changed, and you can carry on drawing by hand.
On a plan without the smart tools, both buttons are disabled and their tooltips read Upgrade to unlock smart boxes and Upgrade to unlock smart polygons.
Auto-label with a trained model
Auto-labeling starts from the model you want to use, in the repository's Models list.
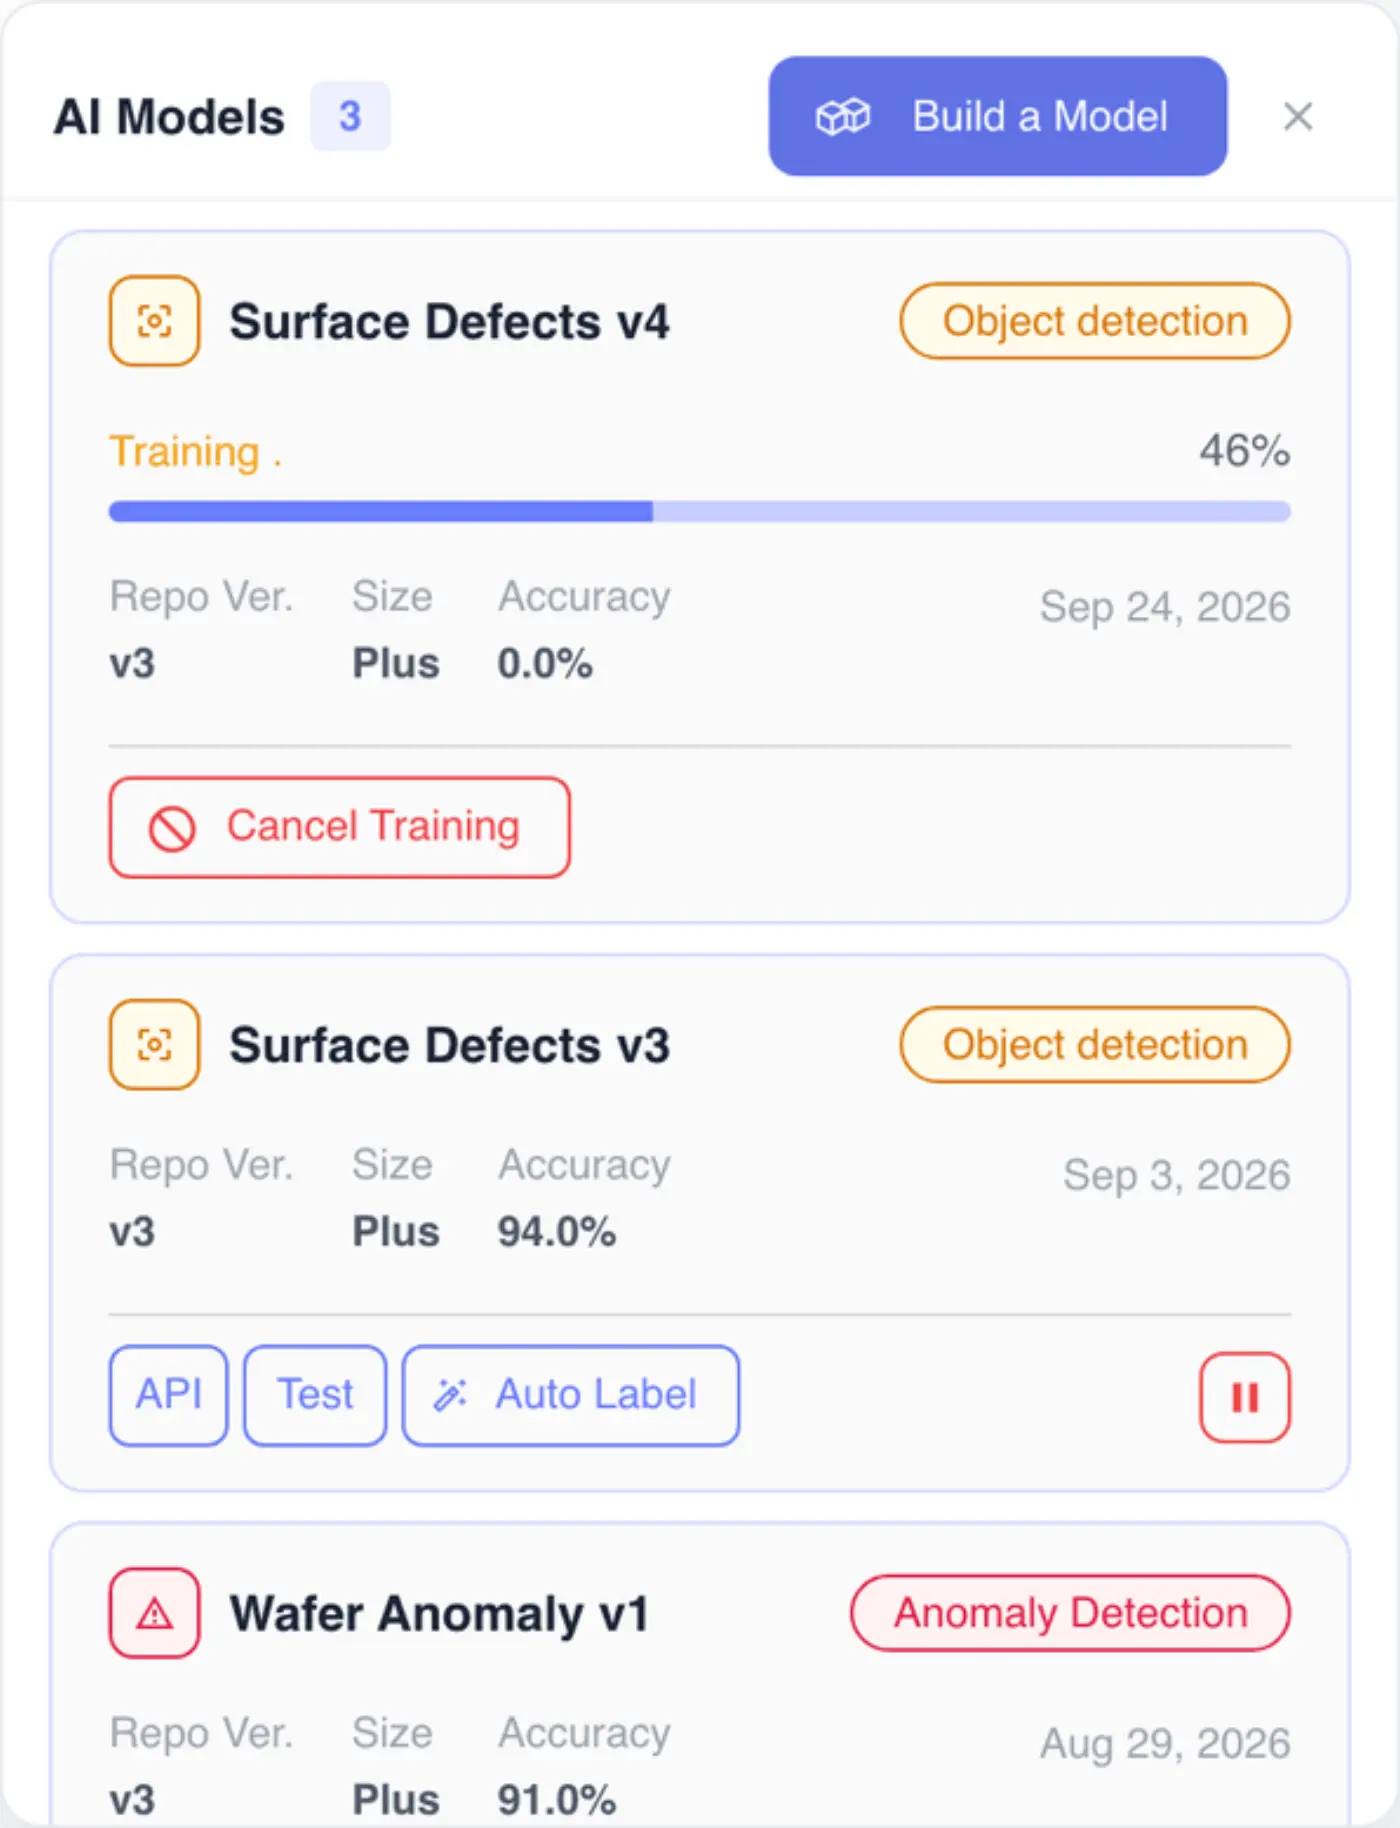
- Open the repository and click Models in its header. The AI Models list opens.
- Find a model that has finished training. The Auto Label button only appears on finished models.
- Click Auto Label. The Auto Label with dialog opens, named after the model.
- Leave Entire repository selected, or pick a folder from the tree under or pick a folder.
- Check the counts at the bottom, then click Start Auto Labeling.
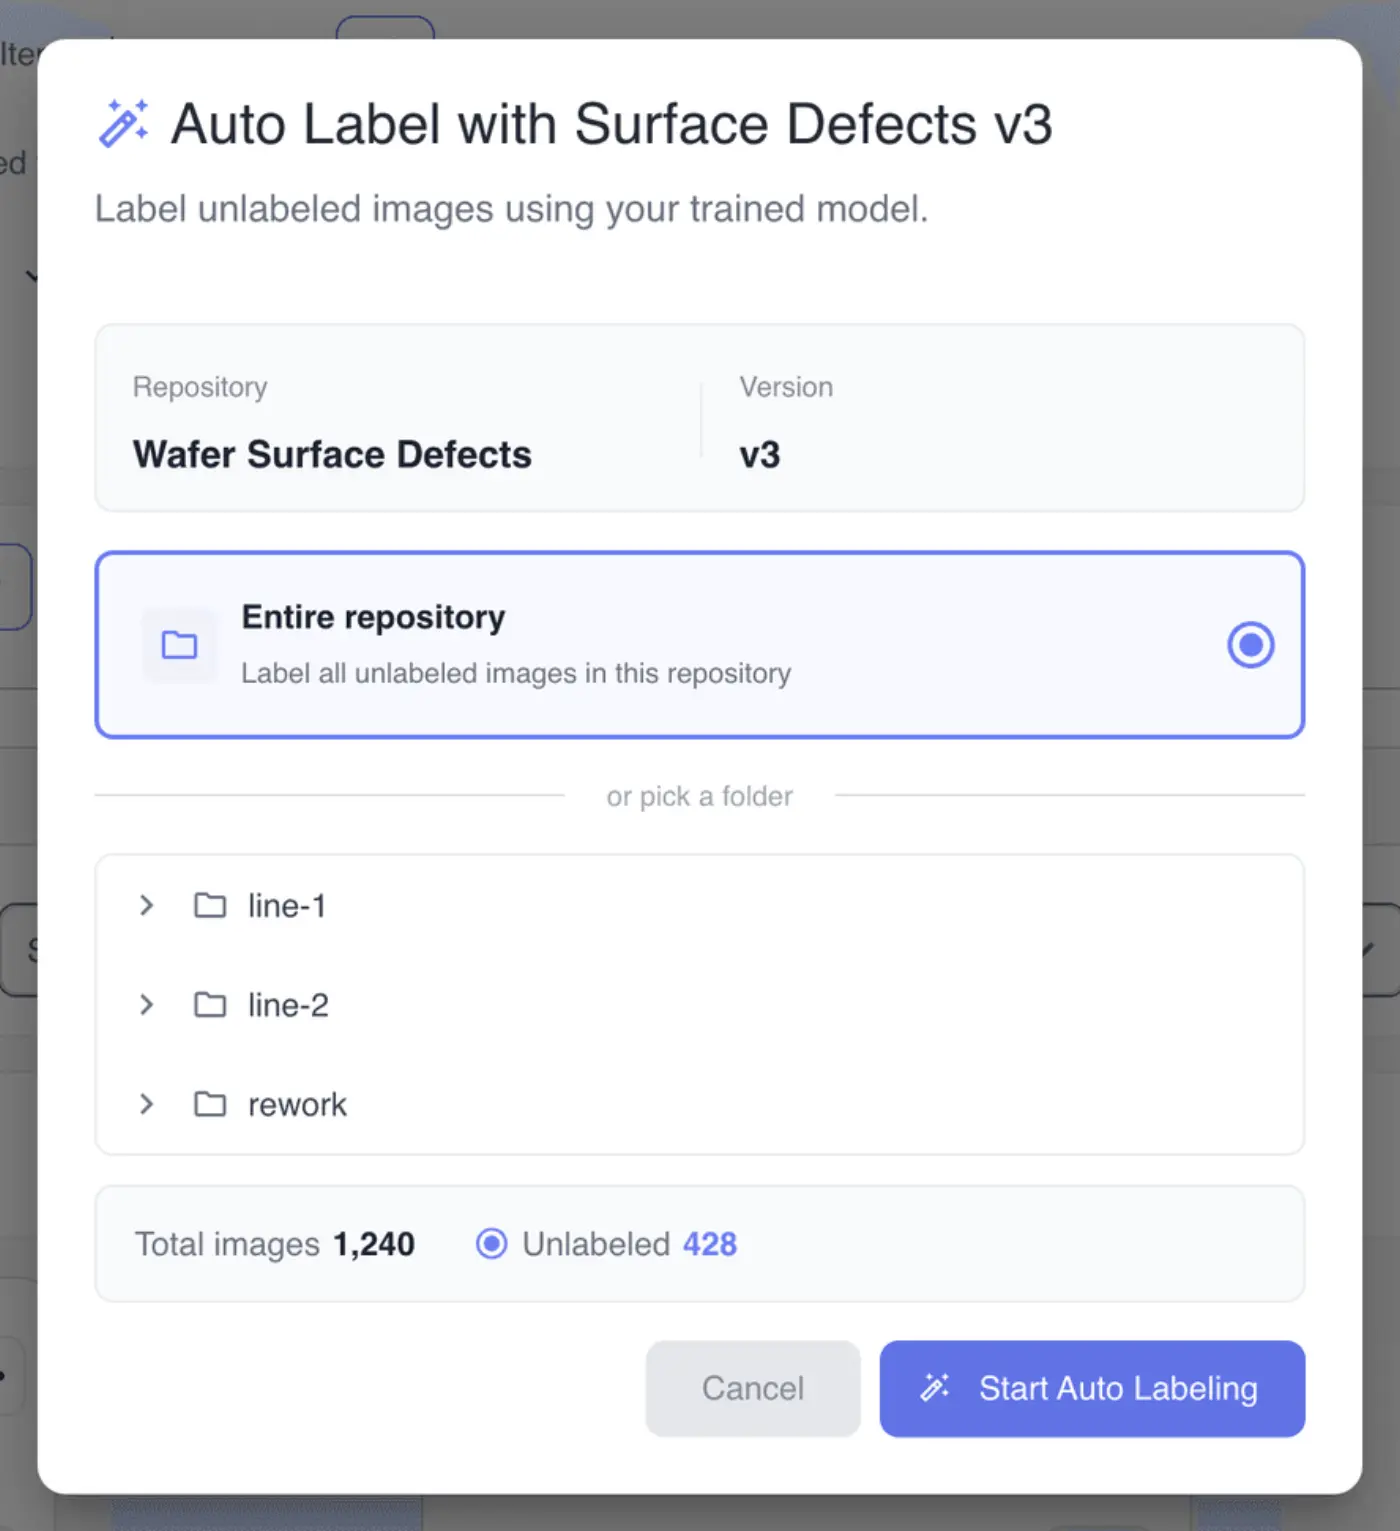
The model only labels images that have no labels yet. The counts show how many that is: Total images and Unlabeled for the whole repository, or Labeled and Unlabeled for a folder. When nothing is unlabeled the count turns red, the dialog says No unlabeled images (or No unlabeled images in this folder), and Start Auto Labeling stays disabled.
If the repository has unsaved labeling work, the dialog tells you the draft will be saved automatically before labeling starts, and names the version the results will land in. The model runs against that saved version, and its labels arrive as a new draft on top of it.
Who can auto-label
You need permission to read models and to write media. Without both, Auto Label is disabled and hovering it names what's missing. Cancelling a run needs the same.
If your plan doesn't include auto-labeling, clicking Auto Label opens an upgrade prompt instead of the dialog.
Follow a run and cancel it
A run carries on in the background after the dialog closes.
- On the model's card, Auto Label changes to Auto Labeling.... Hovering it shows Cancel Auto Labeling.
- The Running tasks panel lists the run under Auto labelling, with the project, repository and model, and a progress bar of images done out of images to label.
- A dot on the Models button means something in the list has news for you, such as a finished run. It clears when you open the list.
When a run finishes, the repository page refreshes its images, classes and draft state by itself, so the new labels show up without reloading.
To stop a run, click Cancel Auto Labeling on the model's card and confirm with Cancel Auto Labeling in the dialog (Keep Running backs out). A run that is still queued can also be cancelled from the Running tasks panel.
While a model is auto-labeling you can't stop that model. The warning reads Cannot stop the model while auto-labeling is in progress. Cancel auto-labeling first.
Check what the model labeled
Treat auto-labels as a first pass. In the canvas, an image the model labeled shows an Auto Labeling chip next to Annotated by in its image details, so you can tell its work from a person's.
The quickest way to get the results checked is a review task over the images, assigned to someone who knows the defects well. See Tasks and Reviewing Labeled Work.
A few habits that save rework:
- Try a single folder first, such as
line-2, before running on the whole repository. - Use a model trained on images like the ones you're labeling. A model trained on one line's camera can do badly on another's.
- Save or discard the draft before you start if you want the run to sit on a version you've named yourself.
When you reach the daily labeling limit
Some plans cap how many labels you can add or remove in a day. Once you reach the cap, new shapes and deletions on the canvas are refused and a message reads You've reached your labeling limit. Enable extra usage to continue. The Enable extra usage link in it opens your usage settings.
With extra usage turned on and credit available, the cap no longer applies. See Usage and Limits.