Team Members and Roles
Invite people to the workspace, limit them to the projects and repositories they need, and create roles that set what they can do.
People join your workspace by invitation. Each person gets one role, which decides what they can do, and a set of projects and repositories, which decides where they can do it. Both live in settings, on the Members and Roles tabs.
See who's in the workspace
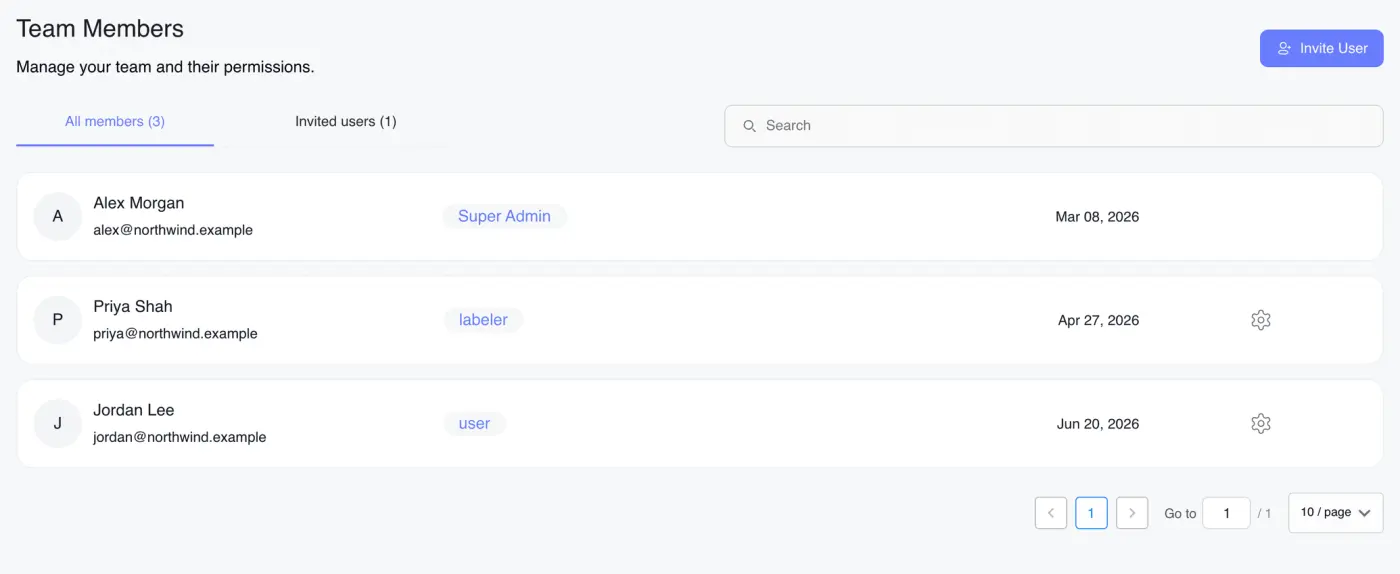
Open settings from the account menu and click Members. The page has two lists:
- All members shows everyone who has joined, with their email, their role and the date they joined.
- Invited users shows invitations that haven't been accepted yet.
The number in brackets beside each is the total. Search filters whichever list is open. A workspace super admin's role shows as Super Admin; every other role shows the name it was created with.
You need permission to read users to see this tab. Without it, the tab is dimmed and hovering it names the missing permission.
Invite someone
Only workspace super admins can invite people. You'll find Invite User at the top of the Members tab, and an Invite button in the header on every page (it only appears once the workspace has a project).
- Click Invite User (or Invite in the header).
- Enter the person's Name and Email.
- Choose a Role.
- Pick one or more projects under Project.
- Pick the repositories they should reach under Repository, or click Select all to include every repository in those projects.
- Click Invite.
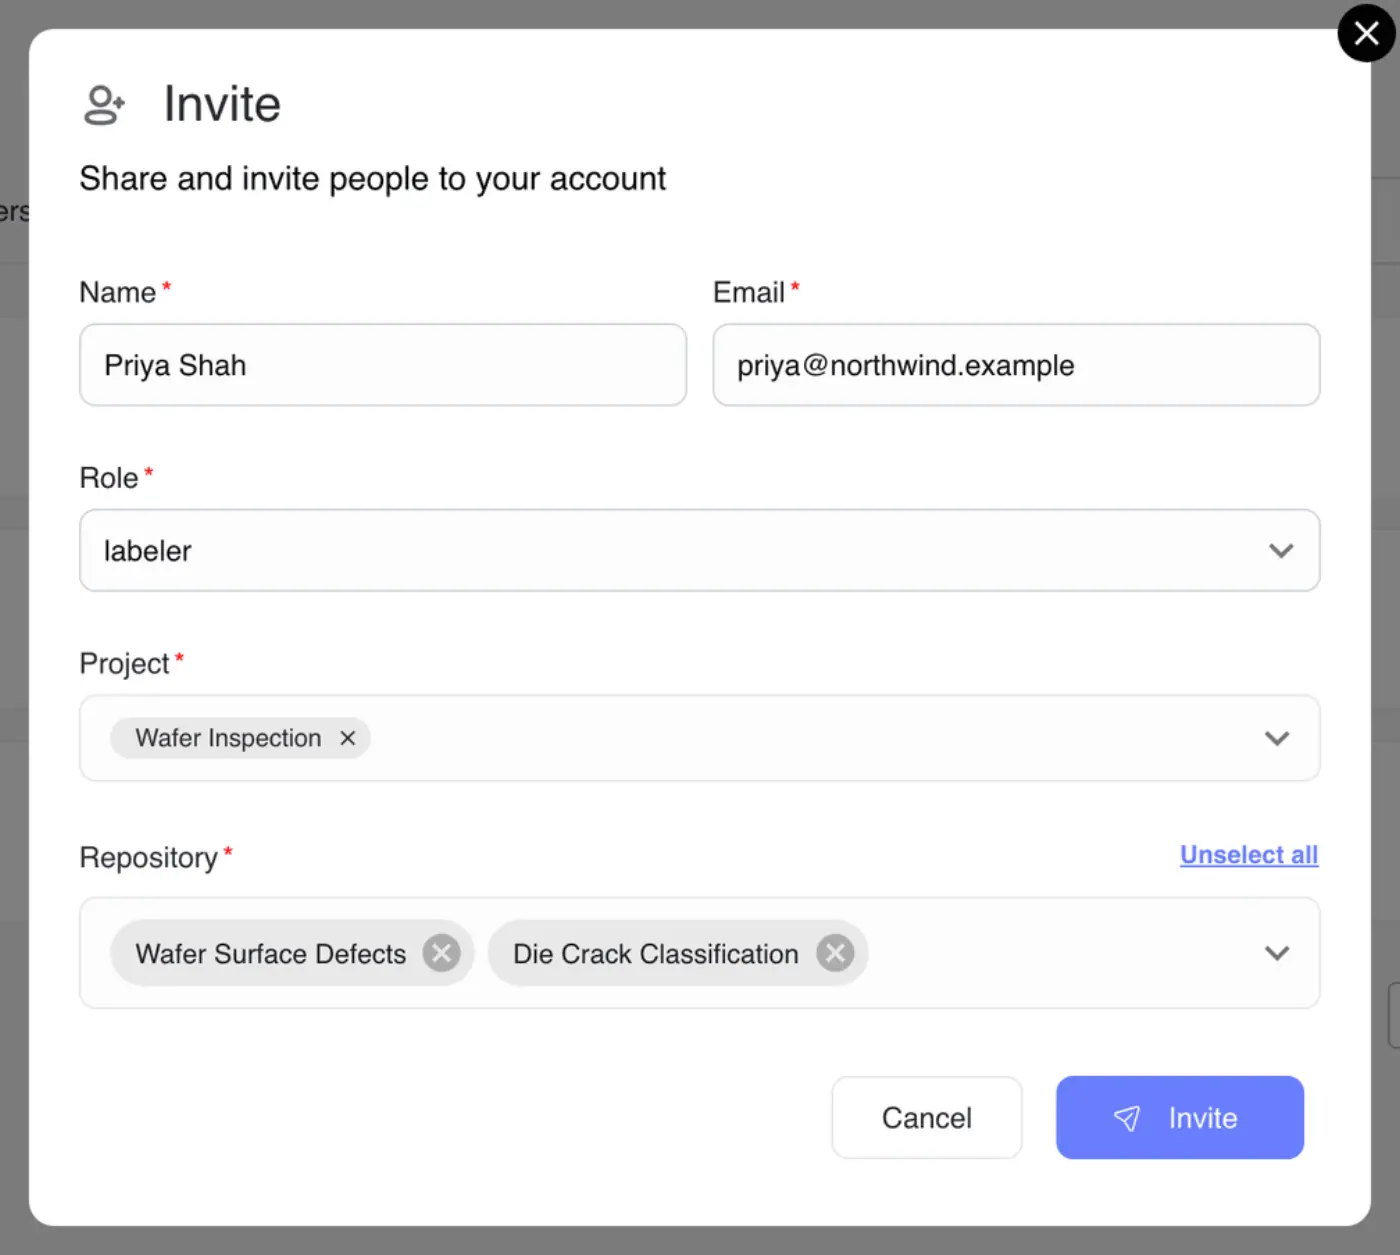
A few things about the form:
- Project stays disabled until you choose a role. Repository stays disabled until you choose a project.
- If you choose the Super Admin role, Project and Repository switch off. A super admin reaches the whole workspace, so there's nothing to limit.
- Invite stays greyed out until you've filled something in.
The new invitation appears under Invited users. The person gets an email with a link to join. Once they accept, they move to All members.
In the example workspace, Sam Okafor has been invited but hasn't joined, so he's listed under Invited users.
When your plan runs out of seats
Your plan includes a set number of user seats. If an invitation would go over it, the invitation isn't sent and a message explains the limit, with an Upgrade plan link that opens the plan picker. You can also free a seat by removing someone.
The Users card on the Overview tab shows how many seats are in use. See Plans and Billing for changing plans.
Cancel a pending invitation
On Invited users, click the bin icon on the invitation and confirm in the Delete invitation dialog. Only super admins see the bin.
There's no resend button. If someone lost the email, delete the invitation and invite them again.
Change or remove a member
Click the gear icon at the end of a member's row.
- Edit User opens the same form as an invitation. The name and email are locked; change the role, projects or repositories and click Save.
- Delete User removes them from the workspace after you confirm. This can't be undone, but it frees their seat.
Not every row has the gear icon. The rules:
- You can't manage your own account here.
- Nobody can manage the organization's owner.
- A super admin can manage anyone who isn't a super admin.
- Only the owner can manage another super admin.
Open the Roles tab
Roles lists every role in the workspace as a card. Only workspace super admins can open it, and it stays dimmed until the workspace has more than one member. Hover the tab to see which of the two is holding it back.
The Super Admin card is built in and has no edit or delete buttons. Every other card has a pencil to edit it and a bin to delete it.
Create or edit a role
- On Roles, click Create a New Role, or the pencil on an existing role.
- Type a Role Name, such as "Reviewer". You can't rename a role after it's created, so the field is locked when you edit one.
- Tick Read or Write on each permission card. Search permissions... narrows the list.
- Click Create a New Role, or Edit Role when editing.
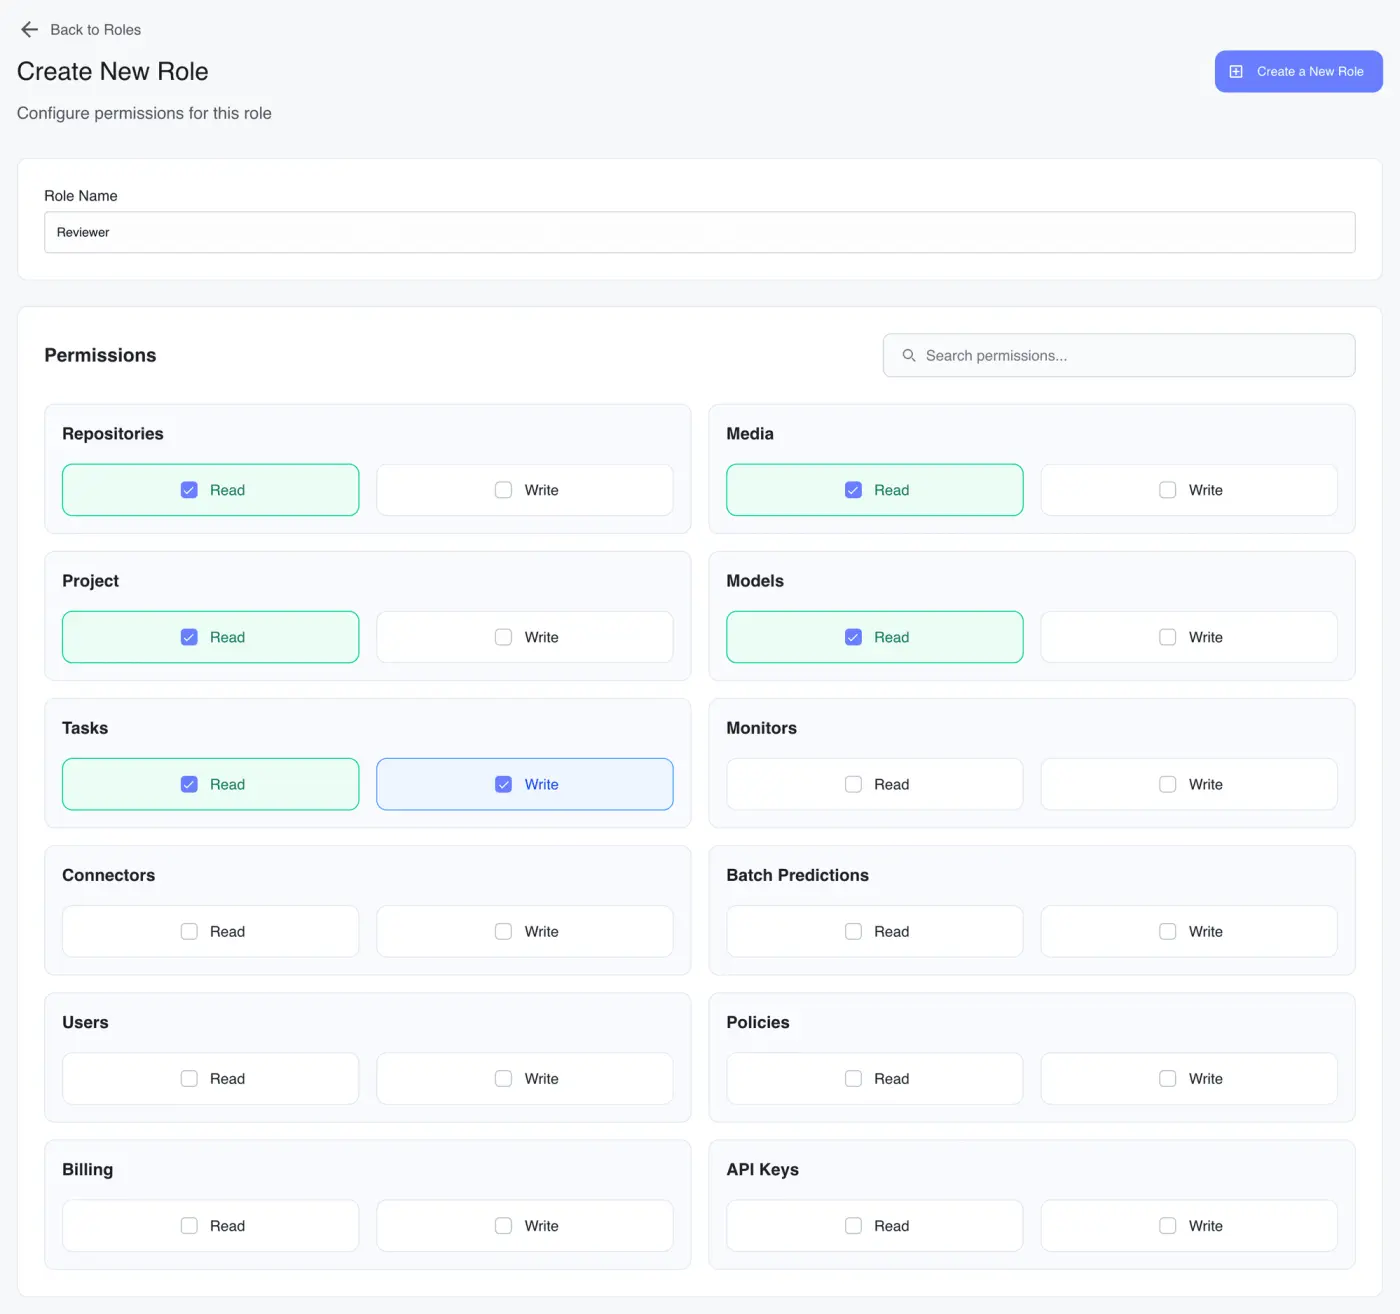
Create a New Role needs your role to read and change both users and roles (policies). If it doesn't, the button is hidden.
How the checkboxes behave:
- Write includes Read. Ticking Write ticks Read too, and you can't untick Read while Write is on.
- Read on Repositories, Project and Media is always on. Hover one of those boxes and it says unchecking isn't allowed. Without them nobody could open anything.
- The button stays disabled until the role has a name and at least one permission.
Changes to an existing role apply to everyone who holds it. Saving shows "Role permissions are updating and may take a few seconds to apply", so give it a moment before testing.
Roles and Permissions Reference explains what each card allows.
Delete a role
Click the bin on a role's card and confirm in the Delete Role dialog.
Move people off a role before deleting it. Deleting the role doesn't remove the members who hold it, and they lose whatever access it gave them.
Add people to a single project
Workspace membership and project membership are separate. Each project has its own team list under the project's Settings, where super admins can add or remove members of that project without changing their role. See Projects.