Solar Sites and Flights
Add a site, upload a drone flight, check its photos and browse them.
Solar finds faulty panels on a solar site from the photos a drone takes over it. The drone captures every shot twice, once with its thermal camera and once with its RGB camera.
The app organises the work in three levels:
- a site is a solar farm or a rooftop;
- a flight holds the photos of one drone flight over the site, such as
Block A – Sep 2026; - a run analyses a flight and writes its Critical, Mild and Low reports.
This article covers sites and flights. Solar Runs covers running a flight, and Solar Results and Reports covers what a run finds.
Switch to Solar
Sites live in their own workspace, separate from the repositories, models and monitors of your general projects.
- Click the Workspace button in the header, next to the logo.
- Choose Solar ("Solar panel datasets & models").
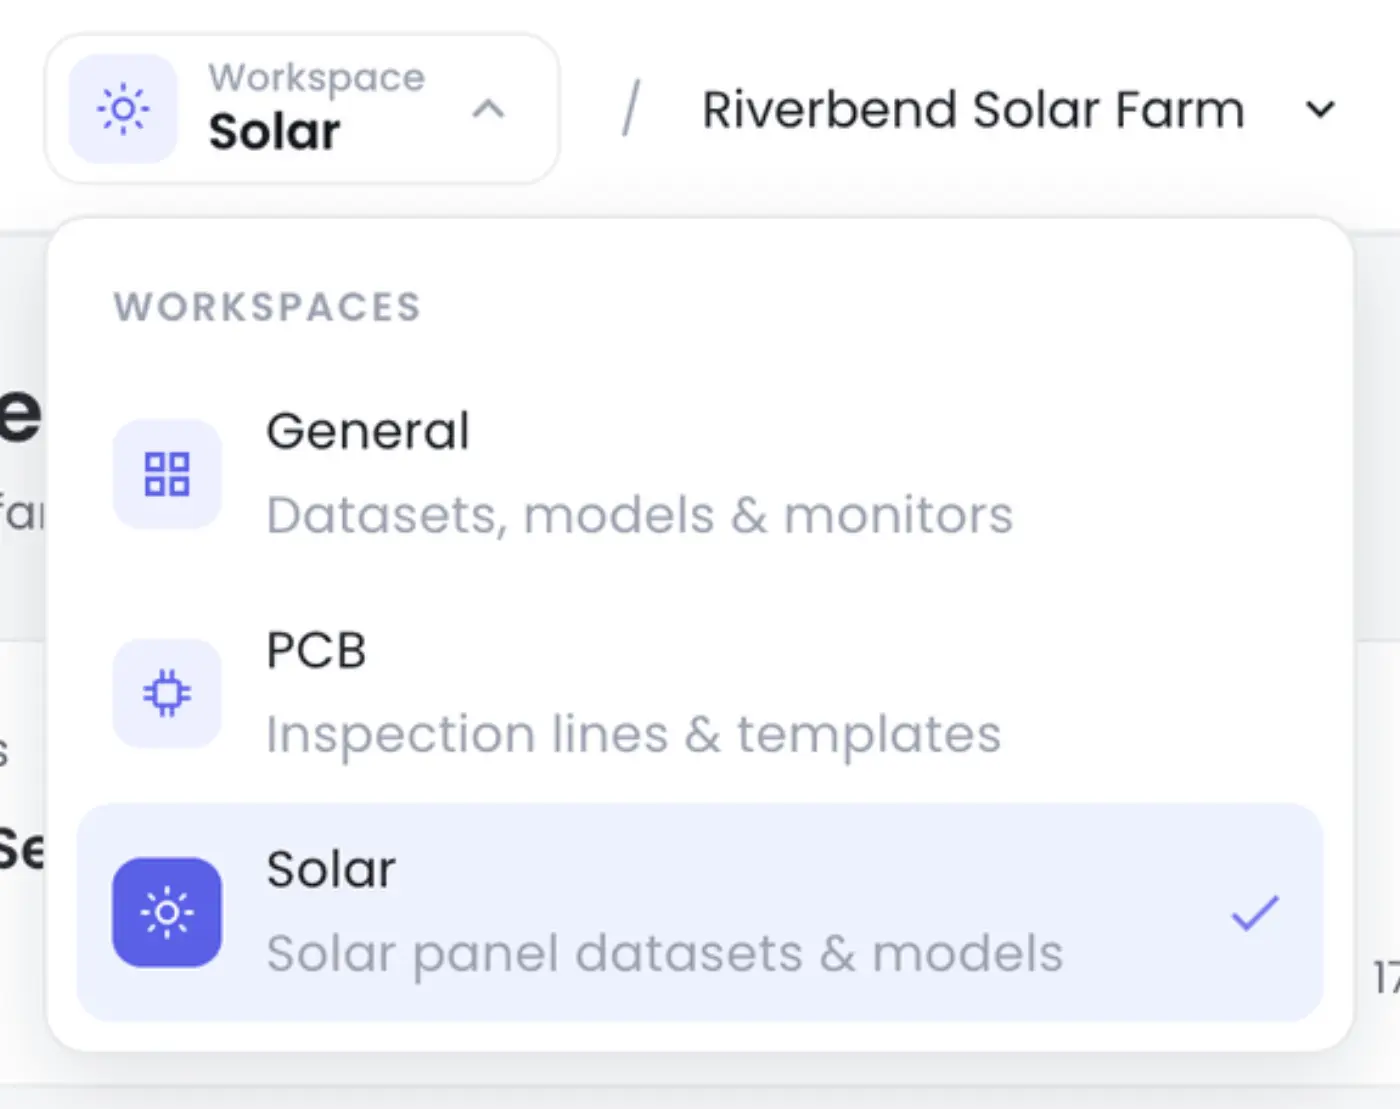
The header's menu now lists your sites, and Add a site at its foot adds another. Every site's page also ends with Inspecting another site? and its Add a site link. Choose General to go back. The app remembers your choice on this browser.
If your plan doesn't include Solar, the option is greyed out with the tooltip Solar is not included in your current plan. What a report costs on your plan, or the Free plan's one trial report, shows on the Generate report step; see Solar Runs.
Add a site
With no sites yet, Solar opens on Find faulty panels from one drone flight, with what a good flight needs under Before you fly: follow these requirements. View a sample report downloads a sample PDF report, about a made-up site, so you can see what your reports will look like.
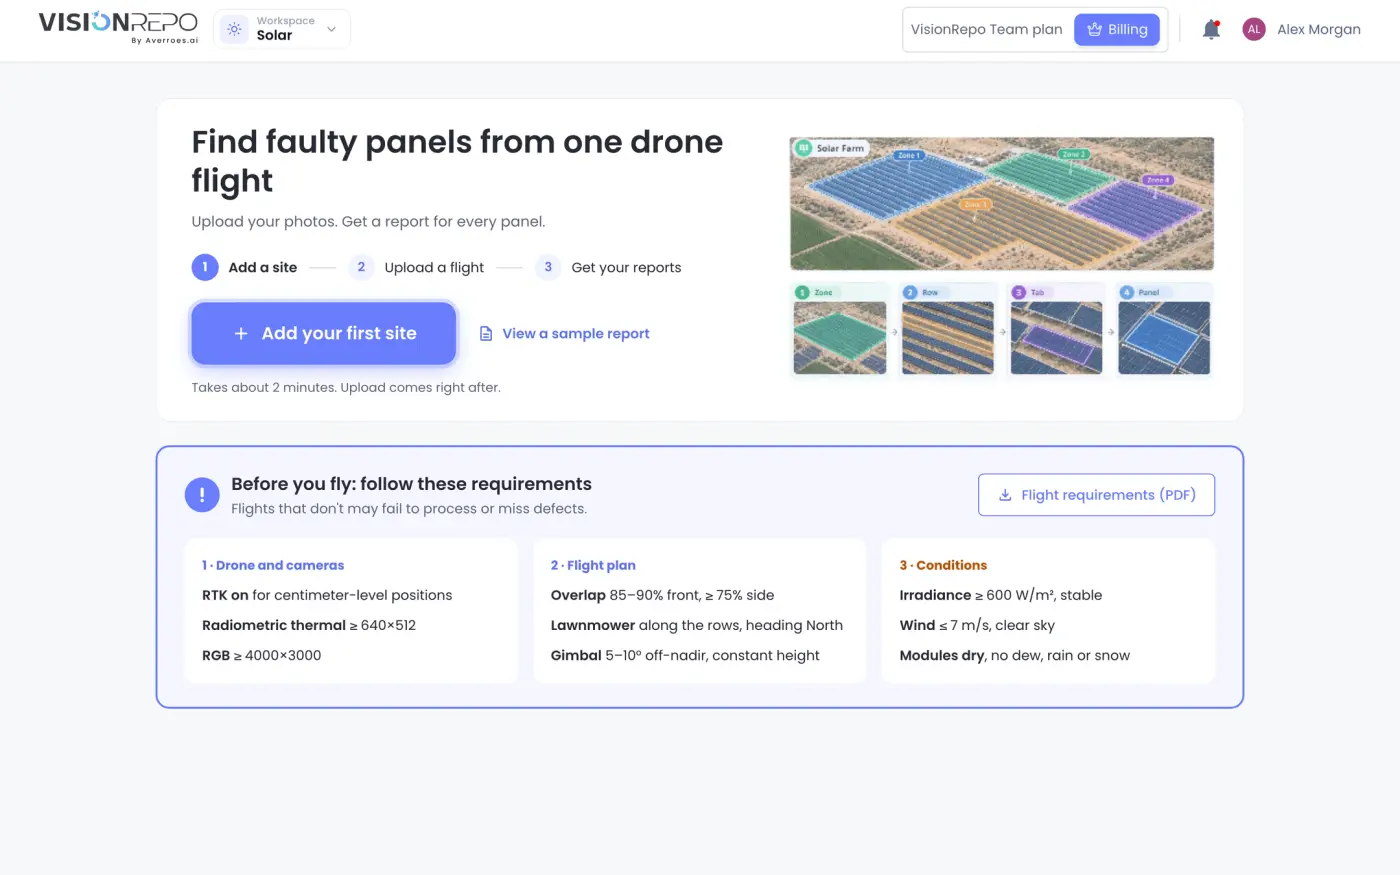
- Click Add your first site. Once you have a site, click Add a site at the bottom of any site's page, or in the header's site menu.
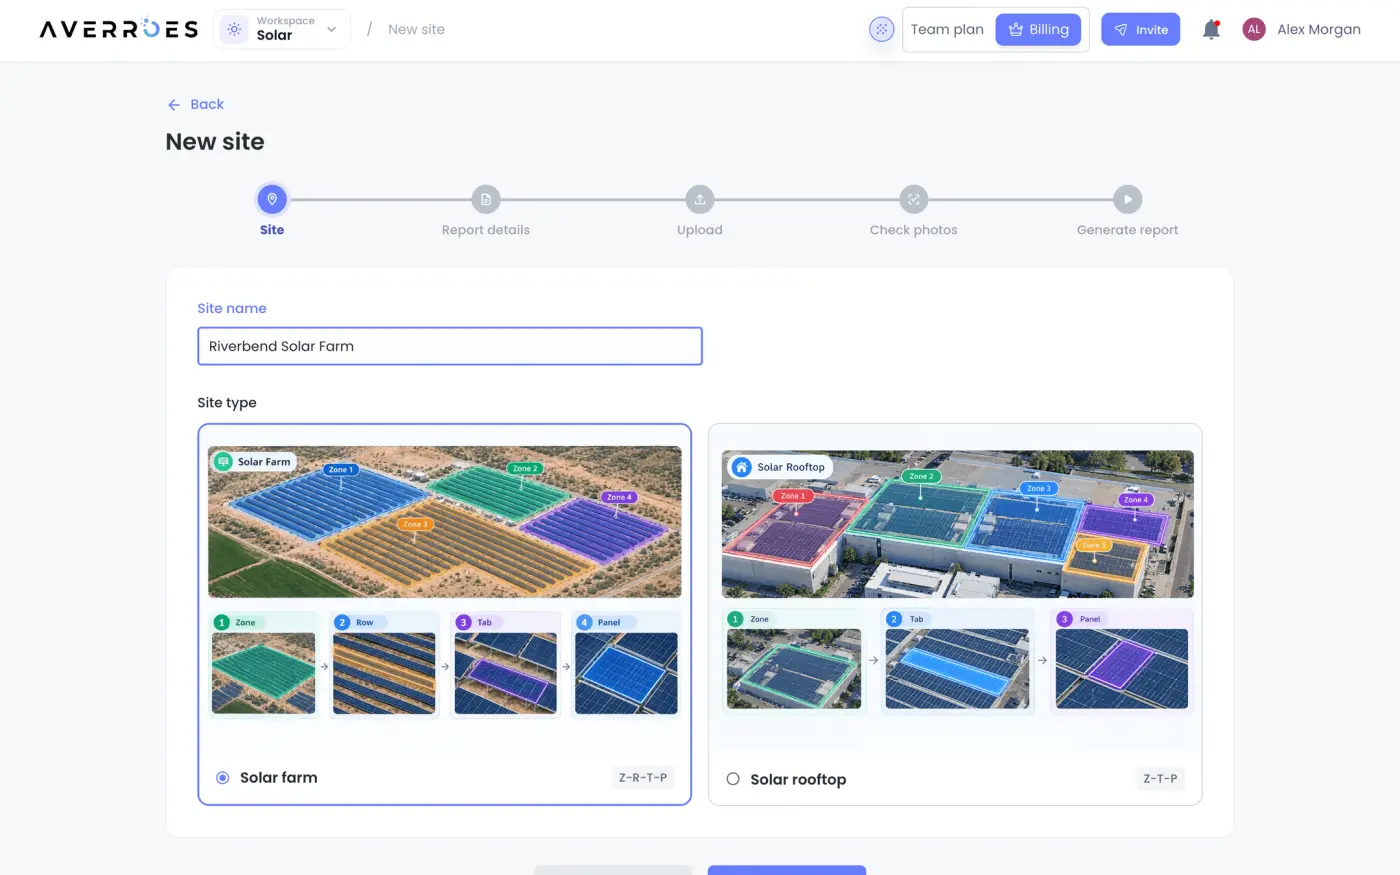
- Enter a Site name and choose Solar farm or Solar rooftop. The site type decides how panels are numbered in the reports: zone, row, table and panel on a farm, zone, table and panel on a rooftop.
- Click Next. The site is created.
- Fill in the Report details you know (see below).
- Click Next to upload your first flight, or Upload later to go to the site.
Whoever adds a site is told when its runs finish or fail.
Fill in the report details
Every report of the site prints these details, so you enter them once per site. They're grouped in four sections, Site, System, Modules and Inverters & transformers, and Filled counts how many you've entered. Every detail is optional.
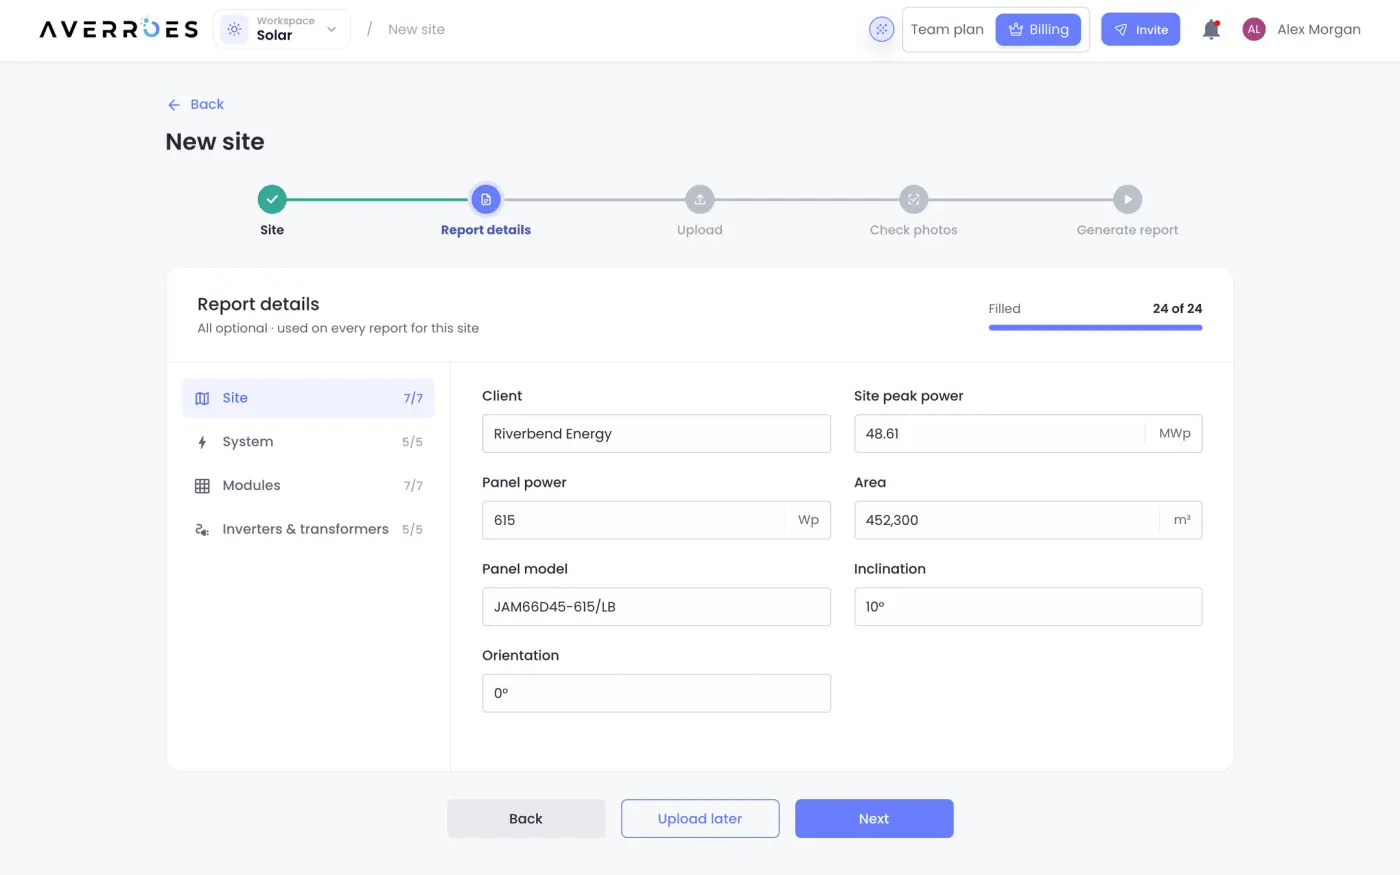
Quantities start with a number and take a unit from the list next to them, such as MWp for the site peak power. On plans that charge per report, the Site peak power is also what a report's size, and so its price, is worked out from. A value the app can't read is marked Enter a number.
To change them later, open the site and click Edit details under Report details, or Edit beside the report details on a flight's Generate report step.
Find your way around a site
A site's page lists its Flights, newest first, with what each one's latest run found. Above them, Latest results, Findings and Running now sum up the site.
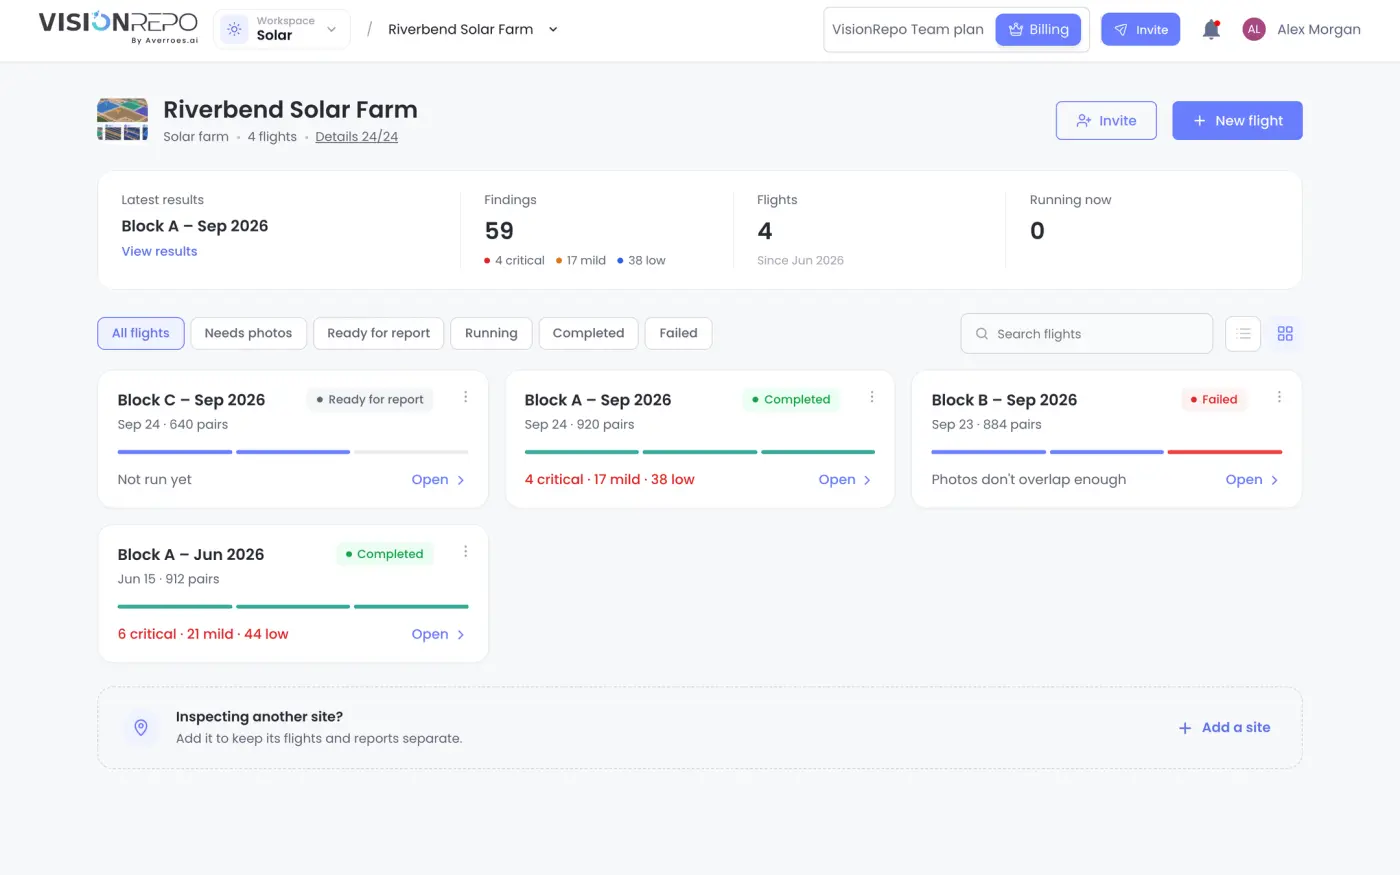
- Pick a status above the flights to see only those: Needs photos, Ready for report, Running, Completed or Failed. All flights shows them all.
- Search by flight name.
- Switch between the table and cards with the view buttons.
- Each flight offers its next step: Upload photos, Generate report, Fix photos, View, View results or Details.
- While a flight's photos are still being checked, it shows Checking photos and opens Check photos. It turns Ready for report, or Photos to fix, by itself when the check is done, and only then appears under Ready for report.
On the right, Report details shows how much is filled in, Team lists who's on the site, and Notify me chooses whether you hear about this site's runs: Results ready and Run failed, in the app and by email, whoever started the run.
Before the first flight, the page shows No flights yet and the Before you fly checklist.
Prepare your drone images
The full requirements, for your pilot, are in Flight requirements (PDF) on the Before you fly card, on the Solar home page and on a site before its first flight.
A run pairs each thermal photo with the RGB photo taken at the same moment, and it can only analyse complete pairs. Upload the files exactly as the drone saved them:
- Use a supported thermal camera. The thermal photos must come from one of these DJI cameras: Zenmuse XT2, Zenmuse XT S, Zenmuse H20T, Zenmuse H20N, Zenmuse H30T, Mavic 3T, Matrice 3TD, Matrice 30T, Matrice 4T or Mavic 2 Enterprise Advanced.
- Keep the original files. The temperature data is stored inside each thermal JPEG. Photos exported from other software, screenshots or resized copies lose it.
- Don't rename the files. DJI names the two halves of a shot
DJI_<date and time>_<capture number>_T.JPGfor the thermal photo and_W,_Vor_Zfor the RGB one. Photos are paired by that capture number. - Use RTK and enough resolution. Turn RTK on for centimetre-level positions. The thermal camera must be radiometric, at least 640×512, and the RGB camera at least 4000×3000.
- Fly for overlap. Neighbouring photos should overlap by 85–90% along a line and at least 75% between lines. Fly lawnmower lines along the rows, heading North, at a constant height, with the gimbal 5–10° off straight down. The site map is built from that overlap.
- Fly in good conditions. Irradiance of at least 600 W/m² and stable, wind up to 7 m/s under a clear sky, and dry modules (no dew, rain or snow).
The two halves of a pair must have been taken within 10 seconds of each other, so photos from different flights never get mixed.
Upload a flight
- On the site, click New flight.
- Change the Flight name if you like. It starts as today's date.
- Click Choose photos to pick photos or a folder, or Upload ZIP to pick a ZIP file. You can also drop them on the page.
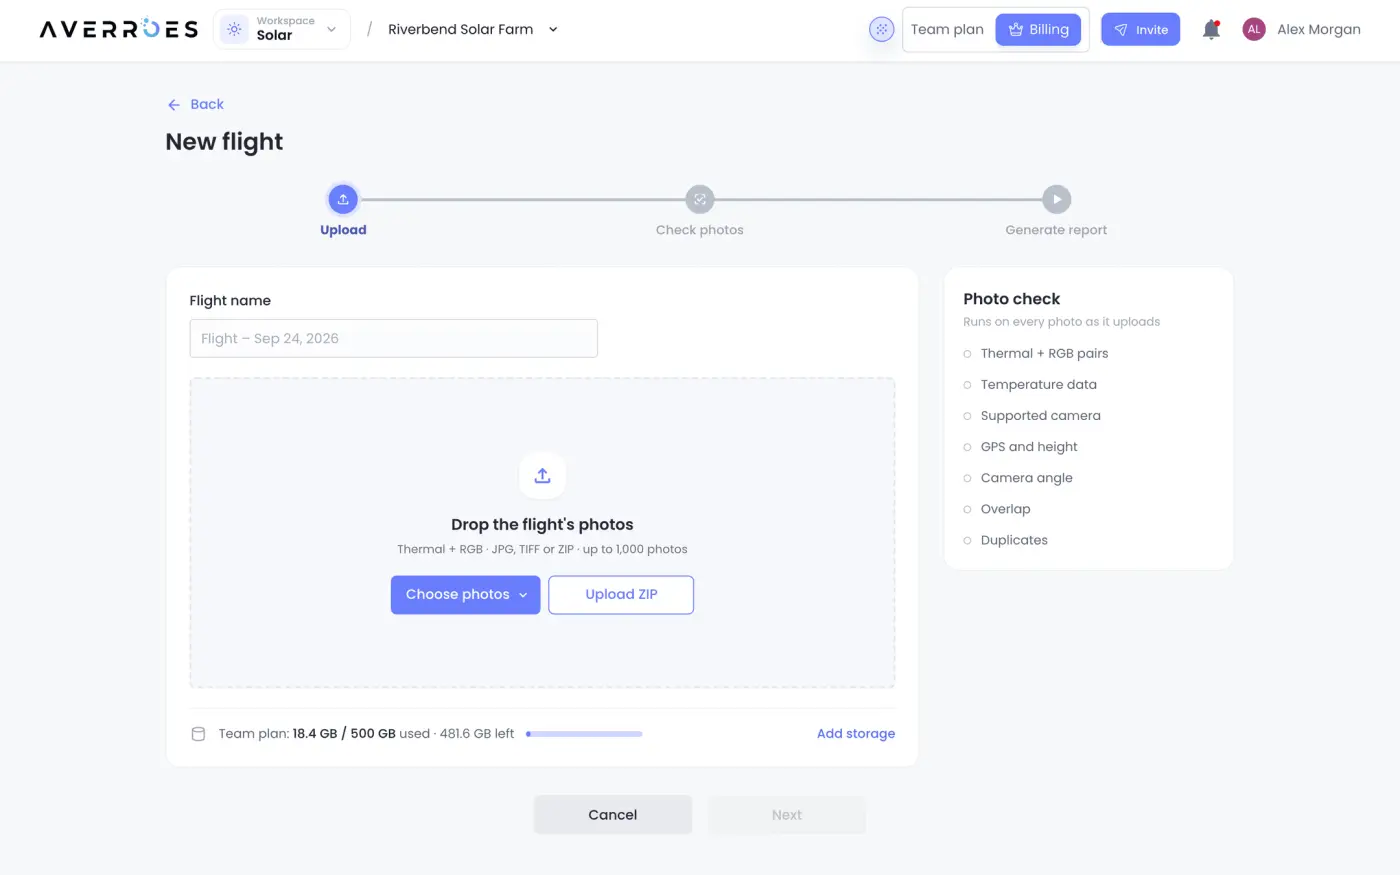
The flight is created as soon as you choose the first photos, and the app moves on to Check photos while they upload. You can upload JPG and TIFF photos, and ZIP files of them, up to 1,000 photos at a time. A photo with the same name and size as one already in the flight is skipped.
The line under the drop area shows how much of your plan's storage is used. If the flight doesn't fit, the app says how much is missing and keeps your photos waiting while you choose Add Extra Storage, Compare plans or Manage storage. Photos wait until there's room, then upload on their own. People who can't change the plan see Ask an admin instead.
Check your photos
While photos upload, the Photo check runs on each one:
| Check | What it looks at |
|---|---|
| Thermal + RGB pairs | Every thermal photo has an RGB photo of the same shot |
| Temperature data | Thermal photos still hold their temperature data |
| Camera | The thermal camera is supported |
| GPS and height | Every photo has a position |
| Camera angle | The camera pointed straight down |
| Overlap | Neighbouring photos overlap enough, estimated from GPS and height |
| Duplicates | No file was uploaded twice |
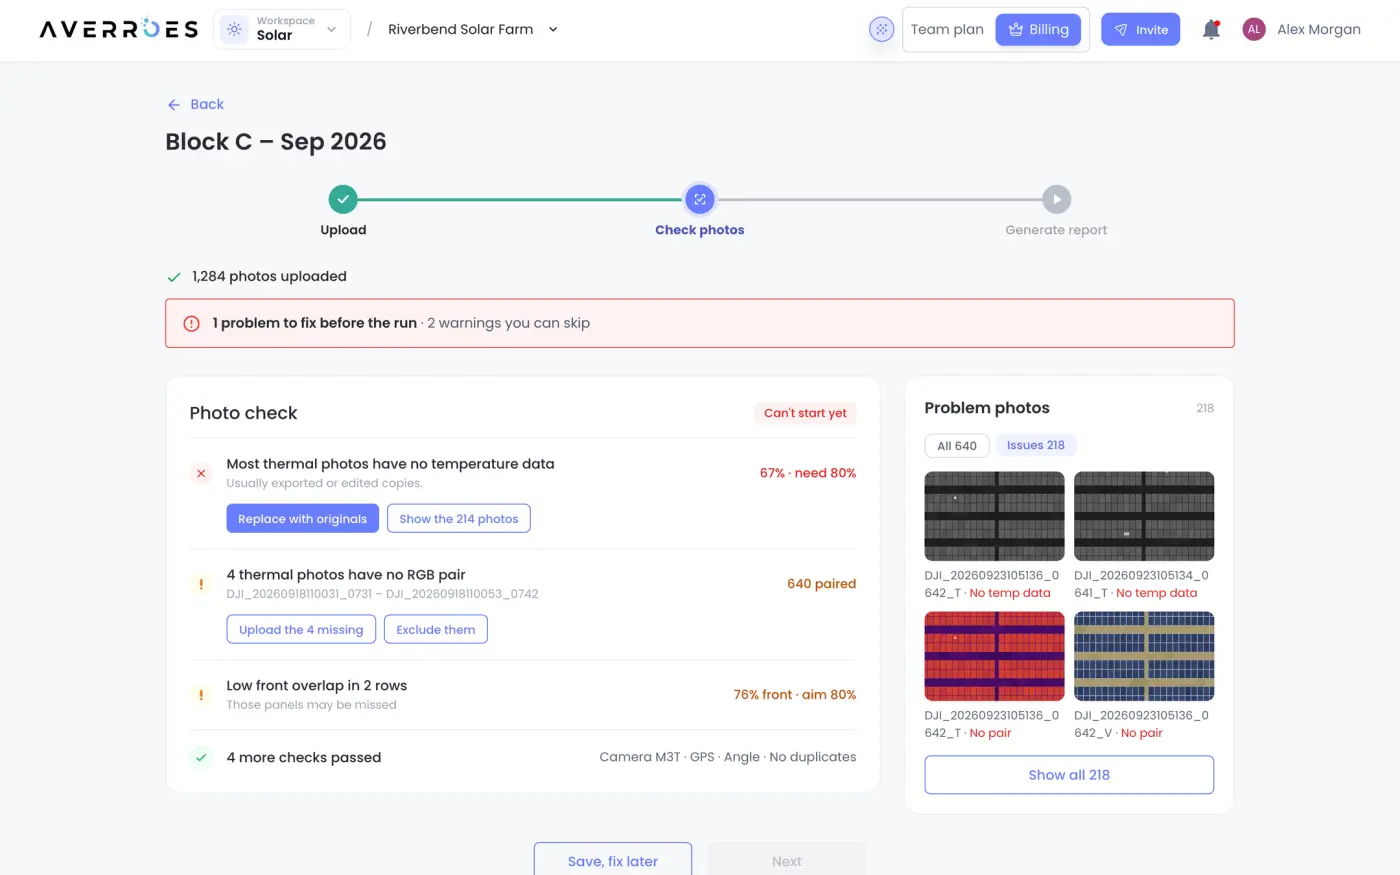
A problem stops the run until it's fixed: no pairs at all, or fewer than 80% of thermal photos with temperature data from a supported camera. Each problem offers its fix:
- Replace with originals or Upload the missing ones picks photos to add.
- Show the N photos lists the photos concerned.
- Exclude them deletes those photos from the flight, after you confirm.
A warning, such as a few unpaired photos or low overlap in some lines, doesn't stop the run. Photos without a pair are left out of it.
Review pairs shows the thermal and RGB photos side by side, and Issues lists only the ones a check flagged. When the check is done, click Next to start the run, or Finish later to come back to it from the site.
Browse a flight's images
Open a flight and click Images. Each card is one capture, with its thermal and RGB photos side by side and, after a run, the worst anomaly found on it.
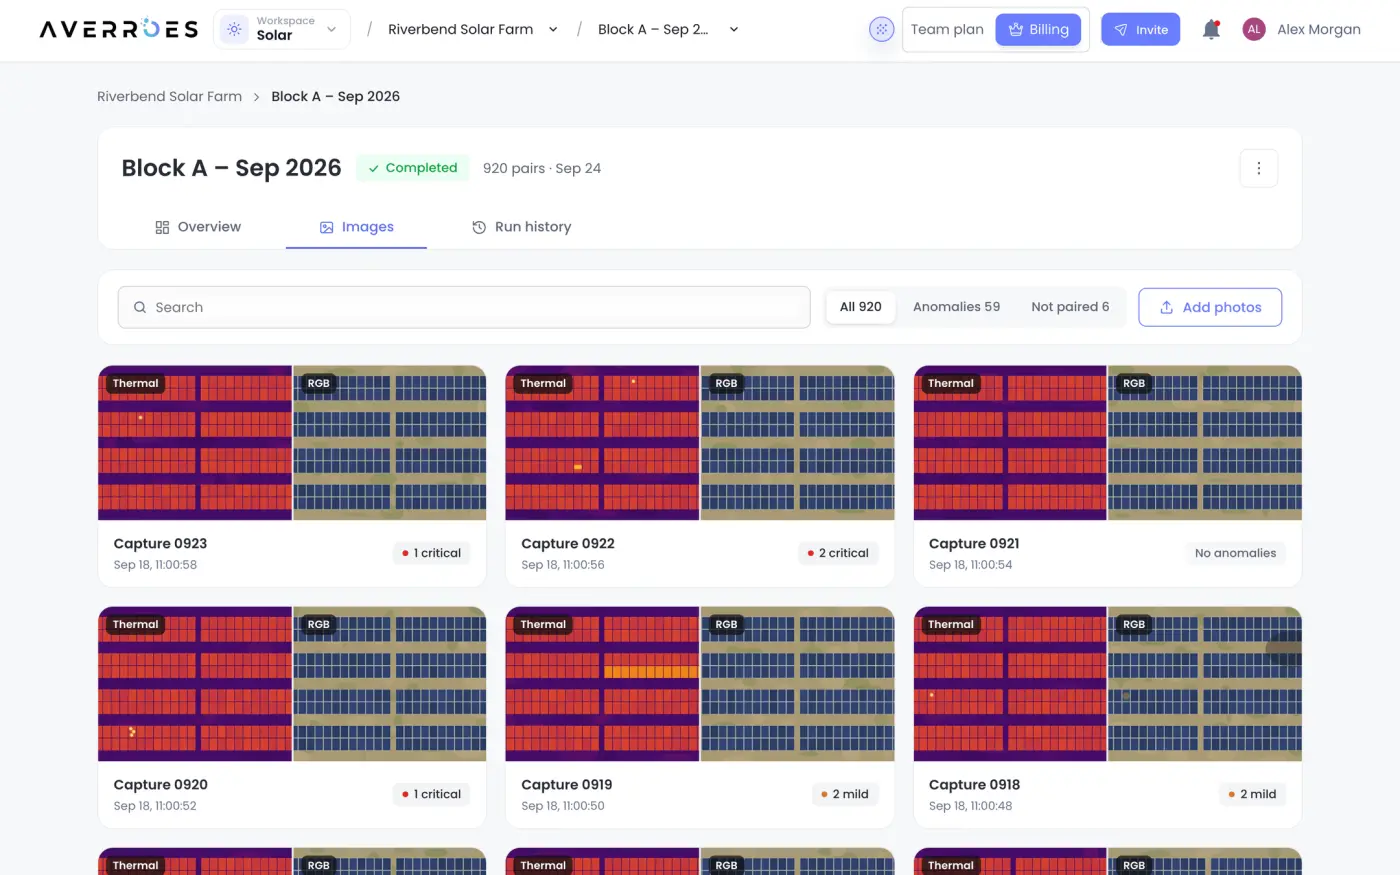
- All lists every pair. Load more shows the next ones.
- Anomalies lists the anomalies the latest run found.
- Not paired lists photos without a partner.
- Not analysed lists the pairs a run couldn't use. It appears when you follow Show the N from the results.
Click a card to open its photos in the image viewer. Add photos adds more photos to the flight.
Rename, share or delete a flight
The ⋮ button at the top right of a flight holds its settings:
| Item | What it does |
|---|---|
| Edit Flight | Rename the flight |
| Download | Download every photo (only for administrators, and only if your plan includes downloads) |
| Delete | Move the flight to the trash |
| API integration | The requests for running flights from your own systems (see Solar Results and Reports) |
Share opens Share flight, where an administrator chooses who else can open it. The avatars beside it show who already can.
Deleting a flight works like deleting a repository. You type its name to confirm, and it stays in the trash until it's deleted for good. See Repositories.