Build a Model
Train a classification, object detection, segmentation or anomaly detection model from a repository.
You train a model from a repository: pick what the model should learn, which folder to train on, and how long to spend. Training runs in the background, and the new model appears in the repository's AI Models panel as soon as it starts.
Start a training run
- Open the repository and select the version you want to train on.
- Click Build a Model in the header. If the repository already has models, the button says Models; click it, then Build a Model at the top of the panel.
- The Build a Model dialog opens.
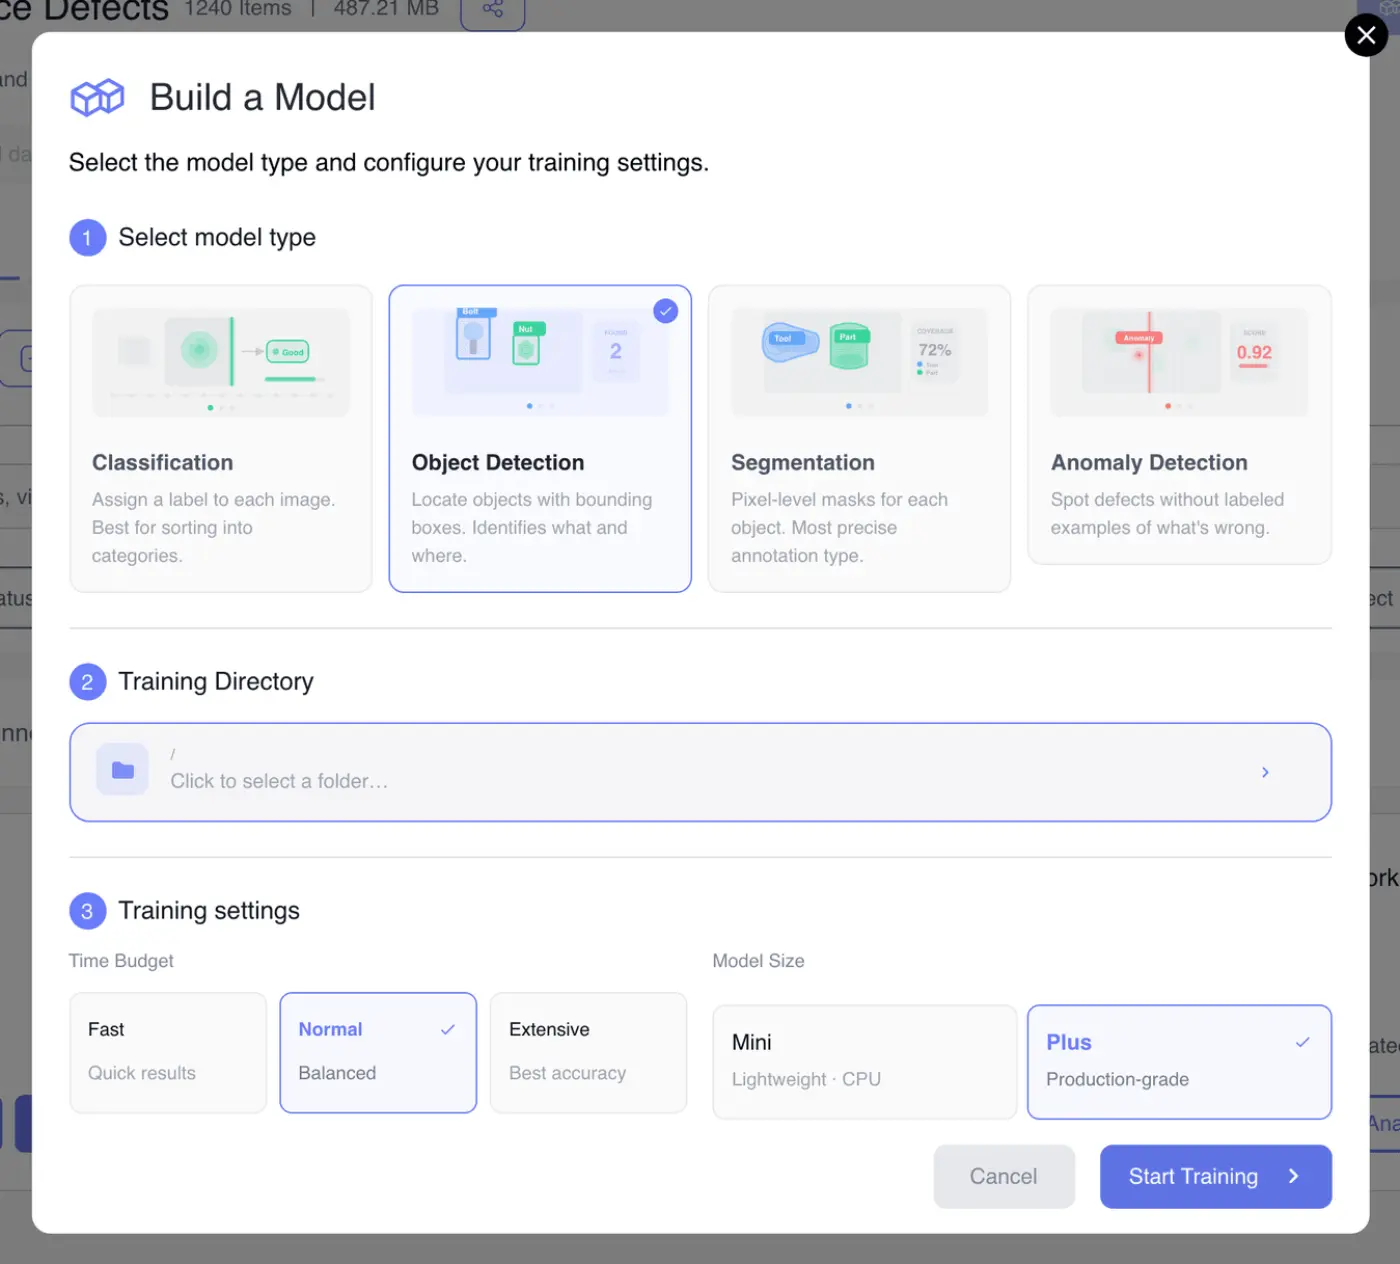
The dialog has three numbered parts. The second and third appear once you've picked a model type.
Choose the model type
Under Select model type, pick the kind of model that matches how the repository is labeled.
| Type | What it learns | What it needs |
|---|---|---|
| Classification | One label for the whole image | At least 10 labeled images across 2 or more classes |
| Object Detection | A box around each object, so what and where | At least 10 labeled images across 1 or more classes |
| Segmentation | A pixel mask for each object | At least 10 labeled images across 1 or more classes |
| Anomaly Detection | What normal looks like, so anything unusual stands out | At least 1 image, no labels |
A card you can't use yet is greyed out. Hover it to see which requirement isn't met. The counts come from the version you're on, so a type can become available after you label more images or switch versions.
Anomaly Detection needs no examples of defects. Upload images of good parts and the model flags anything that doesn't look like them, which makes it a good fit when defects are rare or unpredictable. It works best with plenty of consistent images: varying lighting or camera angles make "normal" hard to learn. With fewer than 100 images, the app trains a few-shot anomaly model instead of the standard one.
If the Anomaly Detection card shows a lock and Upgrade, your plan doesn't include it.
As soon as you pick a type, the app checks the repository against it. Validating dataset… shows while it runs.
Choose which images to train on
Under Training Directory, the model trains on the Entire repository by default. To train on one folder (one product line, one station, one shift):
- Click the directory card (Click to select a folder…).
- In Select Training Directory, pick Entire repository or a folder. Expand a folder to reach the ones inside it.
- Click Select Directory.
The check runs again for the new folder. If you opened the dialog from inside a folder, that folder is already selected.
When you train on a folder, only the classes that have labels in that folder are included.
Fix a validation error
If the selection can't be trained, a red message replaces the training settings and Start Training stays disabled.
| Message | What to do |
|---|---|
| Not enough labeled images. | Label more images, or pick a folder that has more |
| Not enough classes. | Classification needs at least two classes with labels |
| Not enough labeled images with a list of classes | Each listed class shows how many labeled images it has out of the 10 it needs. Label more of those classes |
| Usage limit exceeded. Enable extra usage to continue training. | Turn on extra usage or wait for the limit to reset. See Usage and Limits |
| Large model training is not available on your current plan. | Choose Mini or upgrade |
| This training time budget is not available on your current plan. | Choose a shorter time budget or upgrade |
Other errors show the message from the server. Most of these depend on the folder you picked, so trying a different one can clear them.
Set the time budget and model size
Under Training settings, choose how long to train and how big a model to build.
Time Budget sets how many passes the model makes over your images:
- Fast (quick results) is good for checking whether an idea works.
- Normal (balanced) is the default and right for most models.
- Extensive (best accuracy) takes the longest.
Model Size:
- Mini is lightweight and runs on CPU.
- Plus is production-grade. It's the default.
Anomaly detection always trains a Plus model; hovering Mini explains that small models don't support it. A tile with a lock isn't in your plan. Clicking it (or its Upgrade or Pro badge) opens the plan change page if your role can manage billing. See Plans and Billing.
Start training
Click Start Training. The dialog closes, the Running tasks drawer opens, and the model appears at the top of the AI Models panel with its progress.
If you're working in a draft, the dialog says so: the draft is saved as a new version (for example V4) before training starts, and the model trains on that version. This way every model points to the exact labels it learned from. See Repository Details and Versions.
Training keeps running if you close the page. You can follow it in the Running tasks drawer, which also has a Training settings link to review the settings and a Cancel button. Cancelling asks Cancel training? and can't be undone.
When training won't start
- Plans can limit how many models you train per day. When you hit the limit, an error offers Enable extra usage, which takes you to your usage settings.
- Training uses credits. If the balance is too low, validation shows Usage limit exceeded.
- Your role needs permission to change models. Without it, Build a Model is greyed out and its tooltip says what's missing.
Train a single folder with more options
In the repository's list view, each folder row has a Train button (a play icon). It opens an older training flow with more settings:
- In Select model type, pick a type. Only types that match the folder's labels are available, plus Anomaly Detection.
- Click Train. If the folder can't be trained, a dialog explains what's missing.
- In Training settings, turn on any of the features below, then click Train. Hover Train to see how many credits the run will cost.
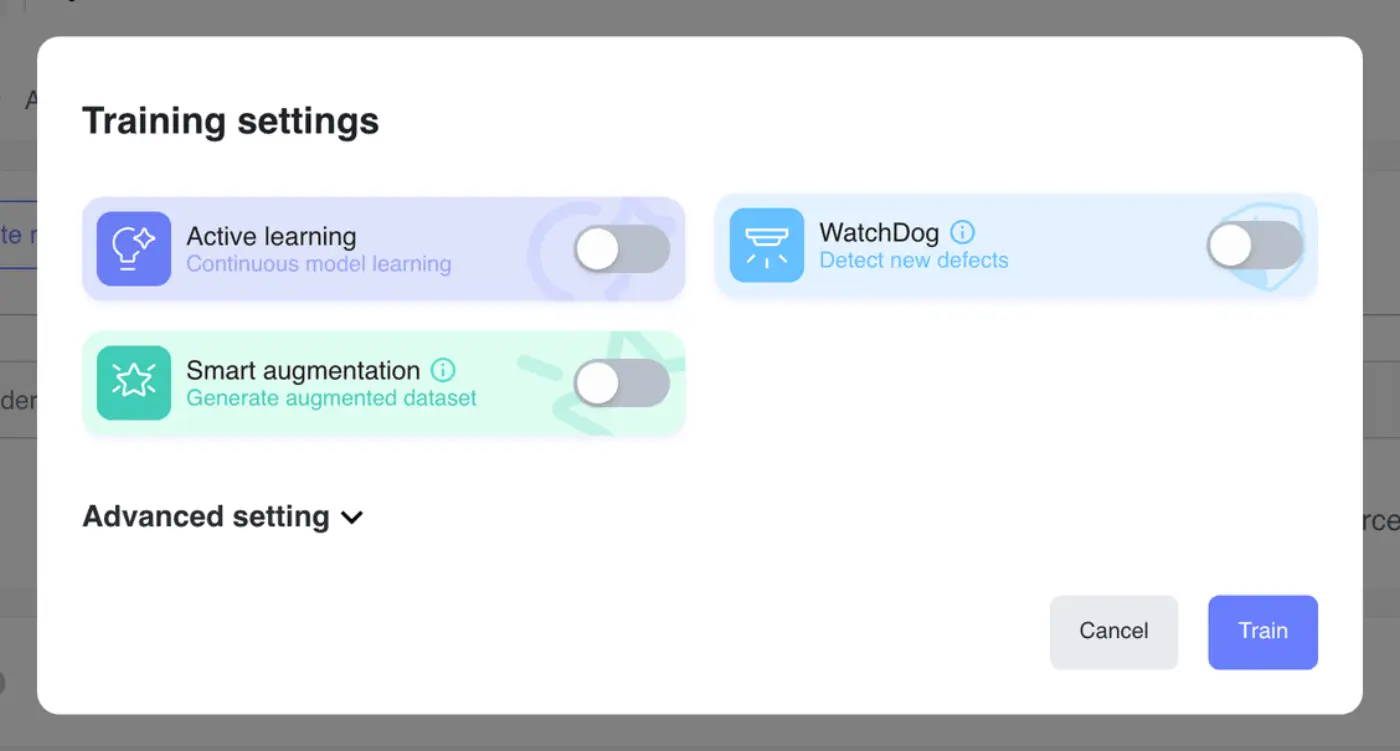
| Setting | What it does |
|---|---|
| Active learning | The model picks the most useful unlabeled images for you to label next. Not available for classification. See Active Learning |
| WatchDog | Trains an anomaly detection model alongside, so it can flag defects the main model was never taught |
| Smart augmentation | Generates varied copies of your images during training so the model copes better with small changes in position, lighting or orientation |
| Advanced setting | Unify image size (the size images are resized to, or Custom) and Number of epochs (1 to 500) |
With WatchDog on, the Running tasks drawer shows a second progress bar for the WatchDog model. Turning off Active learning asks you to confirm, since the model then can't pick images for you.
Get better results
- Label more of what the model gets wrong rather than more of everything. Model Insights shows where that is.
- Check labels before training. Two classes that look alike to a person will confuse the model too.
- Train on the folder you'll run the model on when your lines or stations look different.
- Start with Fast to test an idea, then retrain with Normal or Extensive.