Image annotation for computer vision: the complete guide
Image annotation is adding labels to images so a model can learn from them: a class for the whole image, a box around each object, or an outline of its exact shape. Good annotation starts before the first label, with clear classes and written guidelines, and ends with review, versioning and an export in the format your model expects.
Key takeaways
- The label type follows the question: class (what is it?), box (where is it?), outline (exactly which pixels?).
- Write the guidelines before labeling; most label noise comes from people disagreeing, not from carelessness.
- Label a small set, train, then let the model or an assistant draft the rest for people to review.
- Measure quality with review tasks and agreement between labelers, not by feel.
- Keep versions, so every model points to the exact labels it learned from.
01Define the task and the classes
Every annotation project answers one question. Write it down before anyone draws a box.
Ask what the model must decide. “Is this part OK?” needs a class per image. “Where is the scratch?” needs a box. “How long is the crack?” needs an outline.
List the classes and make them mutually exclusive. If two people could reasonably pick different classes for the same defect, merge them or write a rule that separates them.
Decide what “nothing to label” means. An image with no defects is still information: mark it as empty instead of skipping it.
In VisionRepo, classes belong to the repository and can be imported from another repository. Mark as Empty records that an image has nothing to label.
02Collect and curate images
A dataset should look like the images the model will meet in real use.
Cover the real variation: lighting, angle, product variants, cameras, and the time of day or season.
Include good examples as well as defects. A model that has never seen a good part can't tell you a part is good.
Remove near-duplicates. Ten frames of the same scene teach little and make test scores look better than they are.
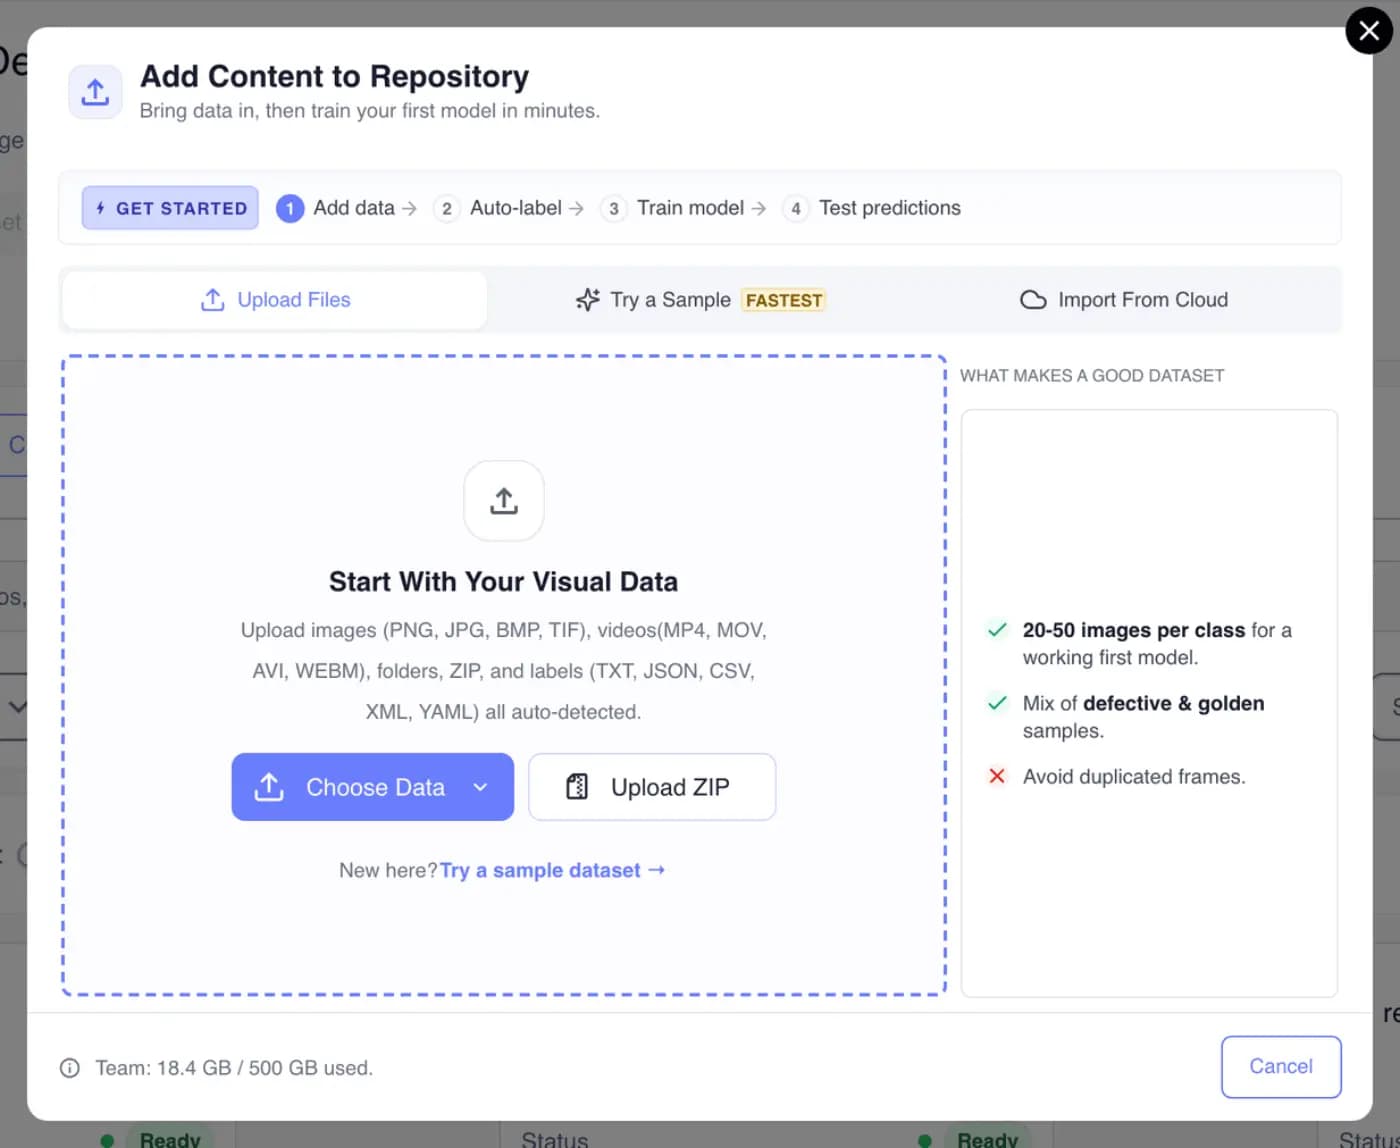
Upload files, folders or a ZIP (1,000 files per upload; ZIPs are exempt), import from SharePoint, Dropbox, Box or OneDrive (AWS S3 on Enterprise), or copy a labeled sample with Try a Sample.
03Write labeling guidelines
Guidelines turn personal judgement into a shared rule. Teams sometimes call this the defect book.
For every class: a one-line definition, two or three examples, and the closest look-alike that is not this class.
For every edge case people argue about, add a rule and an example image. Update the guide when a reviewer rejects something new.
Say how tight boxes should be, whether to include shadows or reflections, and what to do with partly visible objects.
Comment pins with @mentions on an image, and Issue tasks (Missing defect, Not a defect, Wrong label, Wrong position) keep the edge cases in one place.
04Choose the label type
Pick the simplest label that answers the question; more detail costs more time.
Class (whole image): fastest. Use when the answer is about the image, such as OK or reject.
Box: where each object is. Use for counting and locating parts or defects.
Polygon or mask: exactly which pixels. Use when size, shape or area matters, such as crack length or coating coverage.
| Question | Label type | Model |
|---|---|---|
| Is it OK or a reject? | Class per image | Classification |
| What's wrong, and where? | Box per object | Object detection |
| Exactly which pixels? | Outline or mask | Segmentation |
| Does it look different from good? | None (good images only) | Anomaly detection (Ultra) |
A repository's task type decides the tools: Rectangle and Smart Box for detection; Brush, Polygon, Polyline and Smart Polygon for segmentation; tags for classification.
05Label: by hand, smart, model or assistant
There are four ways to put labels on images. Most projects use all of them.
By hand: precise and slow. Use it for the first few dozen images and for anything unusual.
Smart tools: click an object and the outline appears; correct it instead of drawing it.
Your own model: once a first model exists, it labels the unlabeled images as a draft.
An AI assistant: describe what to find, or show one example, and it drafts labels for a whole folder for people to review.
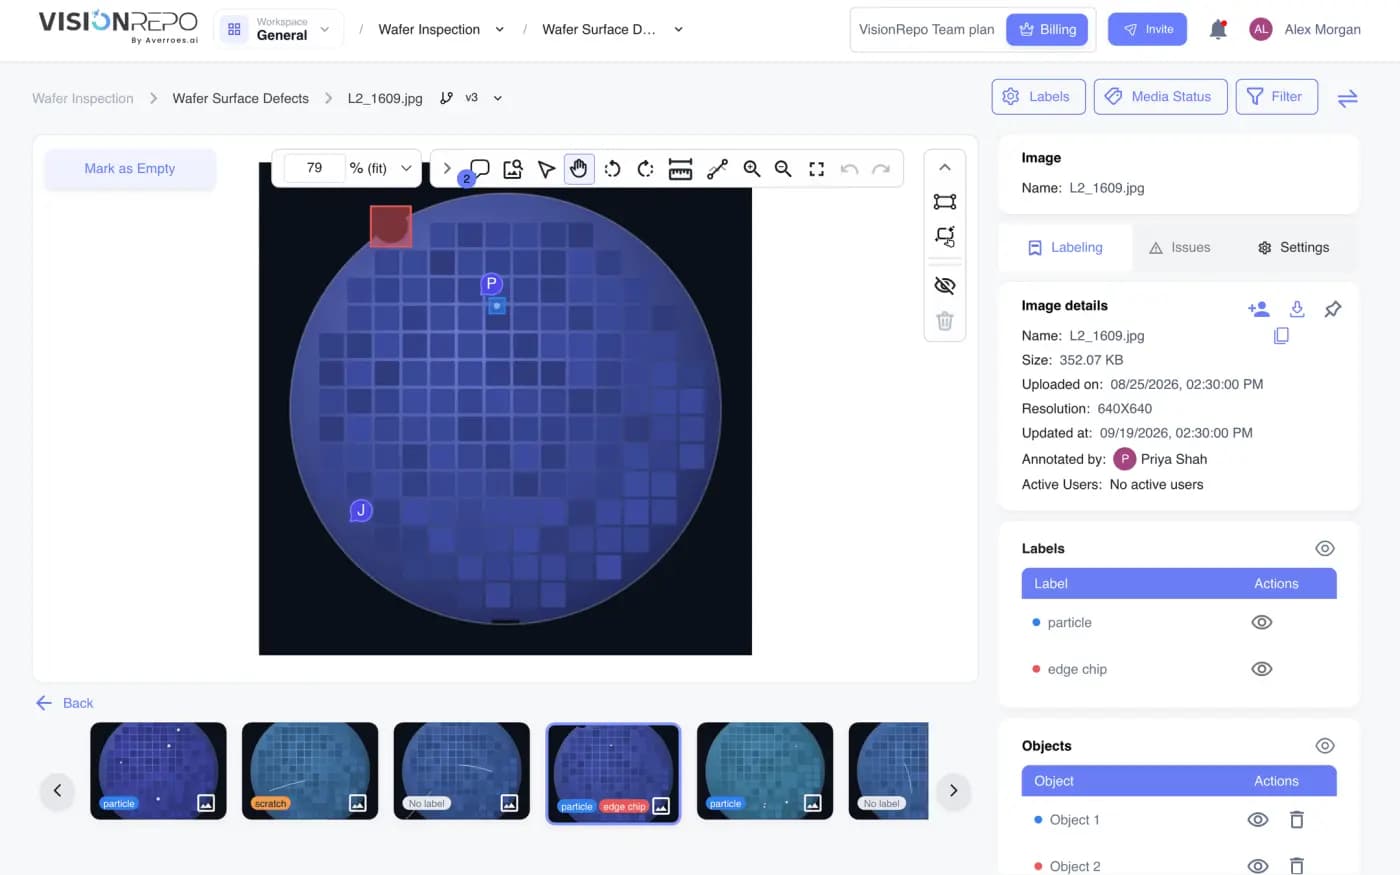
VisionRepo has all four: manual tools, Smart Box and Smart Polygon, Auto Label with your trained model, and Vero, which labels up to 20,000 images per job from a description and then reviews every image. AI labels arrive as unsaved drafts.
06Review and measure quality
Quality is a number, not a feeling. Decide who checks what before labeling starts.
Review a sample of every labeler's work, and all of a new labeler's first batch.
Track agreement: give two people the same images and compare. Low agreement points to a guideline problem, not a person problem.
Record why labels are rejected; the reasons become new guideline rules.
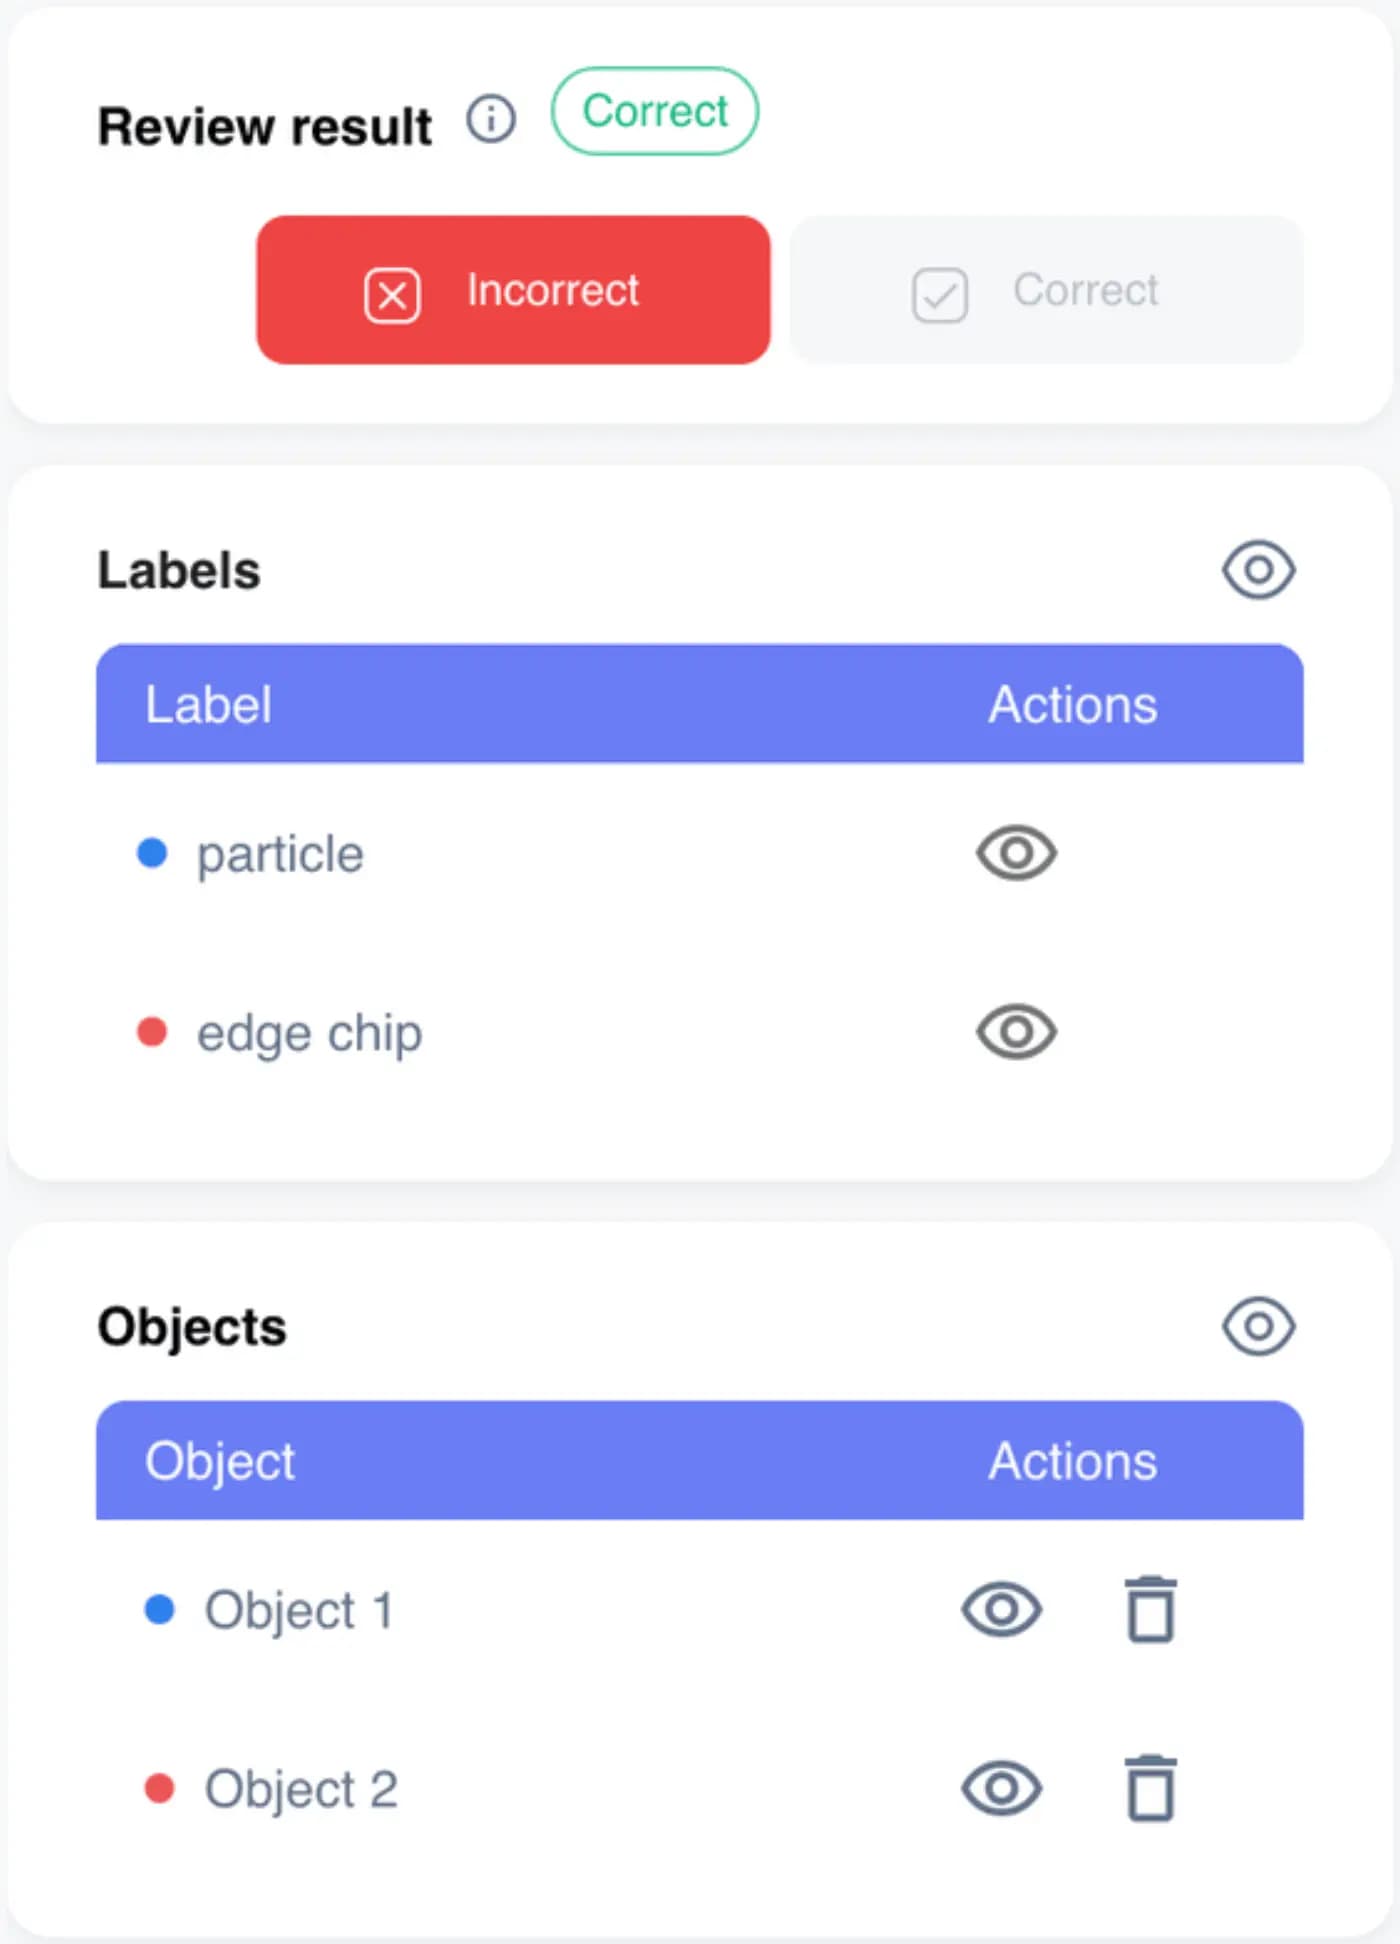
Review tasks show each image with a Review result card: Correct (Ctrl+C) or Incorrect (Ctrl+I), per image or per label. Tasks Management shows per-person accuracy and rejection rates.
07Version and split the dataset
Freeze the labels you train on, so results can be explained later.
Save a version before every training run. If labels change afterwards, the old model still points to the data it learned from.
Split images into training and test sets, and keep the test set aside. Test images must never be used for training.
Split by source when you can (by line, camera or day), so the test set measures real generalisation.
Edits go into a shared draft until someone saves a version (V1, V2…). Training saves the draft as a new version first. Folders can be split into new repositories by percentage or random sample.
08Export to the format your model needs
Formats differ in what they store and how coordinates are written. Convert once, with a tool, not by hand.
COCO JSON: one file for the whole dataset; boxes and polygons; common in research.
YOLO: one text file per image with normalised box coordinates; the Ultralytics family.
Pascal VOC: one XML file per image; older detection models.
VisionRepo imports COCO JSON, Pascal VOC XML and YOLO TXT, and exports up to 27 formats (depending on task type, on Pro and Ultra), including YOLO up to v8 and OBB, TFRecord, Create ML, PaliGemma and Florence 2.
09Train and evaluate
A model is only as trustworthy as the set it is tested on.
Start small: a first model shows which classes need more labels.
Keep a fixed reference set with checked labels, and score every model on it.
Read per-class results and the confusion matrix, not just one overall number; a rare class can fail while the average looks fine.
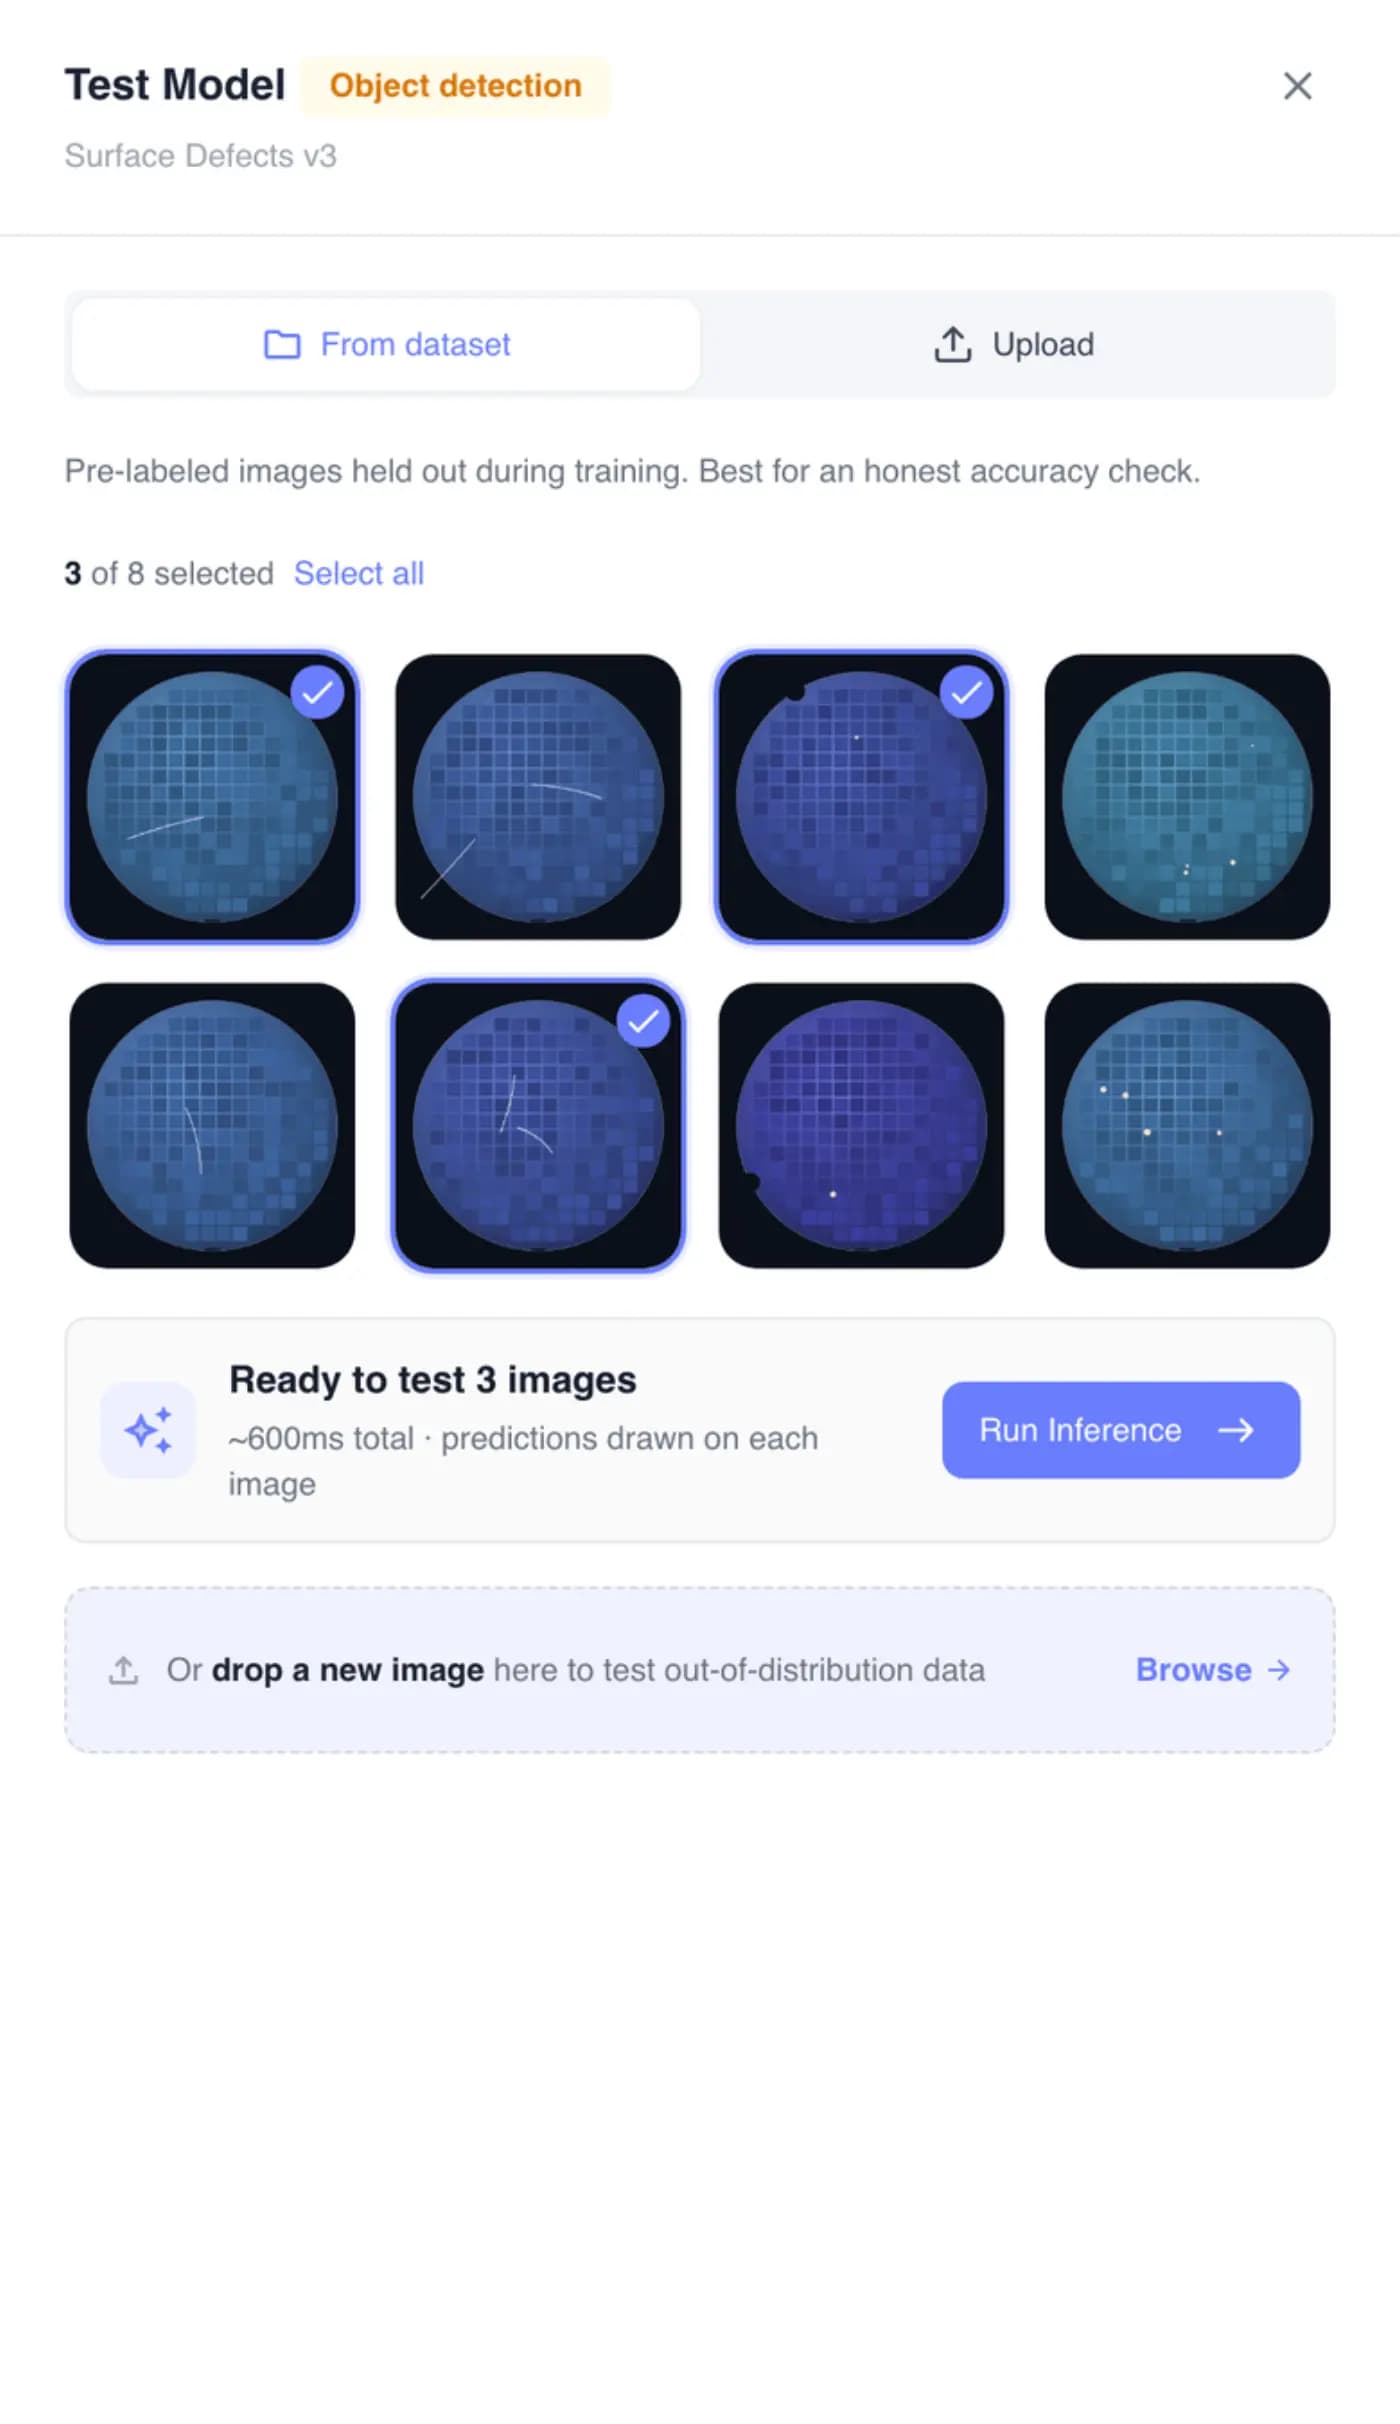
Build a Model trains classification, object detection or segmentation from 10 labeled images, and anomaly detection from good images on Ultra. Each model shows its accuracy, Test runs it on new images, and Vero can compare versions.
10Close the loop
The fastest teams label a little, train, let the model draft the rest, and correct.
Use the first model to draft labels for the unlabeled images, then review the drafts.
Spend human time where the model is unsure or wrong, and on the rare classes.
Retrain after each pass and compare against the previous version on the same reference set.
Auto Label runs your trained model on unlabeled images only and tags the results “Auto Labeling”. Vero can run a whole plan, such as “label lane-3, then train a detector”, after one approval.
FAQ
What is image annotation?
Adding labels to images (a class, a box, an outline or a mask) so a computer vision model can learn from them.
How many images do I need to label?
It depends on the model and the variation in your images. In VisionRepo, training starts at 10 labeled images; 20 to 50 per class makes a stronger first model.
Should I use boxes or polygons?
Use boxes when you need to know where an object is, and polygons or masks when its exact shape or size matters.
Can AI label images for me?
Yes, as a draft. Smart tools outline one object per click, a trained model can label the rest of a folder, and an assistant like Vero can label from a description. People should review the drafts.
Which annotation format should I export?
The one your training code expects: YOLO for the Ultralytics family, COCO for many research models, Pascal VOC for older detectors.
How do I know my labels are good?
Review a sample of every labeler's work, measure agreement between labelers on the same images, and track why labels are rejected.